How to Get a Prototype Made Fast: Top Methods & Tips
In the high-stakes world of agency campaigns, launching a physical product comes with unique risks. A flawed design or a manufacturing hiccup can jeopardize timelines and budgets, turning a brilliant idea into a costly headache. The single most effective way to manage this risk is with a prototype. Think of it as your project’s insurance policy. It allows you to test, refine, and validate your concept before committing to a full production run. This is how you catch potential problems when they are still small and easy to fix. The key is to move quickly and intelligently. Knowing how to get a prototype made fast and effectively is a critical skill. This article will walk you through the essential steps to de-risk your project, ensuring your final product is a success.
Key Takeaways
Use Prototypes to De-Risk Your Project: A prototype isn't just a model for a pitch; it's your best tool for finding and fixing problems early. By testing function, form, and manufacturability before committing to a full production run, you protect your timeline, your client's budget, and your agency's reputation.
Match the Prototype to Its Purpose: Avoid the trap of trying to build a perfect, final version from day one. A simple sketch can explore concepts, a 3D print can test ergonomics, and a functional model can validate a mechanism. Matching the prototype's fidelity to your immediate goal keeps the project moving quickly and efficiently.
Secure Your Idea, Then Find Your Partner: Your agency's concept is valuable intellectual property—always protect it with an NDA before sharing details. From there, choose an expert partner who acts as a true collaborator, helping you translate creative vision into an engineered, manufacturable product for a seamless launch.
What Is a Prototype (and Why Do You Need One)?
When your agency lands on a brilliant idea for a physical product—whether it's a piece of smart tech for an immersive campaign or a custom mailer for a product launch—there’s a huge gap between the concept in your pitch deck and the final item in your client’s hands. A prototype is what bridges that gap. Think of it as the first physical draft of your idea. It’s a tangible, testable version of your product that allows you to see what works, what doesn’t, and what needs to change before you commit to a full production run.
For creative agencies, prototyping is an essential step for a few key reasons. First, it makes your idea real. A physical prototype is infinitely more compelling for client presentations than a render alone. It allows stakeholders to hold the product, feel its weight, and understand its function. Second, it’s your primary tool for risk management. It helps you and your product development partner identify design flaws, engineering challenges, and usability issues early on, when making changes is still fast and affordable. Skipping this step is like trying to build a house without a blueprint—it’s a recipe for costly mistakes and delays that can put a campaign in jeopardy.
What a Prototype Actually Is
So, what exactly counts as a prototype? It’s a preliminary model of your product built to test your core concept. Prototypes aren't one-size-fits-all; they evolve as your project progresses. An early-stage prototype, often called a proof of concept, might be built just to confirm that the basic technology or mechanism works. It doesn't have to be pretty—its only job is to answer the question, "Is this technically possible?"
As the design gets refined, you’ll move on to more detailed versions that look and feel closer to the final product. These later-stage prototypes help you test ergonomics, aesthetics, and user experience. The key is to see prototyping as an iterative process of learning and refinement, not a single event.
How Fast Prototyping Saves Time and Money
It might seem counterintuitive, but spending time and money on a prototype is one of the best ways to save on both in the long run. The primary goal of prototyping is to find problems. Catching a design flaw or a material weakness in a single unit is a simple fix. Discovering that same flaw after you’ve manufactured 10,000 units for a campaign launch is a catastrophe.
Fast prototyping methods allow your team to quickly create, test, and iterate on a design. This cycle of rapid feedback shortens your overall development timeline and gets you to a production-ready design faster. By investing in prototyping, you’re essentially buying insurance against much larger, more expensive problems down the road, ensuring your final product is built for successful manufacturing.
Choose the Right Prototyping Method
Picking the right prototyping method is a strategic decision that shapes your timeline, budget, and the kind of feedback you can get. There’s no single "best" way; the ideal approach depends entirely on your goal. Are you trying to nail the look and feel for a client presentation? Or do you need to prove that a complex electronic function actually works? Answering that question is the first step.
Think of it this way: a "looks-like" prototype is all about aesthetics and ergonomics, while a "works-like" prototype focuses on function, often with rougher visuals. For agency projects, you might need a high-fidelity model that looks exactly like the final product for a photoshoot or a campaign launch. Other times, a quick, functional model is all you need to validate an idea internally. The following methods aren't mutually exclusive—in fact, most successful projects use a combination to move from idea to a production-ready design.
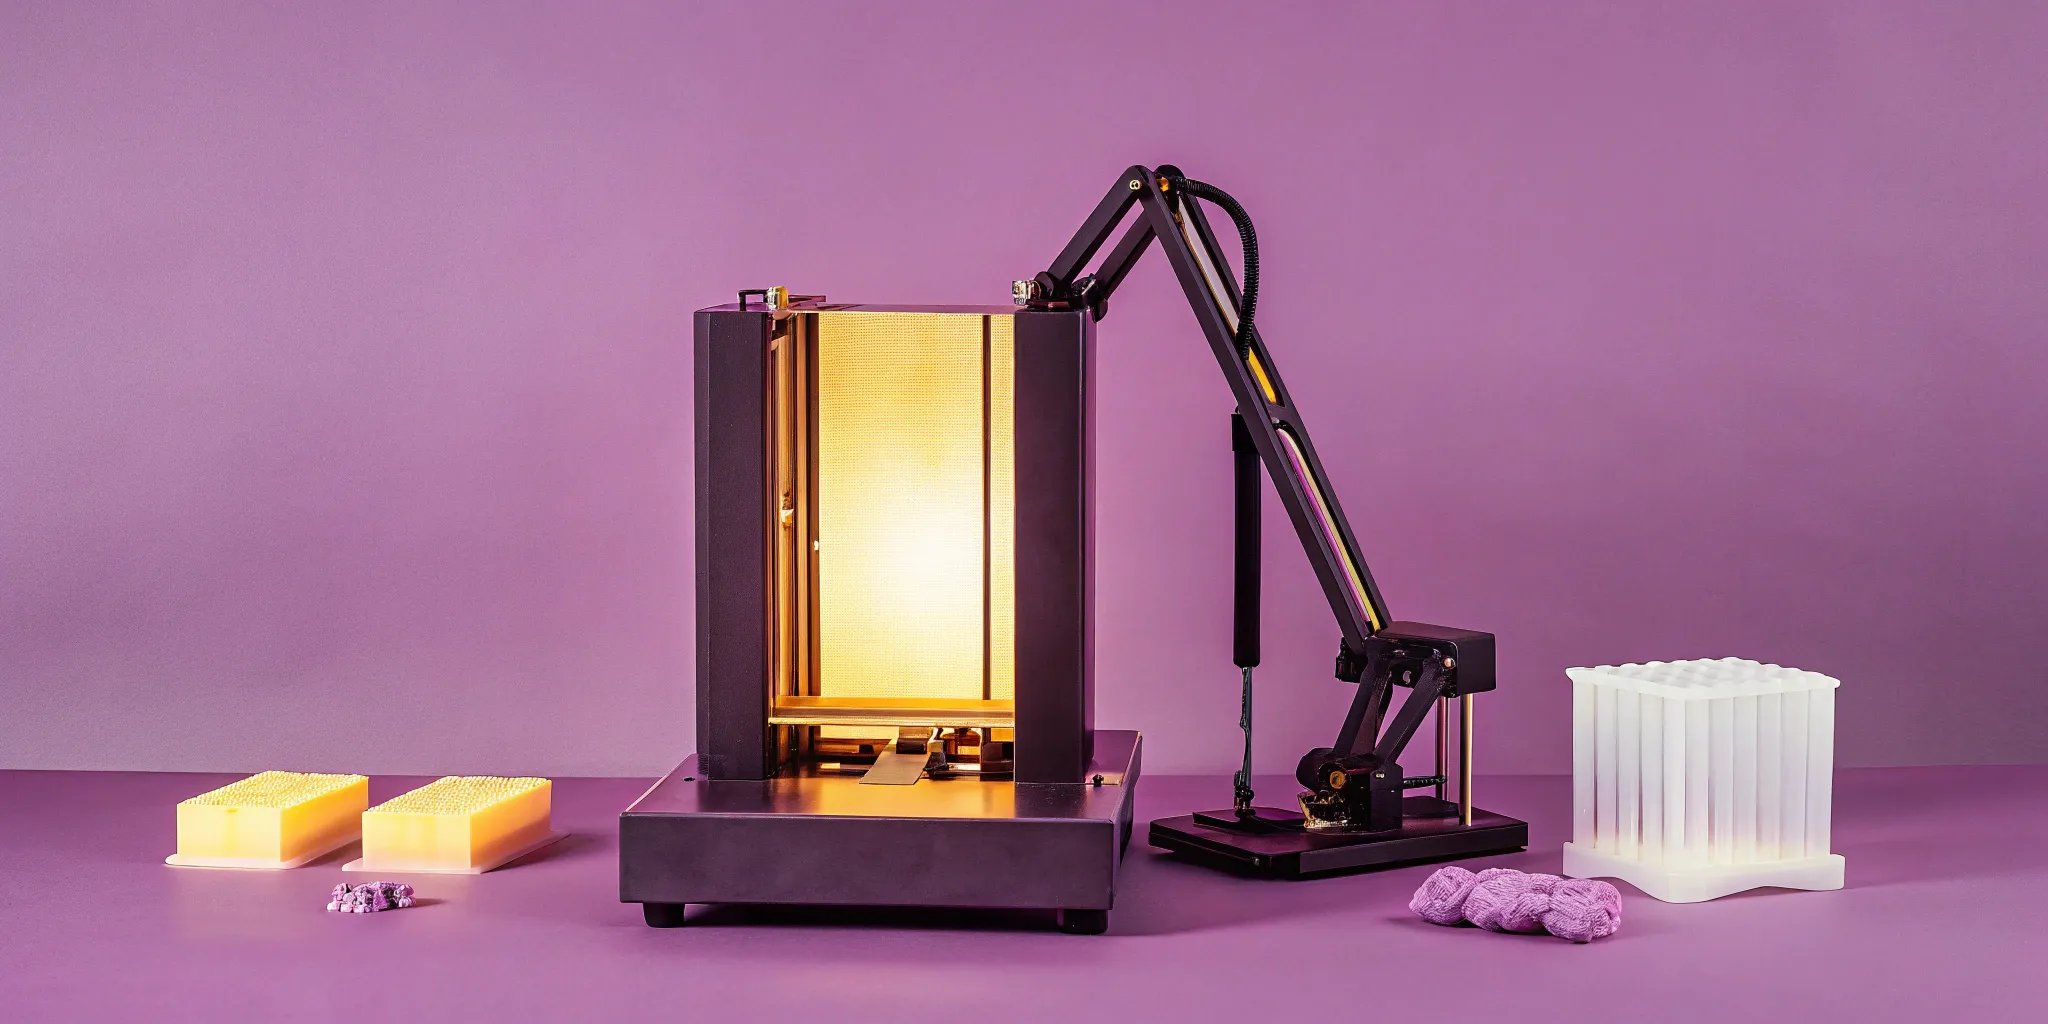
3D Printing
If you need to turn a digital design into a physical object you can hold—and you need it fast—3D printing is your best friend. This method is perfect for creating physical models with moderate complexity, allowing you to test the ergonomics, size, and general form of your product. It’s an incredibly fast and cost-effective way to get tangible feedback. You can quickly see if a handle is comfortable to grip or if the product’s scale feels right in a real-world setting. With various 3D printing technologies available, you can produce everything from rough, low-cost models to highly detailed, presentation-quality pieces.
Digital Prototypes
Sometimes, the most effective prototype isn't physical at all. Digital prototypes are virtual models or simulations of your product, created using software. This is an essential step for any product with a screen or a digital user interface. Tools like Figma allow you to create interactive mockups that show how a user will interact with the product, letting you test the flow and user experience before committing to costly hardware development. A digital prototype is also perfect for creating realistic marketing assets and visuals for client pitches, giving everyone a clear picture of the final product long before it’s built.
Off-the-Shelf Components
Not every piece of your prototype needs to be custom-designed and fabricated from scratch. In fact, it rarely should be. Using off-the-shelf components—like pre-existing motors, sensors, circuit boards, fasteners, and switches—is a smart and efficient way to build functional prototypes. This approach saves a tremendous amount of time and money, especially when you’re focused on proving a concept. By integrating existing parts from a supplier like McMaster-Carr, you can focus your resources on designing the unique parts of your product that deliver its core value, rather than reinventing the wheel for standard internal hardware.
How to Pick the Best Method for Your Project
So, how do you choose? Start by defining the primary goal of your prototype. Ask yourself: "What is the single most important question this prototype needs to answer?" If the question is, "What will this look like on a shelf?" then a visual method like 3D printing is your answer. If it's, "Does this electronic feature work?" you'll want to build a functional model using off-the-shelf parts. Focus on functionality first, then aesthetics. Often, the best strategy is a hybrid one. You might use a 3D-printed shell to house off-the-shelf electronics to create a prototype that both looks and works like the final product. A good product development partner can help you create a custom prototyping plan that gets you the answers you need at every stage.
A Closer Look at Prototyping Techniques
Prototyping isn’t a single step but a series of stages that take your idea from a rough concept to a polished, functional model. Think of it as a progression. You start broad and messy to explore possibilities, then gradually refine your design until it’s ready for the real world. Each technique serves a specific purpose, whether it’s clarifying your vision, testing functionality, or getting that final client sign-off.
For a creative agency, this phased approach is perfect for managing client expectations and budgets. You can present progress at each milestone, from a simple sketch to a fully engineered sample. The key is choosing the right technique at the right time. A simple foam model might be perfect for an internal review, while a high-stakes client presentation demands a prototype that looks and feels like the finished product. An experienced product development partner can help you select the most effective methods to keep your project moving forward without wasting time or money. This strategic approach ensures your final product is not only creative but also viable and ready for production.
Start with Sketches and Low-Fidelity Mockups
Every great product starts as a simple drawing. Before you even think about software or 3D printers, grab a pen and paper. Starting with simple sketches or low-fidelity mockups allows you to visualize your ideas without a significant investment. This is the fastest and cheapest way to explore different directions and get concepts out of your head and into the open for discussion.
Once you have a sketch you like, you can create a low-fidelity physical model using basic materials like cardboard, foam, or clay. These mockups aren’t meant to be pretty; they’re meant to answer basic questions about size, shape, and ergonomics. For an agency, this is a great way to give a client a tangible sense of the idea early on.
Create Realistic High-Fidelity Prototypes
When it’s time to get serious, you’ll move on to high-fidelity prototypes. These are designed to look, feel, and sometimes even function exactly like the final product. High-fidelity prototypes are essential for gathering customer feedback and refining your product. They provide a more accurate representation of the final version, which can significantly reduce risks before you commit to a full production run.
This is the prototype you’d use for a photoshoot, an influencer mailer, or a final client presentation. It requires meticulous attention to detail, from precise color matching and material finishes to the product’s final weight and assembly. This is where professional industrial design and engineering are critical to creating a convincing and impressive result.
Explore Virtual and Augmented Reality
For a truly modern approach, you can use virtual and augmented reality to bring your concepts to life digitally. Utilizing virtual and augmented reality can enhance the prototyping process by allowing you to create immersive experiences. Imagine letting your client use their phone to see how a piece of branded merchandise will look on their desk, or how a custom retail display will fit into a store—all before you’ve manufactured a single part.
This technology enables you to visualize your product in a real-world context, making it easier to identify design flaws or opportunities for improvement. It’s a powerful way to make confident decisions and get stakeholder buy-in without the cost and time of creating multiple physical versions.
Essential Software and Tools
Behind every great prototype is a set of powerful tools. The foundation of modern product development is CAD (Computer-Aided Design) software, which is used to create the detailed 3D digital models that guide production. While professional-grade software is the industry standard, you can leverage free design software like TinkerCAD to explore simple ideas.
Once you have a digital design, you can use online 3D printing services to turn it into a physical object. These platforms can create parts from your digital files quickly and affordably, making them perfect for rapid iteration. While these tools make prototyping more accessible than ever, an expert partner knows how to use them to create a product that’s not just a model, but a manufacturable, market-ready asset.
Manage Your Budget and Timeline
Bringing a physical product to life means keeping a close eye on your budget and timeline. For agencies, where projects move at lightning speed, this is non-negotiable. The key is to be strategic. Knowing the typical costs and timelines for prototyping helps you set realistic expectations with your team and your clients. It’s not about cutting corners; it’s about making smart, informed decisions that align with your project’s goals from the start. A great product development partner will give you a clear view of the road ahead, ensuring there are no surprises along the way.
How Much Does a Prototype Cost?
The final price tag for a prototype depends on a few key things: engineering and assembly labor, the cost of parts, and testing. To get a clear estimate, your development partner will create a Bill of Materials (BOM)—essentially a detailed shopping list for every component in your product. For early-stage models, using off-the-shelf parts is a great way to keep initial costs down. As the design gets more refined, you’ll move to more custom components. In the U.S., engineering labor can range from $60 to $200 per hour. A good partner helps you manage these costs by planning efficiently and sourcing smart.
How Long Does Prototyping Take?
The timeline for building a prototype can be anywhere from a few days to several months, depending on the product's complexity. A simple 3D-printed model for a visual check might only take a week, while a functional electronics prototype often requires 4 to 12 weeks for design, sourcing, and assembly. Mechanical prototypes typically fall in the 4 to 8-week range. Understanding these general timeframes is crucial for building a realistic project schedule. When you’re planning a campaign launch or client presentation, knowing how long your physical assets will take to create ensures everything else stays on track.
Find the Right Balance of Speed, Quality, and Cost
Every project lives within the classic triangle of speed, quality, and cost—you can rarely maximize all three. The trick is to find the right balance for your specific goal. While it’s tempting to go for the fastest, cheapest option, a low-quality prototype can misrepresent your client’s brand and lead to costly fixes later. The best approach is to match the prototype’s fidelity to its purpose. A quick, low-cost model is perfect for internal reviews, but a client-facing prototype needs to reflect the final product’s quality. This strategic thinking is vital for identifying potential issues early without compromising on the end result.
Solve Common Prototyping Challenges
Bringing a physical product to life is an exciting process, but it’s not without its challenges. Even the most seasoned creative teams can hit snags when it comes to budget, timelines, and technical complexity. The good news is that these hurdles are a normal part of development, and every single one has a solution. Thinking through these potential issues ahead of time helps you stay in control of the project and keeps your team aligned.
The key is to approach prototyping with a strategic mindset. Instead of seeing a tight budget as a limitation, view it as a call for creative problem-solving. When a deadline feels impossible, it’s an opportunity to clarify your project’s core goals and focus on what truly matters. Finding the right partner or simplifying a big idea isn’t just about avoiding problems—it’s about making the final product stronger. An experienced product development partner can guide you through these decisions, turning potential roadblocks into milestones on the path to a successful launch. With the right approach, you can handle these common challenges and keep your project moving forward smoothly.
Working with a Tight Budget
You don’t need a massive budget to create a functional prototype. The trick is to be strategic about where you spend your money, especially in the early stages. Your first goal is simply to test an idea, not create a market-ready product. You can start with inexpensive methods like using affordable 3D printing services or even building a simple model with materials from a hardware store.
Free design software can also help you create initial concepts without any upfront investment. The focus should be on validating the core function and form. A simple, low-cost prototype that proves your concept is far more valuable than an expensive, polished model of a flawed idea. Keep it simple, focus on the essentials, and save the bigger investment for later stages.
Meeting Tight Deadlines
In the agency world, deadlines are everything. While a complex prototype can take months to develop, many projects can be turned around much faster with clear focus and planning. The single most important factor for speed is a well-defined scope. Before you begin, get crystal clear on the prototype's primary goal. Is it to test a mechanism, showcase the look and feel for a client presentation, or create a functional unit for a user test?
Each goal requires a different level of fidelity and finish. Trying to do everything at once will slow you down. By narrowing your focus to the essential features for this specific stage, you can accelerate the timeline significantly. Having access to the right tools and materials also makes a huge difference, allowing you to move from design to physical object quickly.
Finding the Right Prototyping Partner
Choosing a partner to build your prototype is one of the most important decisions you’ll make. It’s tempting to go with the cheapest quote, but that can lead to poor quality, costly rework, and a failed product. Instead, look for a partner who brings true expertise to the table. You need a team that not only understands your creative vision but also has the industrial design and engineering skills to execute it flawlessly.
The right partner acts as a collaborator, not just a vendor. They should ask smart questions, offer suggestions to improve the design for manufacturability, and provide a clear, detailed quote. Look for a firm that prioritizes quality and has a portfolio of work that aligns with your goals. A great partner will help you avoid common pitfalls and make the entire process smoother.
How to Simplify a Complex Idea
It’s easy to get caught up in an ambitious creative vision, but when it comes to the first prototype, simplicity is your best friend. The goal is to translate your big idea into a testable physical object, and that often means stripping it down to its core. Start by focusing on functionality first and aesthetics second. What is the one thing this product absolutely must do? Build a prototype that proves that core function works.
This approach is often called creating a Minimum Viable Product (MVP). It doesn’t need to be pretty or have every feature you’ve imagined. The first version is for learning. By breaking your complex idea into smaller, manageable pieces, you can test assumptions, gather feedback, and iterate more effectively. This process makes development less overwhelming and ensures you’re building on a solid, validated foundation.
Protect Your Intellectual Property
When you’re on a tight deadline for a client campaign, it’s tempting to move so fast that you skip a few steps. Don’t let IP protection be one of them. Taking the time to secure your great idea is one of the most important parts of the entire product development process. It protects your client, your agency, and the brilliant concept you’re working so hard to bring to life.
Think of it as building a fence around your property before you start construction. You wouldn’t want someone else to claim your work or, worse, beat you to market with a nearly identical product. Protecting your intellectual property isn’t just about legal paperwork; it’s a strategic move that ensures your physical product creates lasting value. Before you share your design with anyone—from a potential manufacturing partner to a freelancer—make sure you have the right protections in place.
Use Non-Disclosure Agreements (NDAs)
Before you breathe a word about your product idea to anyone outside your core team, you need a Non-Disclosure Agreement (NDA). Think of it as a formal, legally binding agreement that says, "What we talk about stays between us." Always use a confidentiality agreement when discussing your invention with others. This should happen before you send a single design file or get on a call to discuss the project's specifics.
Any professional partner, from an engineering firm like ours to a prototyping shop, will expect this and be ready to sign. If a potential partner pushes back on signing an NDA, consider it a major red flag. Having an NDA in place establishes a foundation of trust and professionalism, ensuring your confidential information remains just that—confidential.
Understand the Basics of Patents
While an NDA protects your conversations, a patent protects your actual invention. Protecting your intellectual property with patents is crucial before you share your design publicly. A patent gives you the exclusive right to make, use, and sell your invention for a set period. There are different types, but a utility patent protects how your product works, while a design patent protects how it looks.
It’s especially important to avoid public disclosure before filing a patent application. Once you publicly reveal your idea—whether in a blog post, at a trade show, or in a campaign—you start a one-year countdown to file for a patent in the United States. For legal guidance, it's always best to consult a patent attorney, but understanding these fundamentals will help you make smarter strategic decisions from the start.
Share Your Designs Securely
Once the legal agreements are signed, you still need to be careful about how you share your project files. Use secure, password-protected platforms for transferring sensitive CAD models and design documents. But security goes beyond technology; it’s about your process. When you start working with manufacturers or other partners, your contract should clearly state that you retain ownership of your design.
This is non-negotiable. You’re hiring a partner for their services, not selling them your idea. A trustworthy firm will outline this clearly in their statement of work. At Jackson Hedden, we treat your intellectual property with the same care we give our own. We ensure every file is handled securely and that ownership is always crystal clear, so you can focus on the creative vision without worrying about who holds the keys to your design.
Work with a Prototyping Partner
Bringing a physical product to life for a campaign requires a different kind of creative partner. You need a team that speaks the language of industrial design and engineering but also understands brand storytelling. The right partner acts as an extension of your agency, translating your vision into a tangible product that’s ready for the real world. Finding that perfect fit is about balancing technical skill with creative chemistry.
How to Choose the Right Firm
Selecting a prototyping partner is one of the most important decisions you’ll make. Look for a firm that not only has the technical chops but also gets your agency’s creative culture. Start by reviewing their portfolio. Do their past projects show a high level of design refinement and engineering know-how? When you research manufacturers, compare them on key factors like speed, cost, and specific capabilities. A great partner will be transparent about their process and work with you to align their approach with your campaign timeline and budget.
Communicate Your Vision Clearly
Your design partner can’t read your mind, so a clear and detailed brief is essential. Before you even start the conversation, get a thorough understanding of your product's function and its role in the campaign. What problem does it solve for the user? What feeling should it create during an unboxing? Provide your partner with brand guidelines, mood boards, and any visual references that capture the look and feel you’re after. The more information you can give them upfront, the faster they can move from concept to a prototype that hits all the right notes for your client.
Give Great Feedback and Get Great Results
Prototyping is an iterative process, and your feedback is what drives it forward. When your partner delivers a prototype, your job is to provide clear, specific, and actionable notes. Instead of saying, "It feels cheap," try, "The plastic has a glossy finish, but we need a matte texture to align with the brand's premium positioning." This is also your chance to gather customer feedback from your client or target users to reduce risk and ensure the final product meets everyone's needs. Think of it as a collaborative loop that refines the idea until it’s perfect.
Design Your Prototype for Manufacturing
A beautiful, functional prototype is a huge win, but it’s only half the battle. The ultimate goal is to create a product that can actually be produced—on time, within budget, and at the scale your campaign requires. This is where designing for manufacturing comes in. Thinking about the production line from the very beginning is the smartest way to move from a single prototype to a successful product launch. It’s not about limiting creativity; it’s about making your creative vision achievable. By planning for production early, you avoid the kind of costly surprises and delays that can derail a campaign. This strategic foresight is what separates a one-off prop from a scalable brand asset that generates real value.
Imagine you’ve just gotten client approval on a stunning influencer kit. Now you need 500 of them, and you need them in six weeks. If the design wasn't optimized for production, you might discover that a key component is impossible to source in bulk or that the assembly is too complex for your timeline. Designing for manufacturing anticipates these challenges. It’s a proactive approach that ensures the incredible product you pitched can be replicated flawlessly, whether you need a hundred units for an exclusive event or thousands for a retail launch. An experienced industrial design firm guides this process, translating your creative concept into a manufacturable reality without sacrificing the magic.
What Is Design for Manufacturability (DFM)?
Design for Manufacturability, or DFM, is the practice of designing a product in a way that makes it efficient to produce. Think of it as building a production roadmap directly into your design files. Instead of creating a concept and then figuring out how to make it, DFM integrates production considerations from the start. This approach helps identify potential manufacturing problems—like a part that’s too complex to mold or a material that’s too expensive for the budget—long before they become real issues. An experienced engineering partner handles the technical details of DFM, ensuring your design is optimized for cost, speed, and quality without you needing to become a factory expert.
Choose the Right Materials
The materials you choose define your product’s look, feel, and performance, but they also have a massive impact on your budget and timeline. The hand-finished wood that looks stunning on a single influencer gift might be completely impractical for a run of 5,000 units. When selecting materials, you have to balance aesthetics with availability and cost. For early-stage prototypes, using off-the-shelf components can be a great way to test an idea quickly and affordably. As you move toward the final design, your engineering team can help you source materials that deliver the right brand experience while still being suitable for mass production.
Plan Your Path from Prototype to Production
Once your prototype is approved, it’s time to prepare for the factory. Transitioning from a single unit to thousands requires a clear and detailed plan. This starts with locking in the final design and creating a comprehensive tech pack, which includes DFM-optimized CAD models, assembly drawings, and a Bill of Materials (BOM) that lists every single part. The next step is to find a manufacturer who can meet your quality standards, volume needs, and deadline. Vetting factories can be a complex process, which is why partnering with a design and engineering firm that has an established manufacturing network is so valuable. They can manage the entire handoff, ensuring a smooth transition from prototype to production.
Refine Your Prototype with Feedback
Your prototype isn’t just a show-and-tell piece; it’s a powerful learning tool. Getting a physical model into the hands of your client and target users is where the creative brief meets reality. This is the moment you find out what truly works and what doesn’t. Feedback is the fuel for iteration, turning a good idea into a great product that’s ready for the real world. For an agency, this stage is absolutely critical. It’s your chance to validate the concept, manage client expectations, and ensure the final product will resonate with the intended audience before you commit to a full production run.
Engaging with users early helps you identify pain points and areas for improvement when changes are still easy and inexpensive to make. By systematically gathering insights and making strategic adjustments, you de-risk the project and ensure the final piece not only looks incredible but also delivers on its promise for your campaign. This process transforms the prototype from a static model into a dynamic tool for refinement, building a clear, confident path toward manufacturing. It’s how you move from a promising concept to a product that people will actually love to use.
How to Gather and Use Feedback
The goal here is to get honest, actionable insights. Put the prototype in front of the right people—your client, key stakeholders, and a small sample of the campaign's target audience. Run informal user testing sessions where you can observe how people naturally interact with the product. Ask open-ended questions like, "What do you think this is for?" or "Walk me through how you'd use this." Avoid leading questions. Your job is to listen and watch. Document everything—the good, the bad, and the unexpected. This raw feedback is the foundation for making your product better before committing to a production budget.
Make Smart, Data-Informed Changes
Once you have a pile of feedback, it’s tempting to act on every single suggestion. The key is to step back, synthesize the information, and make strategic, data-informed changes. Group similar comments, look for patterns, and prioritize the issues that have the biggest impact on the user experience or campaign goals. This is where an engineering partner is invaluable. We can help you evaluate if a requested change is feasible from a manufacturing standpoint and how it might affect costs or timelines. The goal is to iterate on your design based on both user feedback and technical constraints, ensuring every modification is purposeful.
Get Ready for the Final Production Run
After making revisions based on feedback, it’s wise to create one last, refined prototype. Think of this as the final dress rehearsal before the main event. This version should incorporate all your changes and represent the exact product you intend to send to the factory. This final check is crucial for validating that all the modifications work together as intended and haven't accidentally introduced new problems. It gives you, your team, and your client the ultimate confidence to sign off on the design and move into mass production, ensuring a seamless handoff and a flawless final product.
Related Articles
Frequently Asked Questions
My agency has a great product idea, but we're not engineers. Where do we even begin? You don't need to be. The best first step is to get the idea out of your head and onto paper. Start with simple sketches and mood boards to define the product's purpose and aesthetic. This visual brief becomes the foundation for a conversation with a product development partner. A good firm can take that creative vision and translate it into a technical plan, guiding you on the most effective way to build a prototype that proves your concept.
How can we create a prototype without blowing our campaign budget? The key is to match your spending to your goal. Your first prototype doesn't need to be a perfect, market-ready product. Its job is to answer a specific question, like "Does this mechanism work?" or "Is this shape comfortable to hold?" You can keep initial costs low by focusing on that single goal, using affordable methods like 3D printing for form studies or building a functional model with existing off-the-shelf components.
What's the difference between a prototype for internal review and one for a client presentation? Think of it in terms of polish. An internal prototype can be rough because its audience is just your team. You might use cardboard, foam, or a quick 3D print to validate a concept quickly and cheaply. A client-facing prototype, however, needs to be high-fidelity. It should look and feel like the final product because its job is to sell the vision, secure buy-in, and accurately represent your client's brand quality.
Do we really need to worry about patents and NDAs for a one-off campaign product? Yes, absolutely. An NDA (Non-Disclosure Agreement) is standard professional practice and should be signed before you discuss your concept with any external partner. It protects your confidential conversations. While a full patent might feel like overkill, remember that a great idea has value, regardless of whether it's for a limited campaign or a full retail launch. Protecting the intellectual property is a crucial step that safeguards your agency's work and your client's investment.
Our idea is pretty complex. How do we know if it's even possible to make? You can find out by simplifying. Instead of trying to build the entire, complex product at once, focus on creating a prototype that tests the single most challenging or important function. This is often called a "works-like" prototype or a proof of concept. By isolating and validating the core technical element first, you confirm the idea is feasible before investing time and money into developing the aesthetics and secondary features.