Overmolding Design: A Guide to Getting It Right
You’ve probably interacted with an overmolded product today without even realizing it. It’s the secret behind the soft grip on your toothbrush, the protective bumper on your phone case, and the sealed buttons on your TV remote. This process bonds different materials together to create a single, seamless part with superior ergonomics and durability. It’s the go-to method for adding functional features that also communicate a sense of quality and thoughtfulness. For any agency tasked with creating a physical product, a smart overmolding design is your ticket to elevating a standard item into a premium brand asset that feels substantial and is built to last.
Key Takeaways
- Overmolding adds real-world value: Use this process strategically to build in functional features like comfortable grips, waterproof seals, and shock absorption, making your product more durable and impressive.
- A lasting bond is non-negotiable: The success of your product depends on the permanent connection between the two materials. Ensure this by selecting chemically compatible plastics or designing a mechanical interlock to prevent peeling.
- Smart design prevents production problems: Details like consistent wall thickness and proper draft angles are crucial. Getting these engineering fundamentals right from the start ensures a smooth manufacturing process and a high-quality final product.
What is Overmolding and How Does It Work?
Think of overmolding as giving a product a second skin. It’s an injection molding process where we mold one material, usually a soft and flexible plastic, over a second, more rigid material. The classic example is a toothbrush with a hard plastic handle (the substrate) and a soft, rubbery grip (the overmold). This process is fantastic for creating products that need to be durable yet comfortable to hold, water-resistant, or just visually interesting with multiple colors and textures.
The magic happens inside a mold. First, the rigid base part is created. Then, that part is placed into another mold cavity, and the second, softer material is injected to flow around and bond to it. This creates a single, seamless part with distinct material properties. It’s a brilliant way to add functional features like soft-touch grips, waterproof seals, or shock absorption without needing clunky fasteners or adhesives. This integrated approach not only improves the product’s performance but also gives it a premium, polished feel that makes a brand stand out.
The Two-Shot Molding Method
When you need to produce a high volume of overmolded parts quickly and consistently, two-shot molding is the gold standard. This advanced manufacturing method uses a single, complex molding machine to do the entire job in one seamless cycle. First, the machine injects the plastic for the rigid substrate into one side of the mold. Then, the mold rotates, and the freshly made part is moved to a second cavity. In this new position, the second material—the softer overmold—is injected directly onto the substrate.
Because this all happens in one continuous, automated process, it’s incredibly efficient and precise. There’s no manual handling between steps, which reduces labor costs and the risk of contamination or misalignment. For agencies planning large-scale production for a product launch or merchandise line, this injection molding process ensures every single unit is perfect.
Common Materials for Overmolding
The key to overmolding is pairing the right materials. The goal is to have the top layer melt just enough to form a strong, permanent bond with the base part. The most common overmold materials are thermoplastic elastomers (TPEs), which provide that signature soft, rubbery feel. You’ll also see thermoplastic polyurethane (TPU) used for applications needing higher abrasion resistance and durability.
For the rigid substrate, we often use plastics like acrylonitrile butadiene styrene (ABS)—the same tough material LEGO bricks are made of—or polypropylene (PP) and polyethylene (PE), which are common in consumer goods. The specific combination of materials depends entirely on the product’s function. We consider everything from how it will be used to the environment it will live in to select the perfect pair.
How Materials Bond Together
Getting the two materials to stick together permanently is the most critical part of overmolding. This isn’t just about physical encapsulation; for the best results, you need a strong chemical bond. Some plastics are naturally compatible and form an incredibly strong connection when molded together. For example, TPEs and TPUs bond exceptionally well with plastics like ABS, polycarbonate (PC), and certain nylons. The molecules of the two materials actually interlock and fuse during the molding process.
However, not all plastics play well together. If the materials aren't chemically compatible, the overmold can peel away, compromising the product's look and function. This is where deep material science knowledge is essential. We rely on material compatibility charts and extensive testing to ensure the substrate and overmold materials you choose will form a bond that lasts.
Why Use Overmolding in Your Product Design?
Overmolding is more than just a manufacturing technique; it’s a strategic design choice that can solve multiple challenges at once. It improves how a product feels in the hand, how it stands up to daily use, and even how efficiently it can be produced. For agencies tasked with creating physical products that leave a lasting impression, understanding these benefits is key. It allows you to build tangible value into a design, creating an experience that goes far beyond surface-level aesthetics and delivers on both form and function.
Create a Better Feel and Grip
Think about the handle of a premium power tool or the soft, grippy sides of a portable speaker. That satisfying tactile quality often comes from overmolding. By molding a soft, rubber-like material over a rigid plastic frame, you can create a product that’s more comfortable and secure to hold. This is a game-changer for any handheld item, as it makes the grip safer and more reliable, even in wet conditions. This focus on ergonomic design doesn't just improve usability; it communicates a sense of quality and thoughtfulness, making the product feel more valuable in the user's hands.
Add Durability and Water Resistance
Overmolding is also a fantastic way to make a product tougher and more resilient. The process creates a seamless bond between the two materials, which can act as a built-in gasket to seal out dust, dirt, and water. This is critical for consumer electronics, outdoor gear, or any device that needs protection from the elements. The softer outer layer also provides excellent shock absorption, protecting internal components from drops and impacts. By making products more rugged and waterproof, you’re not just preventing damage—you’re extending their lifespan and ensuring the brand experience remains positive long after the unboxing.
Simplify Manufacturing and Assembly
From a production standpoint, overmolding is incredibly efficient. Instead of making two separate parts and then joining them later with messy adhesives or clunky screws, overmolding combines them into a single, solid piece right in the mold. This two-step process, where one material is molded directly onto a base part, eliminates entire steps from the assembly line. This approach not only saves time and reduces labor costs but also results in a stronger, more integrated part without the potential points of failure that come with manual assembly. Thinking about design for manufacturing early helps streamline the entire path from concept to production.
How to Choose the Right Materials for Overmolding
Choosing the right materials is one of the most critical steps in the overmolding process. It’s where your creative vision for the product’s look and feel meets the physical realities of manufacturing and performance. The materials you select will determine everything from the product’s grip and durability to its ability to withstand heat and chemicals. This isn’t just a simple choice between hard and soft plastic; it’s a strategic engineering decision that impacts the final quality and longevity of your product.
Getting this right requires a deep understanding of how different polymers interact. You have to consider chemical compatibility, thermal properties, and the physical bond between the two materials. A poor material choice can lead to delamination (where the soft layer peels off), warping, or a product that fails in its real-world environment. That’s why we work closely with material suppliers and our engineering team to analyze the specific needs of every project. We help you find the perfect combination that feels right, performs flawlessly, and can be manufactured efficiently.
Selecting the Right Thermoplastic Elastomer (TPE)
The soft, grippy material used in overmolding is typically a thermoplastic elastomer, or TPE. This is what gives a toothbrush handle its comfortable grip or a power tool its non-slip surface. But with thousands of TPE variations available, picking the right one can feel overwhelming. The key is to focus on the desired user experience. Do you need a firm, tacky grip for control, or a soft, cushioned feel for comfort?
We consider several key properties, including hardness (durometer), friction, and flexibility, to match the material to your product’s function. Collaborating with material science experts helps narrow down the options to find a TPE that not only feels great but also bonds perfectly with your chosen substrate.
Ensuring Your Materials Will Bond
For an overmolded product to last, the two materials must form a permanent bond. This can happen in two ways: chemically or mechanically. A chemical bond is the ideal scenario, where the two materials have a natural molecular attraction and fuse together during the molding process. For example, certain TPUs bond incredibly well with plastics like ABS and polycarbonate.
When a strong chemical bond isn’t possible, we design for a mechanical bond. This involves creating features like undercuts, holes, or channels in the hard substrate. During the second shot, the molten TPE flows into these features and physically locks itself into place once it cools. This creates a robust connection that prevents the soft material from peeling or slipping, ensuring the final product is a single, solid part.
Factoring in Temperature and Chemical Exposure
Material selection isn’t just about the final product; it’s also about surviving the manufacturing process. Overmolding involves injecting a second material at a very high temperature. The first part, or substrate, must be able to withstand this heat without melting or deforming. For instance, liquid silicone rubber (LSR) is molded at around 350°F, which would soften a standard plastic like ABS. In this case, we’d select a more heat-resistant substrate like PBT or glass-filled nylon.
Beyond the factory, you have to consider the product’s end environment. Will it sit on a car dashboard in the summer sun? Will it be exposed to cleaning agents in a hospital? We analyze the thermal and chemical resistance of each material to ensure your product won’t degrade, discolor, or fail when it comes into contact with different substances or extreme temperatures.
Critical Design Tips for Successful Overmolding
Overmolding is a fantastic process, but its success hinges on getting the initial design right. Small details in the geometry of your parts can make the difference between a flawless product and a manufacturing nightmare. When you’re working on a tight agency deadline, the last thing you want is a production delay because of a design flaw.
Thinking through these critical factors from the start is how we ensure your product not only looks and feels incredible but can also be manufactured efficiently and reliably. It’s about translating your creative vision into a technically sound product that’s ready for production without any last-minute scrambles. By focusing on a few key principles, you can avoid common pitfalls and create an overmolded part that performs perfectly.
Getting Wall Thickness and Geometry Right
One of the most important rules in overmolding is to maintain a consistent wall thickness for both the substrate and the overmolded layer. When walls are uniform, the molten plastic flows evenly and cools at a consistent rate. This simple step helps prevent cosmetic defects like sink marks and internal stresses that could weaken the part. For most applications, a wall thickness between 0.060 and 0.120 inches provides a great balance of strength and manufacturability. Keeping the geometry as simple and smooth as possible also helps the material fill the mold completely, ensuring a strong, reliable bond between the two layers.
Planning Gate Location and Material Flow
Think of a gate as the entry point where molten plastic is injected into the mold. Its location is incredibly important. We strategically place gates to ensure the material can flow through the mold and fill the entire cavity before it starts to cool. A well-placed gate minimizes the distance the plastic has to travel, which prevents defects and ensures a strong weld line where material flows meet. For the overmolded layer, it’s also critical that the mold presses tightly against the first part. This creates a clean, sharp shut-off line, giving you those crisp edges that define a high-quality product.
Setting Draft Angles and Surface Finishes
In injection molding, parts need to be removed from a steel mold. To make this happen smoothly, we design parts with a slight taper on their vertical walls, known as a draft angle. Without it, the part could scrape against the mold during ejection, causing scuffs or damage. A draft angle of 3 to 5 degrees is usually enough to ensure a clean release. This applies to both the substrate and the overmold. Additionally, the surface finish of the substrate can play a role in adhesion. A slightly textured surface can give the overmolded material more to grip onto, creating a stronger mechanical bond between the two materials.
Key Manufacturing Factors for Overmolding
Once your design is locked in, the focus shifts to actually making the thing. This is where a great concept meets the realities of production, and a little bit of engineering foresight goes a long way. Thinking about the manufacturing process from the start is how we ensure your final product is not only beautiful but also efficient and cost-effective to produce. Key factors like heat, pressure, production speed, and tooling costs all come into play. Getting these details right is what separates a smooth production run from a series of expensive headaches. It’s about turning a great idea into a high-quality physical product without any last-minute surprises.
Managing Heat and Material Shrinkage
The overmolding process involves high heat and pressure, so your substrate material needs to be tough enough to handle it without melting or warping. Another challenge is that the soft TPE often shrinks more than the rigid plastic it’s molded onto as it cools. If not managed properly, this difference in shrinkage can cause the final part to bend or warp. To avoid this, we can plan for material behavior by using a stiffer substrate, adding structural ribs for support, and keeping the soft TPE layer relatively thin. We also carefully plan where the molten plastic enters the mold to ensure it flows evenly and reduces stress on the part.
Optimizing for Cycle Time and Efficiency
In production, time is money. The faster each part can be made, the lower the cost per unit. To keep cycle times short and efficient, we design both the substrate and the overmold with walls that are as uniform in thickness as possible. This helps the part cool down quickly and evenly, preventing defects like trapped air bubbles. We also add a slight taper, or draft angle, to the part’s walls—usually between 3 to 5 degrees. This tiny detail makes a huge difference, as it helps the finished part release cleanly from the mold without sticking. These small adjustments are critical for streamlining production and hitting tight deadlines.
Understanding Tooling Costs and Mold Design
The molds used for injection molding, known as tooling, are a significant part of the budget. For overmolding, you have a few process options that impact cost. For high-volume production, two-shot molding is often the best choice. It uses a complex, automated mold to create both parts in one cycle. While the initial tooling cost is higher, it eliminates the need for manual assembly, saving a lot of money in the long run. For smaller runs, insert molding—where the substrate is manually placed into a second mold—can be more cost-effective upfront. We help you weigh these options based on your project’s volume, budget, and timeline to find the smartest path forward.
Common Overmolding Design Mistakes to Avoid
Overmolding can transform a good product into a great one, but a few common design oversights can cause major headaches during production. Getting the engineering right from the start is the key to creating a product that not only looks amazing for your campaign but also performs flawlessly. As your product development partner, we handle these technical details so you don't have to. Still, understanding the potential pitfalls helps everyone make smarter decisions. Let’s walk through the three most common mistakes we see and how to steer clear of them.
Mistake #1: Poor Material Adhesion
The bond between your base material (the substrate) and the soft-touch overmold is everything. If they don’t stick together properly, the final product can peel apart, which is a non-starter for quality. Some plastics have a natural chemical affinity for each other, creating a strong, seamless bond. But when you’re working with materials that don’t naturally adhere, you need a mechanical solution. We achieve this by designing features like undercuts, grooves, or holes into the substrate. These give the overmolded material something to physically grab onto, creating a robust mechanical interlock that ensures the two parts will never separate.
Mistake #2: Ignoring Dimensional Stability
Different materials behave differently when they cool. Most thermoplastic elastomers (TPEs)—the soft, grippy materials used for overmolding—tend to shrink more than the rigid plastics used for the substrate. If you don’t account for this, you can run into serious problems. For example, if the substrate is thin or lacks structural support, the shrinking TPE can actually cause it to warp or bend as it cools. A successful design anticipates these material behaviors. We carefully engineer the part’s geometry and select materials with compatible shrink rates to ensure your product holds its shape perfectly every time.
Mistake #3: Creating Overly Complex Shapes
When it comes to overmolding, simpler geometry is often stronger and more reliable. Designs with deep, narrow ribs or sharp internal corners can trap air during the injection process. This trapped air prevents the molten plastic from filling the mold completely, leading to voids, weak spots, and an unfinished look. Instead, it’s better to use smooth, rounded corners that help the material flow evenly and reduce stress concentrations in the final part. We always design with manufacturability in mind, ensuring every feature is properly vented and shaped to produce a clean, consistent, and defect-free product that’s ready for its close-up.
How to Test and Validate Your Overmolded Design
A great design on paper is one thing, but a high-performance product that holds up in the real world is another. The validation phase is where we bridge that gap, turning a beautiful concept into a tangible, reliable product that your client will love. Testing your overmolded design is a non-negotiable step that confirms your material choices, geometry, and manufacturing process all work together perfectly. Think of it as your insurance policy against costly production errors and brand-damaging product failures. This is how you catch potential issues—like a weak bond, an uncomfortable grip, or a seal that doesn't hold—long before you’ve invested in expensive tooling. By systematically testing your prototypes through drop tests, pull tests, and user feedback sessions, you can gather real-world data and make informed refinements. This process removes the guesswork and allows you to move forward with confidence, knowing your final product will be durable, functional, and ready to impress. It’s about proving the design works not just in CAD, but in the hands of actual users, ensuring the final product delivers on its promise and strengthens the brand experience.
Testing for Bond Strength
The connection between your two materials is the heart of an overmolded part. If that bond fails, the product fails. The goal is to create a robust chemical bond between the substrate and the overmold, but that isn’t always possible depending on the material pairing. When a strong chemical bond isn't an option, we turn to mechanical solutions. By designing the substrate with clever features like undercuts, channels, or holes, we create a physical lock. The second material flows into these features and hardens, forming an incredibly strong mechanical interlock that prevents the materials from peeling, slipping, or separating, ensuring the part remains reliable throughout its lifecycle.
How to Evaluate Your Prototypes
Prototyping is your dress rehearsal for mass production. It’s the most effective way to test new product ideas and see exactly how your chosen materials will bond and perform before you commit to expensive production tooling. Getting physical prototypes in your hands allows you to conduct real-world tests for grip, feel, durability, and function. This is where you can identify any weaknesses in the design or material adhesion. Is the grip comfortable but durable? Does the seal prevent water ingress as intended? Answering these questions with a prototype ensures the final product meets every performance expectation and helps you refine the design for a flawless production run.
Verifying Performance and Quality
Successful overmolding comes down to the details. To get a high-quality finish and reliable performance, you have to pay close attention to key design aspects like wall thickness, corner radii, and shut-off areas. These elements are crucial for preventing common defects like warping and ensuring the overmolding material flows exactly where it’s supposed to. It’s also important to account for the different shrinkage rates of the two materials to maintain the part’s integrity. A well-engineered part design ensures the overmolding material can flow easily into every designated area and adhere perfectly to the base, resulting in a product that not only looks great but performs reliably under pressure.
Smart Ways to Manage Overmolding Costs
Overmolding can feel like a big line item on a project budget, but it’s one of the smartest investments you can make for creating a premium, durable product. The key is to approach it with a clear strategy. When you make informed decisions about your design, materials, and production volume from the start, you can create an incredible product that feels high-end without letting costs get out of control. It’s all about balancing the upfront investment in tooling with the long-term savings and quality gains.
Think of it this way: paying a little more for a well-designed mold that combines two parts into one seamless piece saves you from paying for manual assembly later. Plus, you get a stronger, more reliable product that elevates the brand experience. With the right plan, you can make overmolding work for your budget and your client’s goals.
Balance Design Complexity and Budget
One of the biggest wins with overmolding is its ability to simplify your supply chain. While the initial cost for a two-material mold might be higher than creating two separate tools, you completely eliminate the need for a secondary assembly process. You save on labor costs and time, and you get a higher quality, more durable product right out of the gate. This is also why overmolding is a fantastic way to create high-fidelity prototypes. You can test how well different materials bond and feel before committing to a massive production run, which is a great way to de-risk a new product launch for your client.
How Material Choice Affects Cost
Choosing the right materials is one of the most critical cost-control measures in an overmolding project. It’s not just about how the materials look or feel, but how they behave together. A poor material match can lead to weak bonds, failed parts, and costly rework. This is where working with an experienced engineering partner pays off. We can help you select materials that are chemically compatible and have the right thermal and physical properties for your application. Getting this right from the beginning ensures your product is reliable and saves you from expensive troubleshooting down the line.
Thinking About Long-Term Production Costs
How you plan to manufacture your overmolded part also has a major impact on your budget, especially when you consider the total number of units you need. For smaller runs or prototypes, a manual process where an operator places the first part into a second mold can be more cost-effective. But if you’re planning a large production run for a retail product line, investing in an automated two-shot injection molding process is often the smarter move. The upfront tooling is more expensive, but the lower cost-per-part and faster cycle times deliver significant savings at scale.
Common Applications for Overmolding
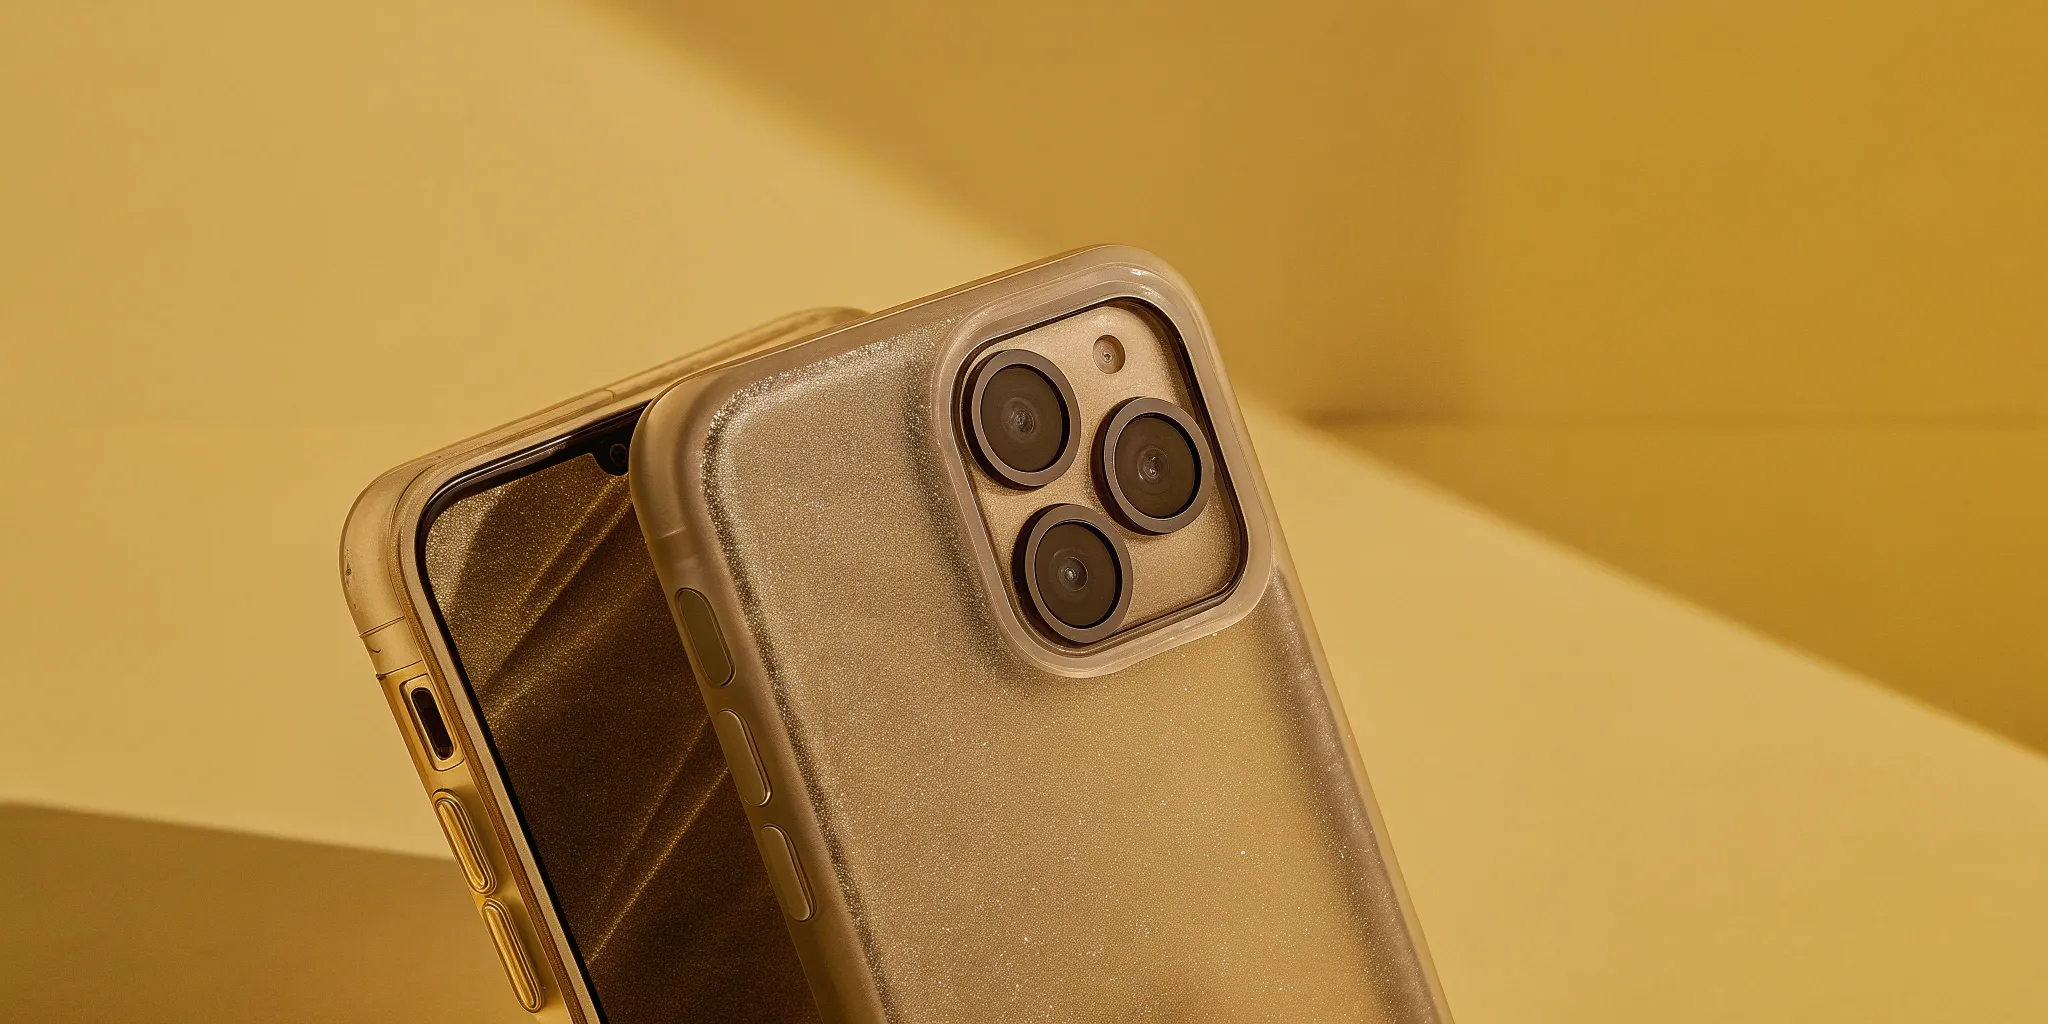
Overmolding is one of those manufacturing techniques you’ve likely encountered dozens of times without ever realizing it. It’s the secret behind products that feel great in your hand, stand up to daily use, and just look more polished and professional. From the soft grip on your electric toothbrush to the protective bumper on your phone case, this process adds functional and aesthetic value in ways that a single material can’t. For agencies looking to create physical products for a campaign or brand, understanding where overmolding shines can spark some incredible ideas. It’s a versatile method for adding texture, color, and durability, turning a standard item into a memorable brand asset that people will actually want to keep and use. This process is a powerful tool for transforming a simple concept into a tangible, high-quality experience that reflects a brand’s commitment to detail.
Consumer Electronics and Personal Care
In the world of consumer electronics, feel and function are everything. Overmolding is the go-to method for creating soft-touch surfaces, non-slip grips, and protective seals on everything from TV remotes to portable speakers. The process allows us to protect sensitive internal components with a shock-absorbing outer layer, which is essential for handheld devices. Think about creating a custom branded phone case or a set of headphones for an influencer kit. Using overmolding, you can add a rubberized grip in a specific brand color, making the product not only look unique but feel more premium and durable. The same goes for personal care items like electric razors or facial cleansing devices, where a waterproof, comfortable grip is part of a great user experience.
Medical Devices and Automotive Parts
While you might not be designing surgical tools, the principles behind their construction are incredibly valuable. In medical device manufacturing, overmolding is used to create sealed, easy-to-clean housings and ergonomic grips that ensure precision and safety. This same focus on performance and usability translates directly to automotive interiors, where overmolded plastics create durable, soft-touch knobs, buttons, and console trim that withstand years of use. For your projects, this is a great source of inspiration. If you’re developing a high-end promotional product that needs to communicate reliability and quality, borrowing from these industries is a smart move. It shows how overmolding can create a product that feels substantial and performs flawlessly under pressure.
Hand Tools and Industrial Gear
Some of the most straightforward and effective uses of overmolding are found in hand tools. The classic example is adding a soft, comfortable grip to a hard plastic handle, like using a flexible TPE over a rigid ABS plastic for a screwdriver or power drill. This application is perfect for any product that requires a secure, comfortable hold. But it’s not just about comfort; that outer layer also adds impact resistance and vibration dampening. When you’re creating branded merchandise, think beyond the standard items. A high-quality, overmolded multi-tool or flashlight feels far more valuable than a cheap, single-plastic alternative. It’s a practical way to improve a product’s look and feel, ensuring your branded gear is something people will actually want to use again and again.
Related Articles
- DFM for Injection Molding: The Ultimate Guide
- Product Design for Manufacturing: A Practical Guide — Jackson Hedden
Frequently Asked Questions
Is overmolding just adding a rubber grip to a plastic part? That’s the most common example, but the process is much more versatile than that. Think of it as permanently fusing two different materials into a single, seamless piece. While creating a soft, comfortable grip is a popular use, we also use overmolding to build in features like waterproof seals, shock-absorbing bumpers, and even just to add a pop of color or texture for a more premium look. It’s a way to solve multiple design challenges in one elegant step.
Why should I pitch overmolding to my client instead of a simpler, single-material product? It all comes down to the user experience and perceived value. A product with a thoughtful, ergonomic grip or a durable, protective layer feels more substantial and high-quality in a user's hands. It communicates that the brand cares about detail and longevity. For a promotional item or branded product, this elevates it from a simple giveaway to a piece of gear that people will actually want to keep and use, creating a much stronger and more lasting brand impression.
Does overmolding add a lot of cost to a project? While the initial tooling for an overmolding mold can be more of an investment than a standard mold, it often saves money in the long run. The process eliminates the need for a separate assembly step, so you don't have to pay for labor to glue or screw two pieces together. This also results in a stronger, more reliable part with fewer points of failure. For larger production runs, the efficiency of overmolding makes it an incredibly smart and cost-effective choice.
What happens if the two plastics we want to use don't naturally stick together? This is a common engineering challenge with a very clever solution. When materials aren't chemically compatible, we design for a mechanical bond. This means we engineer small undercuts, channels, or holes into the hard base part. When the second, softer material is injected, it flows into these features and physically locks itself into place as it cools, creating an incredibly strong connection that won't peel or slip.
How do I know if overmolding is the right choice for my specific project? A great starting point is to think about how the product will be used. If it's a handheld device, needs to be extra durable, or requires protection from water or impacts, overmolding is likely a fantastic fit. It’s also a great choice when you want to combine different colors and textures for a high-end aesthetic. The best way to know for sure is to discuss your concept with us; we can help you weigh the benefits and decide if it’s the right manufacturing path for your goals.