Product Development Life Cycle: A Complete Guide
A physical product rarely moves from a promising sketch to reliable production in a single leap. Manufacturers need a repeatable build cycle that connects customer needs, concept decisions, prototypes, manufacturability reviews, and launch deliverables before volume commitments are made.
The product development life cycle is the structured process for turning an opportunity into a manufacturable product, typically moving through requirements. Concept generation, product design, prototyping and testing, design for manufacturability, pilot production, and launch. Early collaboration matters because problem definition and concept generation shape goals that must hold through production and use, as NIST explains: NIST recommends integrating varied experience early in development.
This is different from a product's market lifecycle, which describes what happens after introduction as demand moves through growth, maturity, and decline. First, it helps to define the development cycle itself and the decisions each stage is meant to resolve.
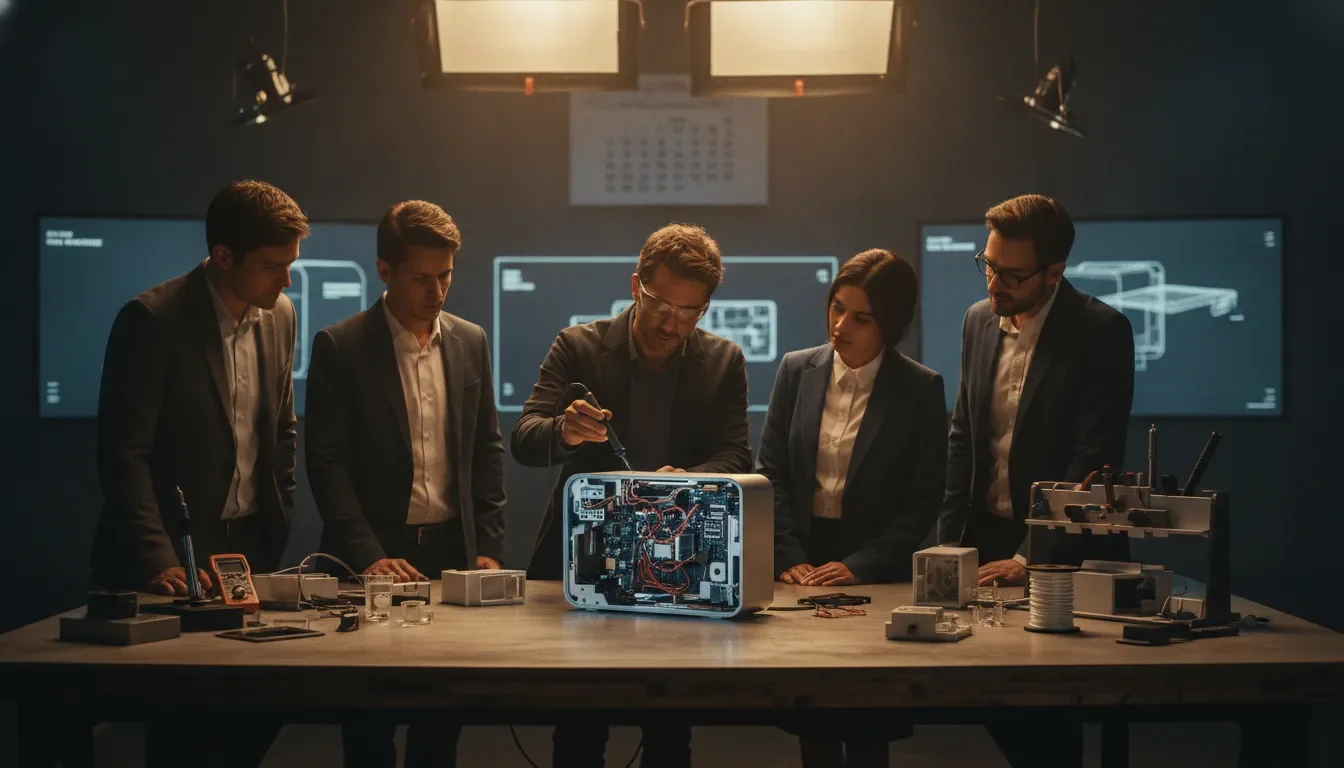
What Is the Product Development Life Cycle for Manufacturers?
The product development life cycle is the structured process a physical product follows from an initial opportunity to a manufacturable, launched product. It gives a team a shared sequence for making decisions, testing assumptions, and resolving production risks before they become expensive. For manufacturers, the cycle is not simply a creative exercise. It connects customer needs and business goals to specifications, materials, prototypes, production methods, and launch readiness.
There is no single universal stage count, but established models provide useful structure. A U.S. government reference identifies seven major lifecycle stages: requirements, design, manufacturing, testing, distribution, use and maintenance, and disposal. The model applies the complete life of a hardware product, including what happens after it reaches the market. Read the seven-stage lifecycle model.
For a new product team, the practical development cycle usually concentrates on the front half of that broader framework:
Ideation: Identify a meaningful opportunity and define the problem worth solving.
Product planning: Clarify the target customer, business case, specifications, and constraints.
Concept development: Generate, compare, and test possible solutions.
Industrial design and mechanical development: Translate the selected direction into form, function, materials, components, and production-ready documentation.
Prototyping and testing: Evaluate how the product looks, works, feels, and performs before committing to scale.
Design for manufacturability: Refine the product for efficient, repeatable, cost-effective production.
Launch: Move through pilot production, process validation, production ramp, and post-launch feedback.
Academic product development frameworks follow a similar progression, moving from opportunity identification and product planning through customer needs, specifications, concept generation, concept selection, testing, and industrial design. MIT's product design and development framework shows why the work is structured: each phase creates information that makes the next decision more reliable. Physical products also require manufacturing thinking earlier than many teams expect.
Jackson Hedden integrates industrial design, mechanical development, and design for manufacturability under one roof, rather than treating each as a separate vendor handoff. DFM begins on day one, so choices about geometry, materials, tolerances, assembly, tooling, and production volume can be considered while the product is still flexible. That approach reduces coordination overhead and helps prevent a visually successful concept from becoming difficult or costly to build.
The result is a connected cycle rather than a series of isolated deliverables. A prototype can expose a design issue, a manufacturing review can change a component, and customer feedback can send the team back to an earlier concept. The goal is not to move forward blindly. It is to build enough evidence at each stage to make the next commitment with confidence. See how Jackson Hedden approaches product design and development as part of that integrated process.
Product Development Life Cycle vs. Product Lifecycle: What Is the Difference?
The product development life cycle and the product lifecycle describe two different management questions. The first asks how to turn a product opportunity into a manufacturable offering. The second asks what happens to that offering after it reaches the market. Confusing the two can create unclear ownership, unrealistic schedules, and decisions made at the wrong stage.In physical product work, the product development life cycle is a focused build cycle for one new product. It moves from opportunity identification and customer needs through specifications, concept generation, selection, testing, and industrial design. Those structured phases are reflected in the product development process described by MIT's David Eppinger and Karl Ulrich. MIT's product development framework shows why early decisions about users, requirements, and concepts influence the work that follows.
Product development life cycle compared with product lifecycle
Focus: Building one new product, from a defined opportunity to launch and production readiness. vs. Managing a product's market life over time, from its introduction through eventual decline.
Stages: Ideation, planning, customer needs, specifications, concept selection, testing, industrial design, prototyping, and launch preparation. vs. Introduction, growth, maturity, and decline. Railsware describes these as the four periods of a product's market path.
Typical duration: One build cycle, often about 6 months to 2 years depending on complexity, risk, and manufacturing requirements. vs. Multi-year market tenure, although the duration varies by category, customer demand, competition, and product updates.
Primary owner: A cross-functional design, product development, manufacturing, and quality team coordinating decisions toward launch. vs. Marketing and product management teams monitoring demand, positioning, pricing, adoption, and portfolio decisions.
The distinction matters because each cycle needs different evidence. During development, teams need customer insight, viable concepts, prototypes, material choices, cost targets, and manufacturing feedback. A product is not ready simply because its appearance is approved. It also needs a path to consistent production and a launch plan that matches the intended market.
For manufacturers, keeping the two models connected is essential. Market feedback should inform the next opportunity, while development teams should understand the commercial role the new product must play. Treating them as separate but linked systems gives stakeholders a clearer handoff from building one product to managing its performance over time.
Stage 1: Ideation and Concept Development
A strong product begins with a well-defined opportunity, not a sketch produced in isolation. At this stage, the goal is to understand whose problem is worth solving. Why existing options fall short, and what a successful outcome would look like before committing to detailed development.
That makes ideation a practical part of the product development life cycle. Research from MIT places opportunity identification, customer needs, concept generation, selection, and testing within a structured development process. And Columbia's academic model puts opportunity identification and idea generation at the front of new product development. The sequence matters because an attractive concept can still fail if it addresses a weak market need or an unrealistic business opportunity.
Early collaboration improves those decisions. The National Institute of Standards and Technology recommends bringing varied experience into problem definition and concept generation so the team can identify the goals that need to be met across the product's life. For a physical product, that perspective may include the founder, target customers, industrial design. Manufacturing, sales, and service stakeholders who understand how the product will be made and used.
Define the opportunity before generating solutions
The first deliverable is a concise problem or purpose statement. It should describe the user, the unmet need, the context in which the need occurs, and the outcome the product should create. It should not lock the team into a particular mechanism or appearance too early. A useful statement leaves room for several possible solutions while establishing clear boundaries for the work.
The team should also define the target customer and the primary use case. A product intended for a professional buyer may have different requirements from one purchased directly by consumers, even when both address a similar need. Clarifying the buyer, user, decision criteria, and purchase environment helps prevent broad assumptions from driving later decisions.
Turn the opportunity into testable concepts
With the opportunity framed, the team can generate multiple directions rather than defending the first idea. Concept boards make these directions easier to compare. Each board might show the intended user experience, core functions, form language, materials, competitive context, and the reason the concept could win. The purpose is to surface the underlying choices, not to create polished marketing art.
A preliminary business case then tests whether the opportunity deserves further investment. It can outline the customer value, likely price position, expected production considerations, risks, and open questions. At this point, estimates are working assumptions, not promises. The team is deciding what to investigate next, not pretending uncertainty has disappeared.
Before moving into detailed design, review the concepts against the problem statement and customer evidence. Eliminate ideas that cannot deliver a meaningful benefit or that introduce disproportionate manufacturing and commercial risk. For a closer look at how outside product development support can guide this work, see what a product development agency actually does. The strongest concept is the one that earns the next stage through evidence, clarity, and a credible path to production.
Stage 2: Industrial Design and Product Engineering
Once the concept has a defined customer problem and a credible direction, the product development life cycle moves into a phase where decisions become tangible. Industrial design gives the product its user-facing form and experience, while product engineering translates that direction into a buildable system. The work is not simply about making a concept look finished. It is about resolving the choices that determine whether the product can be manufactured, supported, and positioned for the right market.
Academic models of new product development place this phase after opportunity identification and concept generation. The design stage helps establish the target customer, market positioning, feature set, and pricing before the physical build begins. That sequence matters. A visually compelling product can still miss its market if its features, materials, or cost structure do not support the intended buyer and business model. Columbia's overview of new product development describes design as part of a structured path from opportunity and idea generation through testing and launch.
From concept direction to production-ready definition
The primary deliverable is a coordinated design definition that other people can use to make decisions and move the product forward. That typically includes:
CAD files that communicate form, fit, interfaces, dimensions, and key tolerances.
A bill of materials (BOM) identifying materials, components, quantities, and approved substitutions where appropriate.
Material and component specifications that connect the user experience to performance, durability, sourcing, and cost requirements.
Design reviews that document open questions, tradeoffs, revisions, and approval criteria.
Autodesk's New Product Introduction framework identifies design and development outputs such as CAD, BOM, and design-for-manufacturing principles, along with early planning for regulatory compliance. Bringing those considerations into the phase early reduces the risk of discovering later that a material, enclosure, mechanism, or component choice creates a compliance or production problem. Regulatory planning does not replace formal testing or certification, but it gives the team a clearer path toward those requirements.
One connected team, fewer coordination gaps
This is also where vertical integration creates a practical advantage. When industrial design, mechanical development, and DFM expertise sit under one roof, the product does not have to be repeatedly translated between disconnected vendors. A change to the housing can be evaluated alongside internal components, material selection, and manufacturing constraints, which reduces coordination overhead and keeps the rationale behind each decision visible. Jackson Hedden's product design services connect those disciplines around the product's intended use and business case. The result is a clearer, reviewable product definition that can move into prototyping with fewer unanswered questions and a stronger foundation for manufacturability.
Stage 3: Rapid Prototyping and Testing
A concept becomes useful evidence when you can hold it, operate it, and observe how people respond to it. Rapid prototyping turns the approved direction into physical artifacts that reveal what drawings and digital models cannot: awkward controls, weak interfaces, assembly conflicts, material behavior, and manufacturing risks. It is also where the team begins replacing assumptions with testable evidence before committing to tooling or production volume.
Two prototype types often work together. A looks-like prototype represents the product's form, proportions, materials, finishes, and visual presence. It helps stakeholders review ergonomics, appearance, brand fit, and how the product occupies its intended environment. A works-like prototype focuses on function. It may use temporary materials or an unconventional enclosure, but it demonstrates the mechanism, electronics, movement, load, user interaction, or other performance requirements that matter.
These prototypes answer different questions, so combining them too early can make testing harder to interpret. A rough functional model can isolate performance without spending time perfecting its exterior. A refined appearance model can support user and stakeholder review without suggesting that every internal component is production-ready. For a deeper look at these prototyping and production differences, the testing plan should define what each build is intended to prove.
Test the product, not just the prototype
Testing should be tied to requirements established earlier in the product development process. Functional testing may examine operation, fit, durability, safety, tolerances, or performance under expected conditions. Compliance testing can identify requirements related to applicable standards, materials, labeling, or market access. User feedback adds another layer, showing whether people understand the interaction, can complete the intended task, and perceive the product as credible and useful.Not every question requires a complete prototype. A focused mockup may expose an ergonomic problem, while a functioning prototype may be necessary to test heat, force, connectivity, or repeated use. The right sequence reduces wasted effort: test the highest-risk assumptions first, record the result, and revise the product based on what the evidence shows. A focused prototyping process keeps each build connected to a decision rather than treating prototypes as presentation pieces.
Use failures to refine the next build
The outputs from this stage should be concrete: functioning prototypes, test reports, documented user observations, and prioritized design revisions. A failed test is valuable when the team can trace it to a clear condition, decide what must change, and verify the revision in the next iteration. That feedback loop may expose a component that is difficult to assemble. A feature that adds cost without enough value, or a tolerance that cannot be held consistently by the intended manufacturing process.
Finding those issues before tooling, supplier commitments, and full-scale production is one of prototyping's strongest financial benefits. Early revisions usually involve less disruption than correcting a production-ready design after parts have been ordered. The goal is not an endless series of models. It is to reach sufficient functional, user, and compliance confidence to support the next stage, where manufacturing constraints and production economics receive a formal review.
Stage 4: Design for Manufacturability (DFM)
Design for Manufacturability turns a promising product concept into a product that can be made consistently, efficiently, and at a viable cost. Instead of waiting until a supplier reviews the final files, the team evaluates manufacturing realities while important decisions are still flexible. That means considering materials, tolerances, assembly methods, finishes, tooling, supplier capabilities, and expected production volume before the project reaches the factory floor.
DFM is most effective when it starts on day one. NIST emphasizes bringing a variety of experiences into problem definition and concept generation so the goals established early can carry through the full product life cycle. In practical terms, manufacturing input should shape the concept rather than serve as a late-stage approval step. A form that looks compelling but requires an impractical process, excessive hand assembly, or expensive tooling may need to be redesigned before it is ready for production. NIST's research on early product development decisions explains why that cross-functional input matters.
What a DFM review covers
A useful review connects the product's intended experience to the realities of making it repeatedly. The team examines whether the selected material supports the required performance, appearance, durability, and cost target, and checks part geometry, draft, fastening, seams, and assembly access. The right questions depend on the product and process. Injection molding, machining, sheet metal fabrication, casting, and soft-goods production each create different constraints.
The review should also compare process options against expected volume. A method that works for a small pilot may be too slow or labor-intensive at scale. Conversely, investing in complex tooling too early can put unnecessary pressure on a product that has not yet proven demand. Decisions should be documented clearly enough for the manufacturing partner to quote accurately and for the development team to understand the cost and schedule implications of each tradeoff.
DFM deliverables before tooling
Typical deliverables include a documented DFM review, material and process recommendations, supplier quotes, updated CAD and manufacturing specifications, and a tooling specification. Together, these outputs give stakeholders a shared basis for approving the next investment. Autodesk's overview of New Product Introduction identifies DFM within the design and development phase, alongside CAD and bills of materials, before prototyping, testing, and pilot production.
Performing this work before tooling is approved can prevent costly late-stage redesign. Changes made after molds, fixtures, or production processes are committed can affect schedules, minimum order quantities, unit cost, and supplier relationships. For a deeper look at the decisions involved, see this guide to design for manufacturability. The goal is not to limit the product prematurely. It is to make informed choices early enough that manufacturability strengthens the product instead of forcing compromises at the end.
Stage 5: Launch and Full-Scale Production
Launch is not a single handoff from product development to a factory. It is a controlled transition from a validated pilot run to repeatable production. Supported by clear quality records, trained operators, prepared suppliers, and a go-to-market plan that reflects actual capacity. The objective is to make the product available at the right volume without avoidable quality issues, stockouts, or excess inventory.
New Product Introduction (NPI) frameworks commonly move from prototyping and testing into pilot production, process validation, launch, and post-launch evaluation. That sequence gives the manufacturing team an opportunity to confirm that tooling, work instructions, materials, inspection points, and assembly methods perform as intended before the product reaches customers. Autodesk's NPI overview describes this progression and reports that formal NPI frameworks can support faster time to market and fewer post-launch quality issues than ad hoc methods.
Validate the pilot before increasing volume
A pilot run should be treated as a production rehearsal, not simply a small batch for early sales. It tests whether the approved design and tooling can produce consistent units through the planned manufacturing process. The team can identify problems such as difficult assembly steps, unacceptable variation, unclear inspection criteria, material substitutions, or tooling behavior that was not visible during prototype work.
Process validation should produce documented decisions. Record the approved tooling configuration, process parameters, acceptance criteria, inspection methods, test results, and any corrective actions. Quality control documentation should also define who owns each check and what happens when a unit falls outside specification. These records give the production partner a practical reference and make future troubleshooting faster.
Coordinate production with the market launch
Manufacturing readiness and go-to-market readiness need to advance together. Marketing may be preparing a launch date, sales may be collecting orders, and distribution may be committing to delivery windows while the factory is still confirming output. A launch plan should connect demand assumptions to supplier lead times, tooling capacity, packaging availability, minimum order quantities, and the planned production ramp.
That coordination helps the team avoid two expensive mismatches. If demand begins before replenishment is reliable, stockouts can damage early customer confidence. And if production volume is increased before demand is validated, the company can tie up cash in excess inventory. A phased ramp with explicit volume gates creates room to adjust forecasts while protecting the customer experience.
Use field feedback to improve the next cycle
Post-launch evaluation closes the loop. Gather feedback from customers, support teams, installers, distributors, and production operators, then separate isolated preferences from recurring product or process issues. Review returns, warranty claims, assembly time, defect trends, and fulfillment performance against the assumptions used during development. The resulting changes may lead to a tooling adjustment, clearer instructions, a supplier change, or a new product revision. In that way, launch becomes the beginning of informed improvement rather than the end of the product development life cycle.
How Long Does a Product Development Life Cycle Take?
A typical manufacturing product development cycle takes roughly six months to two years. That range is broad because a straightforward consumer product and a highly regulated, mechanically complex product carry very different development demands. The calendar is shaped less by the number of named stages than by the decisions and dependencies inside each one.
Complexity is usually the first variable. A product with a small part count, familiar materials, and limited functionality may move from approved concept to production relatively quickly. Products with multiple components, electronics, moving parts, tight tolerances, or demanding user conditions require more design reviews and prototype iterations. Each added interface creates another opportunity for fit, function, or assembly issues to surface.
What drives the timeline?
Regulatory requirements can add planning, documentation, testing, and review time before a product is ready for market. The exact burden depends on the intended use and market, but compliance should be considered during early concept and design work, not added as a final checkpoint. Late changes to materials, construction, labeling, or test methods can force earlier work to be repeated.
Tooling is another major schedule factor. A product may need custom molds, fixtures, dies, or other production equipment, and those assets require specification, quoting, fabrication, sampling, and approval. Tooling decisions made before the design is stable can create expensive delays. The same is true when a manufacturing partner identifies a production problem after detailed development is complete.
Iterations also affect duration, but iteration itself is not a failure. Prototypes and structured testing expose problems while they are still relatively inexpensive to address. The goal is to learn early, make deliberate changes, and confirm the solution before committing to full-scale production. Rushing through validation often shifts time from development into tooling changes, quality issues, or post-launch corrections.
How a structured process compresses the schedule
A well-run product development life cycle reduces avoidable waiting and rework by connecting concept decisions, product definition, prototyping, design for manufacturability, and launch planning. Formal New Product Introduction frameworks have been reported to deliver 30% to 50% faster time-to-market and 40% fewer post-launch quality issues than ad hoc methods, according to Autodesk's NPI overview. That advantage comes from clearer milestones, earlier cross-functional input, and defined handoffs, not from skipping necessary testing.
For a practical view of how research, prototyping, tooling, and production fit together, see this realistic timeline for launching a physical product. The most reliable forecast is built after the team understands the product's complexity, regulatory path, prototype plan, and tooling requirements. A range with explicit assumptions is more useful than a precise date that ignores those variables.
Frequently Asked Questions
What are the seven stages of the product development life cycle?
A practical manufacturing model moves from requirements and design to manufacturing, testing, distribution, use and maintenance, and disposal. Teams often break those stages into more detailed gates, such as concept approval, prototype sign-off, DFM validation, tooling, pilot production, and launch. The right level of detail depends on the product and its manufacturing process.
What is Design for Manufacturability (DFM) in the product development life cycle?
DFM means shaping a product so it can be manufactured efficiently and cost-effectively. It considers materials, tolerances, part count, assembly, tooling, supplier capabilities, and quality requirements before production begins. Treating DFM as an early design activity helps prevent expensive changes after tooling or a production run has started.
Why is prototyping important for physical products?
Prototypes give the team a way to evaluate appearance, fit, function, usability, and manufacturing risks before committing to full-scale production. A prototype can expose an interference, weak feature, difficult assembly step, or material problem while changes are still manageable. Testing several iterations also creates clearer evidence for design decisions and production planning.
How does the product development life cycle differ for manufacturing?
Physical products must become repeatable, inspectable, and economically producible, not merely functional. Manufacturing development therefore gives special attention to DFM, material selection, supplier coordination, tooling, pilot production, process validation, packaging, and quality controls. These requirements make the path different from a software-focused process, where tooling and physical distribution may not apply.
How long does a typical manufacturing product development life cycle take?
There is no single schedule. A relatively straightforward product may take about six months, while a complex product can take up to two years, depending on requirements, testing, tooling, regulations, and supply-chain readiness. A formal New Product Introduction framework has been associated with 30% to 50% faster time-to-market than ad hoc methods, according to Autodesk.
Ready to Get Started on Your Next Product Launch?
A clear path from early concept through manufacturability can help your team make confident decisions at each stage of the build. Jackson Hedden brings industrial design and product development into one connected process, helping manufacturers move forward with fewer handoffs. Get started on your next product launch by contacting the team to discuss your product and goals.