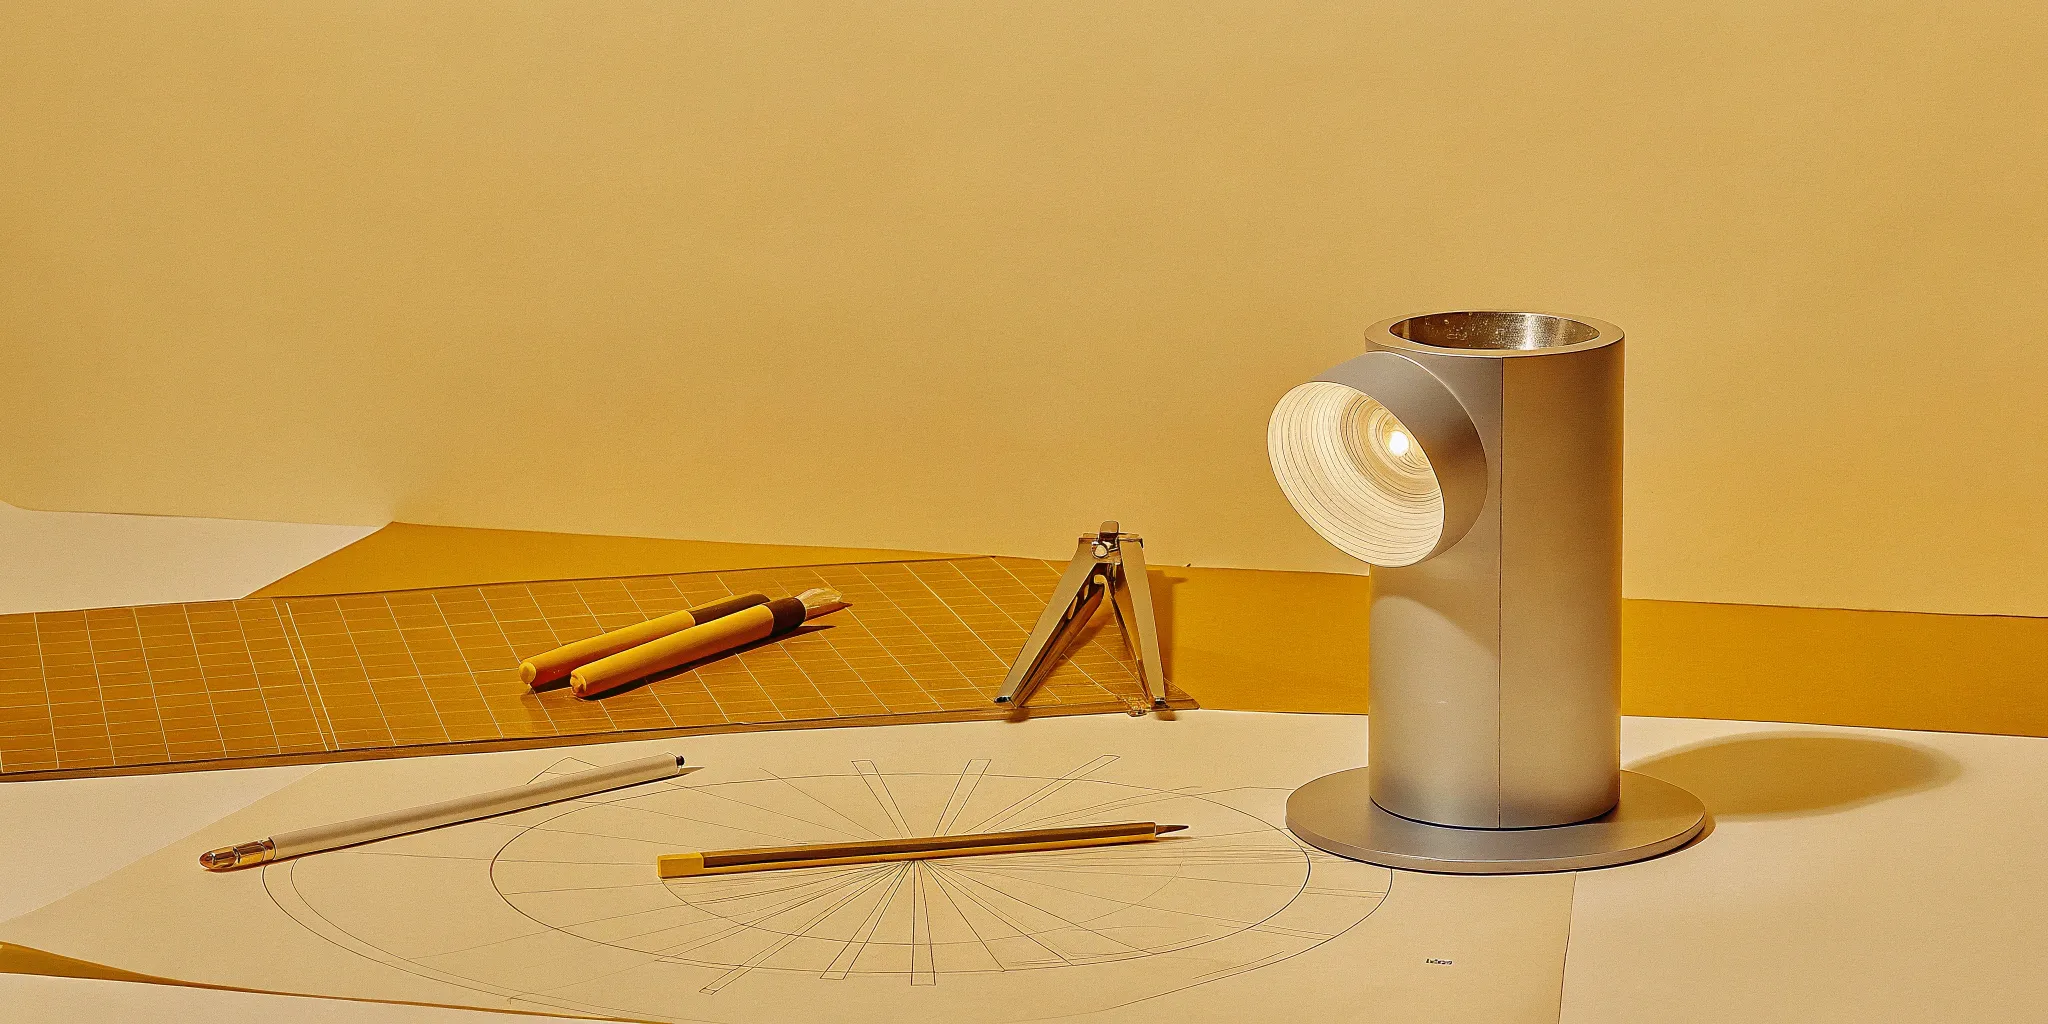
What Are Concept Sketches? A Practical Guide
Your team just cracked the big idea for a campaign: a custom piece of tech for an influencer kit or a unique packaging experience that will stop people in their tracks. The energy is high, but then comes the hard part—how do you turn that brilliant thought into something tangible? Before you get lost in manufacturing specs and 3D models, there’s a critical first step that aligns everyone from your creative director to your client. We’re talking about concept sketches. These quick, exploratory drawings are the fastest way to give your idea form, test its potential, and create a clear visual language that bridges the gap between creative vision and engineering reality.
Key Takeaways
Prioritize Clarity Over Artistry: A concept sketch’s main job is to get everyone on the same page. Use quick, simple drawings with clear annotations to align your team and sell a vision to clients, saving time and preventing misunderstandings before development begins.
Build a Hybrid Toolkit and a Consistent Process: Combine the speed of pen-and-paper with the flexibility of digital tools to find a workflow that works for you. A structured process, from file organization to using layers, makes iteration and collaboration with engineering partners much more efficient.
Show Your Process, Not Just the Final Product: Your portfolio and client presentations become more powerful when you include your rough ideation sketches. This visual journey demonstrates strategic problem-solving and builds confidence by showing how you arrived at the best solution.
What Is a Concept Sketch?
Think of a concept sketch as the first conversation you have about a new idea, but with a pen and paper. It’s where a vague thought—like a new piece of tech for an influencer kit or a unique packaging design—starts to take physical form. Before we get into complex CAD models and engineering specs, we start here. These sketches are fast, fluid, and focused on exploring possibilities, not perfecting a final design. They are the visual foundation upon which every great product is built.
What They Are and Why They Matter
At its core, a concept sketch is a quick, rough drawing used to explore and communicate an initial idea. The goal isn't to create a polished piece of art, but to brainstorm visually. This is where we figure out the basic form, function, and feel of a product. For agencies, this is a critical step. It translates the core of a creative brief into something tangible that everyone—your team, your client, and your engineering partner—can see and react to. It’s the fastest way to get everyone on the same page and serves as the starting point for the entire product development process.
Key Elements of a Great Sketch
The most important thing to remember is that a concept sketch is all about communication, not artistic skill. A great sketch clearly conveys the core idea, even if the lines are a bit messy. The priority is on expressing the concept’s main features and overall shape. Don't worry about perfect perspective or clean lines; in fact, imperfect sketches are often more effective at this stage because they invite feedback and feel less final. A successful sketch captures the essence of the idea, making it easy for others to understand the vision and contribute to its refinement. It’s a tool for thinking, not just for drawing.
Their Role in the Design Process
Concept sketches are the engine of creative exploration. They allow us to generate a huge number of ideas quickly without getting bogged down in the technical details. Think of it as visual brainstorming—we can explore dozens of directions for a product in a single afternoon. This process of rapid iteration is essential for landing on the strongest possible design. Sketches act as a bridge, communicating design principles, aesthetic direction, and key features to the entire team. They ensure that the creative vision is aligned with the engineering possibilities from the very beginning, saving time and preventing misunderstandings down the road.
Common Types of Concept Sketches
While the term "concept sketch" is broad, it can be broken down into a few key types that are especially relevant for product development. You’ll often see sketches focused on exploring the overall form and silhouette of a product. Others might be more detailed, highlighting a specific feature, mechanism, or user interaction. For agency projects, common types include product concept art for new merchandise, packaging sketches to visualize the unboxing experience, and even environmental sketches for retail displays or experiential activations. Each type serves a specific purpose in helping to define and communicate the different facets of a physical product idea.
Your Essential Sketching Toolkit
Having the right tools can make all the difference between a frustrating session and a creative breakthrough. But let’s be clear: you don’t need the most expensive gear to create compelling concept sketches. The best toolkit is the one that feels intuitive to you and gets the job done efficiently. Whether you’re a die-hard analog artist or a digital native, the goal is to find a workflow that lets you capture ideas as quickly as they come. Many designers, including our team, use a mix of traditional and digital methods to get the best of both worlds. Let’s walk through some of the go-to tools for professional concept sketching.
Traditional Tools: Pen and Paper
There’s a certain magic to putting pen to paper. It’s immediate, tactile, and free from the distractions of notifications and software updates. Many designers still rely on simple mediums like a good sketchbook and a few favorite pens to capture that first spark of an idea—sometimes even on a napkin. The lack of an "undo" button can feel intimidating, but it often forces you to be more decisive and confident in your lines. For your physical toolkit, consider starting with a few basics: a smooth-paper sketchbook, a set of graphite pencils for light construction lines, and some fine-liner pens like the Pigma Micron for crisp, permanent linework. Adding a few gray markers can help you quickly block in shadows and add depth.
Digital Tools: Tablets and Software
Digital sketching offers incredible flexibility, making it a staple for professional design work. The ability to use layers, easily erase mistakes, and experiment with color palettes without commitment is a huge advantage. A graphics tablet, like a Wacom, or an iPad with an Apple Pencil are the standard hardware choices. When it comes to software, you have plenty of options. Apps like Procreate and Adobe Photoshop are popular for their powerful brush engines and editing capabilities. For a more vector-based approach, the Concepts app offers an infinite canvas and realistic pens and brushes, making it a flexible digital sketchbook where you can draw, plan, and design your ideas. This is perfect for creating clean, scalable drawings that can be easily shared with your team.
Combining Analog and Digital
You don’t have to choose between pen and pixel. A hybrid workflow can be incredibly powerful, blending the raw energy of a hand-drawn sketch with the precision of digital tools. A common technique is to start with a quick, loose sketch on paper, then scan or photograph it to use as a base layer for digital refinement. This preserves the initial creative spark while allowing for clean-up and color exploration in software. Another effective method is to sketch directly over simple 3D models. This approach combines the speed and accuracy of a digital underlay with the expressive, emotional quality of hand drawing. It’s a fantastic way to ensure your proportions are correct while still giving the concept a human touch.
How to Set Up Your Workspace
A little organization on your digital canvas goes a long way. Before you start drawing, take a moment to set up your file for success. The most important habit to build is using layers. Create new layers for different parts of your drawing, like linework, shading, color, and annotations. This lets you easily change or erase one part of the sketch without messing up the rest of your work. This non-destructive workflow is a lifesaver during revisions and makes collaboration much smoother. For example, you can keep your initial rough sketches on a hidden layer to show your process later. Consider creating a template file with your preferred canvas size, resolution, and a basic layer structure so you can jump straight into sketching without wasting time on setup.
Mastering the Fundamentals
Great sketches don't just appear out of thin air. While creativity is the engine, a solid grasp of the fundamentals is the framework that gives your ideas structure and clarity. Think of these skills not as rigid rules but as your secret weapons for turning a vague thought into a compelling, understandable concept. This isn't about becoming a classically trained artist; it's about becoming a more effective visual communicator. When you can confidently handle perspective, guide the viewer's eye, and add just enough detail to tell the story, your sketches become powerful tools for collaboration and persuasion.
The goal here is to build muscle memory so you can focus on the idea itself, not the mechanics of drawing it. When you internalize these core principles, you can sketch faster, explore more options, and present your work with the confidence that it clearly conveys your vision. Whether you're hashing out an idea for a new piece of tech or designing an immersive brand experience, these foundational skills ensure your creative concepts land with impact. They bridge the gap between the vision in your head and the understanding in your client's, making the entire development process smoother and more aligned.
Core Sketching Techniques
At their heart, concept sketches are about speed and exploration. They are meant to be "rough, quick drawings used by designers and artists to quickly explore and communicate initial ideas for a project." Forget about perfection. The real magic happens when you let go and focus on getting as many ideas onto the page as possible. Use loose lines, build forms from simple shapes like cubes and cylinders, and vary your line weight to add depth. The most important thing is to keep your hand moving. This initial phase is about quantity over quality, creating a visual brainstorm that you can refine later.
Nailing Perspective and Proportion
Perspective is what makes a flat drawing feel like a real, three-dimensional object. Even a basic understanding of one or two-point perspective can make your product sketches look grounded and believable. But don't get bogged down in technical perfection. Remember, the priority is on communicating the core concept, not on the artistic quality of the drawing itself. As long as the proportions feel right and the object looks solid, you’ve done your job. This foundational skill helps clients and team members visualize the product in a real-world context, making your idea much easier to grasp and get excited about.
Creating a Clear Visual Hierarchy
A great sketch guides the viewer’s eye directly to what matters most. This is visual hierarchy in action. You can achieve this by using bolder lines for the main silhouette, adding more detail to a key feature, or using a pop of color to draw attention. A well-structured sketch can "convey emotional qualities... or the story behind a design." By intentionally emphasizing certain elements, you control the narrative and ensure your audience understands the core function or most innovative feature at a single glance. It’s a subtle but powerful way to make your drawings more intuitive and impactful.
Using Notes and Annotations
Your drawing tells part of the story, but annotations tell the rest. Adding notes is one of the simplest ways to add layers of clarity to your work. As one expert suggests, you should "annotate your sketches with text and dimensions. This helps clients (who might not be designers) understand your ideas better." Use callouts to specify materials, explain a mechanism, or highlight a user interaction. These notes transform your sketch from a simple picture into a functional document that your entire team—from creatives to engineers—can use as a reference point.
Applying Color and Shading
Color and shading are the final touches that can truly bring a concept to life. You don’t need to create a photorealistic rendering; simple shading can define form and show how light interacts with the product’s surfaces. A strategic splash of color can highlight branding, indicate a material change, or emphasize an interactive element like a button. Modern digital sketching tools offer brushes that feel real and provide access to professional color systems, making it easy to add a polished, professional feel. This step helps make your idea more tangible and emotionally resonant for your audience.
Communicating Your Ideas Through Sketches
A brilliant idea is only as powerful as your ability to share it. For agencies, concept sketches are the secret weapon for turning abstract campaign thoughts into tangible, discussable visuals. They bridge the gap between your team's vision and your client's understanding, making complex product ideas feel simple and exciting. But effective communication through sketching is more than just drawing well; it’s a strategic process. It’s about planning your message, speaking a clear visual language, and presenting your ideas in a way that invites collaboration and builds consensus. When you master this, your sketches become the foundation for incredible physical products and campaigns that leave a lasting impression. This is how you move from a great concept on a whiteboard to a physical product ready for the real world.
Plan Your Approach
Before your pen ever hits the paper (or stylus hits the screen), take a moment to strategize. What is the core problem you’re trying to solve with this product? What are the one or two key features that absolutely must come across? Your first round of sketches should be quick, rough explorations designed to get ideas out of your head. Think of them as visual brainstorming. The goal isn't to create a masterpiece; it's to explore and communicate initial ideas efficiently. By defining your focus upfront, you ensure that even your quickest drawings are purposeful and move the conversation in the right direction, saving valuable time and energy.
Develop a Consistent Visual Language
When you're presenting multiple concepts, consistency is key. A uniform visual style helps your client and team members focus on the ideas themselves, rather than getting distracted by different drawing techniques. Establish a simple, repeatable language for your sketches. This could mean using a specific line weight for outlines, a consistent shading method for depth, and a clear format for annotations. This approach turns a collection of individual drawings into a cohesive presentation. It shows professionalism and makes it easier for everyone to compare concepts and understand the core design principles you're proposing for the project.
Iterate and Refine Your Work
Don’t get attached to your first idea. The real magic of sketching happens during the iterative process, where you build on, combine, and discard concepts. Embrace the messiness of this stage—the priority is on communicating the core idea, not on artistic perfection. Give yourself permission to explore a range of possibilities, even the wild ones that seem a bit out there. Sometimes the most innovative solutions come from pushing the boundaries. This process of iterative design not only leads to stronger concepts but also creates a visual record of your problem-solving journey, which is incredibly valuable when explaining your final recommendation.
Present Your Concepts with Confidence
Your sketches can’t speak for themselves. When you present your work, you’re not just showing drawings; you’re telling a story. Walk your audience through your thought process. Explain the "why" behind each concept and how it addresses the project's goals. Be prepared to talk about the user experience, potential materials, and manufacturing considerations, even at a high level. Your confidence in presenting the work, even in its early stages, helps build trust and gets clients excited about the possibilities. Frame each sketch as a potential solution, and guide the conversation toward productive feedback rather than simple likes or dislikes.
Align with Clients and Stakeholders
Ultimately, the goal of concept sketching is to create alignment. These drawings are conversation starters, designed to get everyone on the same page before you invest significant time and resources into detailed engineering. Use the feedback session to turn challenges into opportunities for collaboration. Listen carefully to what resonates with your client and what doesn't. Good sketches make it easy for stakeholders to point to specific elements and give clear, actionable feedback. This collaborative loop is what transforms a good idea into a great, manufacturable product and ensures the final outcome is something everyone is excited about.
Concept Sketching in Action
Concept sketching isn’t confined to a single industry; it’s a universal language for visual problem-solving. Seeing how different fields apply this foundational skill can give you fresh ideas for your own creative process. From physical products to digital interfaces, quick sketches are the starting point for bringing big ideas to life. Here’s a look at how professionals across various creative disciplines use concept sketches to explore, communicate, and create.
Industrial and Product Design
In product design, everything starts with a sketch. This is where we explore how a physical object will look, feel, and function. The goal is to generate a wide range of ideas quickly, without getting bogged down in the technical details. These early sketches help us figure out the product’s core aesthetic and user experience. For an agency launching a piece of branded merchandise or a custom tech gadget, this stage is critical. It’s how we translate a brand’s identity into a tangible form, ensuring the final product feels authentic and intentional. Sketches serve as a powerful communication tool, aligning the client, the agency, and the engineering team on a shared vision before moving into 3D modeling and prototyping.
Architecture
Architects use concept sketches to explore the initial ideas for buildings and spaces. But you don’t need to be designing a skyscraper to benefit from their approach. For agencies creating experiential marketing campaigns, pop-up shops, or trade show booths, architectural sketching is key to designing immersive environments. A few quick drawings can map out the flow of a space, visualize how attendees will interact with different elements, and establish the overall mood. This process helps you think through the user journey in a physical space, ensuring the final build is not only visually striking but also functional and engaging for visitors. It’s the fastest way to test spatial ideas and make sure your brand experience lands exactly as planned.
Entertainment and Media
The stunning worlds you see in films, video games, and animated shorts all begin as simple concept sketches. In entertainment, concept art is the crucial first step in visualizing characters, environments, and key story moments. For agencies developing campaigns with a strong narrative component, this is an invaluable technique. Sketching out a character for an animated ad or storyboarding a key scene helps solidify the creative direction early on. It saves a huge amount of time and money by identifying potential visual or storytelling problems long before production begins, ensuring the entire team is aligned on the look and feel from day one.
UI/UX Design
In the digital world, sketching is the foundation of user-centered design. Before a single line of code is written, UI/UX designers use rough sketches to map out wireframes, user flows, and screen layouts. This process is all about creative problem-solving—figuring out the most intuitive way for a user to accomplish a task. For an agency building a campaign microsite or a mobile app, this low-fidelity approach is perfect for iterating on ideas quickly. It allows you to test different layouts and navigation structures without investing in polished designs, ensuring the final digital experience is seamless, user-friendly, and perfectly aligned with the campaign’s objectives.
Marketing and Advertising
Right in the heart of your world, sketching is the fastest way to get a creative idea out of your head and onto paper. Whether you’re storyboarding a 30-second commercial, planning the composition of a print ad, or visualizing a series of social media posts, sketches bring your concept to life. They help you think through the visual hierarchy, pacing, and overall message of a campaign. This initial step is essential for pitching ideas to clients and getting buy-in from your internal team. A clear set of storyboards or layout sketches ensures everyone understands the vision, making the path to final execution smoother and more collaborative.
Structuring Your Professional Workflow
A great idea is only as good as the process that brings it to life. When you’re moving from a creative brief to a physical product, having a structured workflow isn’t about limiting creativity—it’s about channeling it effectively. A solid system ensures that your initial sparks of genius don’t get lost in translation between your team, your clients, and your engineering partners. It keeps projects on track, makes collaboration smoother, and helps you deliver consistently high-quality work, even on the tightest deadlines. By building a reliable process around your sketching, you create a clear path from concept to reality, making sure every great idea has a chance to become a tangible, successful product.
Organize Your Files and Ideas
Before you even put pen to paper (or stylus to screen), think about where your ideas will live. A messy desktop is a recipe for lost concepts and wasted time. Create a logical folder structure for each project, separating initial sketches, refined concepts, and final presentations. Use a consistent naming convention that includes the project name, date, and version number. This simple habit makes it easy to find exactly what you need when you need it. Remember, concept sketches are about generating a large volume of ideas quickly. A good organizational system ensures you can easily revisit, compare, and build upon those initial thoughts without getting bogged down.
Document Your Process
Your sketches do more than just show what an idea looks like; they tell the story of how you got there. Get into the habit of documenting your thought process alongside your drawings. Add notes, callouts, and annotations to explain your choices, highlight key features, or ask questions. This documentation is invaluable for both you and your collaborators. It provides context that a simple image can’t convey, making handoffs to engineers or presentations to clients much clearer. The priority is on communicating the core concept, not on creating a perfect piece of art. A well-annotated sketch is often more useful than a beautifully rendered but unexplained image.
Collaborate with Your Team
Sketches are a universal language, making them one of the most effective tools for team collaboration. They break down complex ideas into visuals that everyone can understand, from account managers to mechanical engineers. Use your sketches as a focal point in meetings to gather feedback and align on a direction. They are a powerful tool for communicating design principles, aesthetic goals, and technical requirements to everyone involved. When an agency and an engineering firm like ours team up, clear concept sketches act as the bridge between creative vision and technical execution, ensuring everyone is working toward the same goal from day one.
Manage Your Time Effectively
Creativity doesn’t always follow a schedule, but project timelines are a reality. To stay productive, try time-boxing your sketching sessions. For example, give yourself a set amount of time, like two hours, to generate as many rough thumbnail sketches as possible. This pressure encourages you to focus on quantity over quality initially, preventing you from getting stuck on a single idea too early. Once the time is up, you can step back, evaluate the concepts you’ve generated, and choose the most promising ones to refine further. This approach respects both the creative process and the project clock, helping you produce a wide range of ideas efficiently.
Ensure Quality in Every Sketch
It’s easy to fall into the trap of wanting every sketch to be a masterpiece, but that’s not the goal in the early stages. The most important measure of quality in a concept sketch is its ability to communicate an idea clearly. Don’t be afraid to make mistakes or leave things a bit messy. The aim is to explore possibilities and generate options, not to create a portfolio-ready piece with every drawing. A "quality" sketch is one that effectively captures a thought, solves a problem, or sparks a conversation. By embracing imperfection, you give yourself the freedom to innovate and find the best possible solution for the project.
Taking Your Skills to the Next Level
Once you’ve got the fundamentals down, the real growth begins. Moving from a good sketcher to a great one is all about intentional, consistent effort. It’s not about waiting for inspiration to strike; it’s about building a professional practice that supports your creative work day in and day out. This means dedicating time to specific exercises, strategically planning your development, and curating a portfolio that truly showcases your problem-solving abilities.
Think of your skills as a toolkit. The more tools you have—and the sharper you keep them—the more prepared you’ll be for any creative challenge that comes your way. Whether you’re sketching a high-tech device for a product launch or developing packaging for an immersive campaign, your ability to quickly and clearly visualize ideas is your greatest asset. The following steps are designed to help you refine that asset, build your confidence, and establish a workflow that allows you to produce your best work, every time. It’s about creating a system for improvement that keeps you moving forward in your career.
Effective Practice Exercises
The best way to get better at sketching is, unsurprisingly, to sketch a lot. But mindless doodling will only get you so far. The key is to practice with purpose. Start with exercises that prioritize speed and idea generation. For example, try giving yourself five minutes to sketch 20 different variations of a simple object, like a chair or a water bottle. This forces you to think fast and avoid getting hung up on perfection. Concept sketches are a way to generate a large number of ideas quickly without getting bogged down in details. This kind of rapid ideation builds creative muscle and helps you push past the most obvious solutions to find something truly innovative.
Map Out Your Skill Development
To improve efficiently, you need a plan. Take an honest look at your work and identify one or two areas that need the most attention. Is it perspective? Shading? Line weight? Whatever it is, focus your practice there. Remember, the priority is on communicating the core concept, not on the artistic quality of the drawing itself. If your perspective is wonky, your brilliant idea might get lost in translation. Dedicate a small amount of time each day to deliberate practice focused on that single skill. By isolating your weaknesses and addressing them one by one, you’ll see significant, measurable improvement in the clarity and impact of your sketches.
Build a Stronger Portfolio
Your portfolio should do more than just show off your best drawings; it should tell the story of how you think. Clients and creative directors want to see your process. Including a few pages of ideation sketches for a project is a powerful way to do this. Concept sketches help show this journey from a rough idea to a refined solution. Don’t just present the final, polished render. Show the messy thumbnail sketches, the rejected ideas, and the annotated drawings that led you there. This demonstrates your ability to iterate, solve problems, and think strategically—qualities that are far more valuable than just being able to draw well.
Create a Go-To Resource Library
No designer works in a vacuum. The most efficient creatives build a personal library of inspiration, tools, and references they can pull from at a moment’s notice. This can be a digital folder, a Pinterest board, or a physical scrapbook—whatever works for you. Fill it with images you love, tutorials on new techniques, and examples of great design. It’s also smart to have a core set of digital tools ready to go. Apps like Concepts and Morpholio are popular for their flexibility, allowing for easy importing, tracing, and the use of helpful stencils. Having these resources organized and accessible saves you time and helps you get past creative blocks faster.
Keep Up with New Tools and Tech
The tools available to designers are constantly evolving, and staying current is essential for keeping your work fresh and your workflow efficient. This doesn’t mean you have to jump on every new piece of software, but it’s important to be aware of what’s out there. Set aside a little time to explore new apps, watch tutorials on updated features in the programs you already use, or read industry publications like Core77. Embracing new technology can open up different ways of thinking and creating. A powerful and flexible app might be the key to streamlining your process or adding a new dimension to your sketches.
Related Articles
Product Design Sketch 101: A Complete Guide — Jackson Hedden
Concept Design and Development: A 7-Step Guide — Jackson Hedden
Full-Service Product Design: Complete Process & Tips | Jackson Hedden Inc
Frequently Asked Questions
Do I need to be a great artist to create effective concept sketches? Absolutely not. The goal of a concept sketch is to communicate an idea clearly, not to create a masterpiece for a gallery. Think of it as a visual thinking tool. As long as your drawing can get your core idea across to a teammate or a client, it has done its job perfectly. Confidence in your lines will come with practice, but the focus should always be on clear communication over artistic perfection.
Should I start with digital tools or traditional pen and paper? The best tool is the one that lets you get your ideas down the fastest. There’s no right or wrong answer here. Pen and paper offer a direct, tactile experience that many creatives find freeing. Digital tools provide flexibility with layers and easy erasing. Many professionals, including our team, use a hybrid approach—starting with a quick paper sketch and then refining it digitally. My advice is to start with whatever feels most comfortable and intuitive for you.
How do I present rough sketches to a client without them looking unprofessional? It all comes down to how you frame the conversation. Never just send the sketches over without context. When you present, you’re telling the story of your problem-solving process. Explain that these are initial explorations designed to align on a creative direction before investing more time. Grouping your sketches into a clean presentation and adding notes to explain features or materials also adds a layer of professionalism and shows the strategic thinking behind the drawings.
How many different concepts should I create in the initial sketching phase? Instead of aiming for a specific number, focus on the goal: to explore as many different directions as possible. In the beginning, quantity is more important than quality. Pushing yourself to generate a high volume of ideas helps you move past the most obvious solutions and uncover more innovative ones. Try setting a timer for 30 minutes and see how many distinct thumbnails you can create. You can always pick the strongest few to refine later.
What makes a sketch 'ready' to share with an engineering partner? A sketch is ready for an engineering partner when it clearly communicates the product's core concept, primary features, and overall form. It doesn’t need to be a perfect technical drawing. What’s most helpful are clear views of the product from a few key angles and annotations that call out specific functions, materials, or user interactions. The sketch should serve as a strong starting point for a detailed conversation about making your vision a reality.