Product Design Sketching: An Agency's Guide
Your agency just landed a huge client, and the big idea involves a custom piece of tech for an influencer kit. The concept is brilliant, but how do you turn that idea into something real? This is where the gap often appears between creative vision and physical reality. The crucial first step is the product design sketch. It’s more than just a drawing; it’s the bridge that connects your campaign concept to the engineering and manufacturing process. A clear sketch translates your vision into a tangible blueprint, ensuring that partners like us can build exactly what you imagined, without costly guesswork or misinterpretation down the line.
Key Takeaways
Use sketching as a strategic alignment tool: Your goal isn't to create a masterpiece, but to quickly get your team, clients, and engineering partners on the same page. A clear sketch serves as a visual brief, preventing misunderstandings and accelerating the development process.
A few core techniques add professional polish: Mastering the basics of perspective, line weight, and shading is what separates a simple doodle from a convincing product concept. These skills help communicate form and function, making your vision look more tangible and well-considered.
Think about manufacturing from the very first line: Ground your creative ideas in reality by considering how a product might be assembled or what materials it could use. This foresight streamlines the handoff to engineering and ensures your concept is viable from the start.
What is Product Design Sketching?
At its core, product design sketching is about turning an idea in your head into something you can see and share. Think of it like that brilliant concept you draw on a napkin—it’s the fastest way to make an abstract thought tangible. For creative agencies, sketching is the critical bridge between a campaign concept and a physical product, whether it's a piece of custom merchandise, an influencer kit, or an interactive installation. It’s a visual language that everyone on the team—from the creative director to the client—can understand instantly.
Product sketches aren’t just pretty pictures; they are thinking tools. They help you explore different forms, figure out how parts might fit together, and communicate your vision with clarity. Before you ever touch complex 3D software or spend a dime on prototyping, sketching allows you to ask the important questions. Does this shape feel right for the brand? How will a user interact with this? Is the concept even feasible? It’s a low-risk, high-reward activity that lays the groundwork for all the detailed engineering and design work to come.
Why Sketching Is the First Step to a Real Product
Sketches are the foundation of the entire product development process because they are fast, cheap, and incredibly flexible. In an agency environment where timelines are tight and ideas evolve quickly, you can’t afford to get bogged down. Sketching lets you generate dozens of concepts in a single afternoon, exploring different angles, features, and styles without any real commitment.
This rapid exploration is essential for innovation. It’s how you find the strongest direction and get early buy-in from stakeholders. A clear sketch can align your team and your client, preventing misunderstandings that could lead to costly revisions later. It’s a basic tool that helps you solve problems on paper, making the transition to 3D modeling and prototyping smoother and more efficient.
Digital vs. Traditional Sketching
You have two main toolkits for sketching: traditional and digital. Traditional sketching with pen and paper is immediate and tactile, perfect for quick brainstorming sessions and getting raw ideas down without distraction. There’s a certain freedom that comes from working away from a screen.
Digital sketching, using tools like Procreate on an iPad or a Wacom tablet with Photoshop, offers incredible flexibility. You can easily undo mistakes, work in layers, and experiment with color and texture. Digital sketches can also be refined into highly realistic renderings that are polished enough for client presentations or even marketing materials before the physical product exists. Most designers use a hybrid approach, starting with loose paper sketches and then moving to digital to refine and finalize the concept.
You Don't Have to Be an Artist to Sketch
Let’s clear up a common misconception: you do not need to be a fine artist to create effective product sketches. The goal here is communication, not a masterpiece for a gallery. Your objective is to convey an idea clearly, not to render it with perfect photorealism.
That said, a little technique goes a long way. Learning the basics of perspective, proportion, and line weight can make a huge difference in how professional and convincing your sketches look. These are learnable skills, not innate talents. A simple drawing that accurately communicates form and function is far more valuable than a beautiful one that is confusing or misleading. Focus on clarity, and your sketches will do their job perfectly.
Key Sketching Techniques to Learn
Once you have your tools, it’s time to build your skills. You don’t need to be a master artist, but learning a few core techniques will make your sketches clearer, more professional, and much more effective at communicating your vision. Think of these as the fundamental building blocks of product sketching. Mastering them will help you translate the ideas in your head onto the page quickly and accurately, ensuring your engineering partners know exactly what you’re aiming for.
These techniques are all about creating the illusion of form, depth, and realism on a flat surface. They help answer critical questions before a single CAD model is built: What does this product look like from the side? How does this button feel? Is this surface glossy or matte? Getting these details right on paper saves an incredible amount of time and money down the line. With a little practice, they’ll become second nature, turning your sketches from simple doodles into powerful design tools that bridge the gap between creative concept and physical reality.
Start with Basic Shapes and Forms
Every complex product is just a combination of simple shapes. Before you try to sketch a high-tech wearable or a sleek piece of merchandise, get comfortable with the basics. Practice drawing straight lines, circles, ellipses, and cubes. A great way to build muscle memory is to use these as warm-up exercises every time you sit down to draw.
Once you feel confident with 2D shapes, move on to 3D forms like cylinders, spheres, and pyramids. Learning to see the world in these simple geometric components will make it much easier to construct more intricate objects in your sketches.
Get the Hang of Perspective
Perspective is what makes a 2D drawing look 3D. It gives your sketch a sense of place and makes the object feel tangible. For product design, you don’t need to be an architectural drafter, but understanding one- and two-point perspective is key. A pro tip is to use a slight three-point perspective, which means the object’s lines appear to recede toward three different vanishing points.
This technique prevents your sketch from looking flat or distorted. It adds a subtle energy that makes your product look more dynamic and real, as if you could reach out and grab it. It’s a simple shift that can dramatically improve how professional your sketches look.
Use Line Weight to Add Clarity
Not all lines are created equal. Varying the thickness—or weight—of your lines is a powerful tool for guiding the viewer’s eye and creating visual hierarchy. Use thicker, bolder lines for the main outline or silhouette of your product. This makes the overall form pop off the page.
Use medium-weight lines for major details and internal edges that define different parts of the product. Finally, use thin, light lines for fine details, textures, or construction lines. This intelligent use of line weight adds depth and makes your sketch instantly easier to read, ensuring the most important features of your design stand out.
How to Create Depth and Dimension
To make your product feel solid and believable, you need to show that it has volume. One of the best ways to do this is to "draw through" the object. Imagine it’s made of glass and lightly sketch the edges and forms you can’t see from your current viewpoint. This simple exercise forces you to think about the product’s complete three-dimensional structure.
This technique ensures your proportions are correct and that all the parts connect logically. It proves you understand how the product is constructed, which makes the visible parts of your sketch much more convincing and grounded in reality.
Sketching Different Materials and Textures
A product isn’t just about its shape; it’s also about what it’s made of. Your sketch should communicate whether a surface is hard and glossy, soft and matte, or rough and textured. You can achieve this with simple shading techniques. Use clean, parallel lines (hatching) or intersecting lines (cross-hatching) to add shadows and create the illusion of form.
Practice rendering different materials. For example, sharp, high-contrast reflections can suggest polished metal or plastic, while soft, diffused shading can represent a rubber or fabric surface. This adds a layer of realism that helps stakeholders visualize the final product’s look and feel.
The Right Tools for Product Sketching
Getting your ideas on paper doesn’t require a high-tech studio. The best tools are often the ones that let you capture a concept quickly and without friction. Whether you prefer the feel of pen on paper or the flexibility of a digital canvas, the goal is the same: to make your vision tangible. A great sketch clearly communicates form, function, and intent, making it the perfect starting point for a conversation with an engineering partner. Let's walk through how to build a simple, effective toolkit that works for you.
Your Traditional Sketching Toolkit
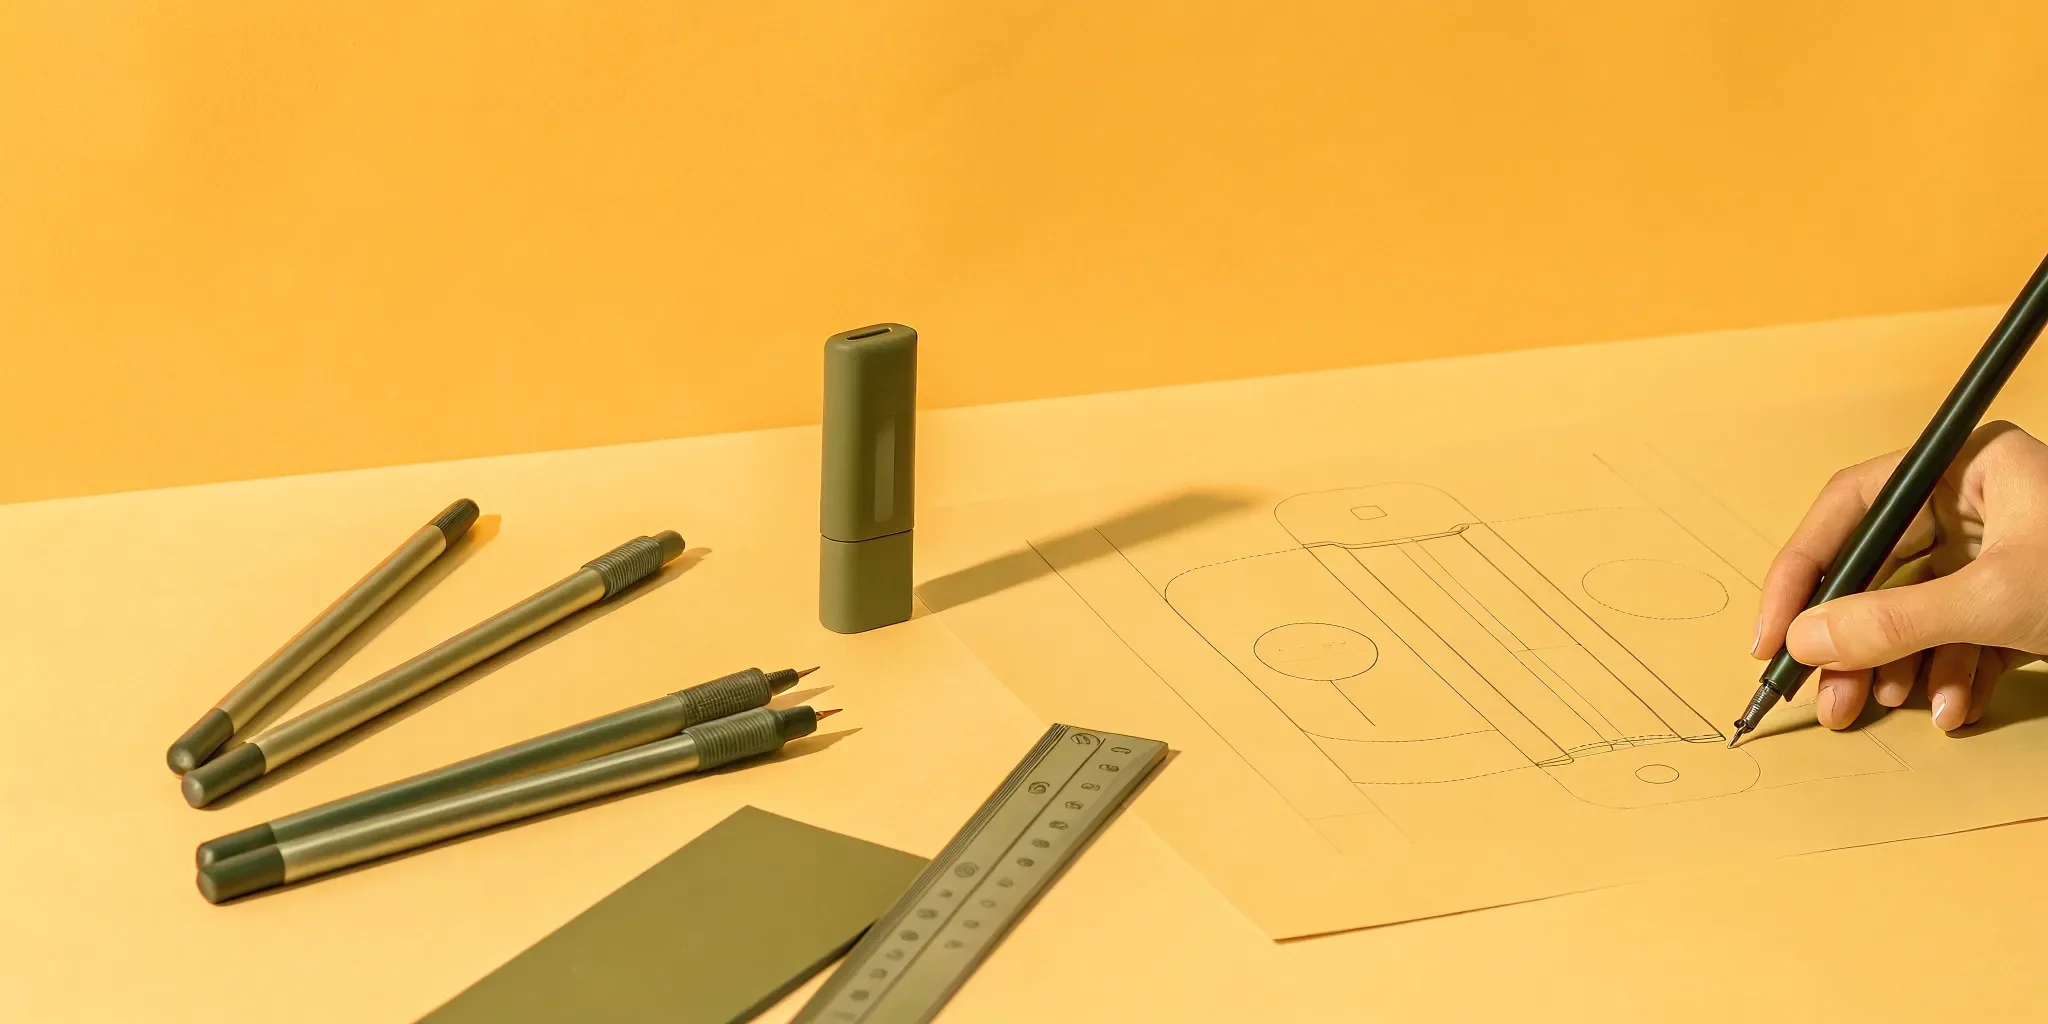
You don’t need to spend a lot of money to build a great analog sketching kit. In fact, you probably already have everything you need. The goal of a product design sketch is to quickly translate an idea from your head to the page, so simple tools are often the most effective. Start with a basic ballpoint pen and some cheap copy paper. Drawing with a pen forces you to be decisive and builds confidence, since you can’t erase your mistakes. As you get more comfortable, you can add a few fineliner pens in different sizes to practice line weight and a couple of light gray markers to add shading and depth.
Top Digital Sketching Platforms
If you prefer working on a screen, a simple digital setup can make iterating and sharing your ideas incredibly easy. An iPad with an Apple Pencil and the Procreate app is a popular and intuitive combination for freeform sketching. For a desktop setup, a Wacom tablet paired with software like Autodesk Sketchbook or Adobe Photoshop gives you a powerful canvas. When your concepts need to be cleaner and more structured, a vector-based program like Sketch is an excellent choice. It’s designed to help you create polished designs and working prototypes that are easy to hand off to collaborators or development partners.
How to Set Up Your Workspace
Your environment can have a huge impact on your creative flow. You don’t need a dedicated studio, just a clean, comfortable space where you can focus. Find a spot with good, consistent lighting to avoid casting shadows on your page. Keep your tools organized and within reach so you don’t have to interrupt your drawing to find a specific pen. For practice, grab a ream of the cheapest 11x17 inch paper you can find. Using inexpensive materials removes the pressure to be perfect and encourages you to fill pages with ideas, which is exactly what you want when you’re just starting out.
Where to Learn and Practice
Sketching is a skill, and like any skill, it improves with consistent practice. Try to set aside a little time each day to draw. One of the best pieces of advice is to practice for at least an hour a day using only a pen. This forces you to commit to your lines and learn from your errors instead of erasing them. Start by sketching everyday objects around you—your coffee mug, your headphones, a stapler. Pay attention to their shapes, proportions, and how light hits them. There are countless free tutorials on YouTube for industrial design sketching, and you can find plenty of inspiration and tips to improve your sketching with a quick search.
Types of Product Design Sketches
Not all sketches are created equal. Depending on where you are in the product development process, your sketches will serve different purposes, moving from broad, abstract ideas to detailed, specific blueprints. For agencies, understanding these stages is key to collaborating effectively with a design and engineering partner and managing client expectations. Think of it as a funnel: you start with a ton of ideas and gradually refine them into a single, manufacturable product. Each type of sketch is a tool to help you move smoothly to the next phase, ensuring the creative vision stays intact while the technical requirements are met. Let's walk through the four main types of sketches you'll encounter.
Exploratory Sketches: Getting Ideas Down Fast
This is the "no bad ideas" phase of sketching. Exploratory sketches are quick, rough, and all about quantity over quality. Think of them as visual brainstorming—the goal is to get every concept out of your head and onto paper as fast as possible. This is your chance to play with different shapes, forms, and layouts without worrying about perfection. For an agency, this is the perfect starting point for a new project. You can quickly visualize dozens of ideas for a piece of branded merchandise or an influencer kit, giving your team a ton of creative material to react to and build upon. Don't overthink it; just grab a pen and let the ideas flow.
Concept Sketches: Refining Your Vision
Once you’ve identified the most promising ideas from your exploratory sketches, it’s time to develop them into concept sketches. These are more refined drawings that communicate a specific vision. Here, you’ll start to think about how different parts might work together and what the core features of the product will be. While still flexible, these sketches are clearer and more detailed, helping everyone on the team—and the client—understand the proposed direction. This is where you can explore different design languages and start to solidify the product's look and feel. For an agency, this is the stage where a cool idea starts to feel like a real, tangible product.
Technical Sketches: Preparing for Engineering
This is where creative vision meets manufacturing reality. Technical sketches are all about precision and detail, serving as the bridge between your design concept and the engineering team. These drawings often include dimensions, material callouts, and different views (like top, side, and front) to explain exactly how the product should be built. Increasingly, this stage involves digital tools to create precise 2D drawings or even initial 3D CAD models. As an agency, you won’t be expected to create these yourself, but understanding their purpose is crucial for a smooth handoff to a product development partner like us. These sketches ensure your idea is buildable, functional, and ready for prototyping.
Presentation Sketches: Selling the Idea
Presentation sketches are the polished, client-facing visuals that sell the final concept. These are often high-fidelity digital renderings that look incredibly realistic, showing the product in its best light with ideal colors, materials, and lighting. They’re designed to get that all-important sign-off from stakeholders. Modern product rendering is so advanced that these images can often be used for marketing materials or pitch decks long before a physical prototype even exists. For an agency, this is a powerful tool. It allows you to present a product concept with confidence and excitement, helping your client see the finished product just as you imagined it.
How to Build a Sketching Workflow
A solid workflow turns sketching from a simple drawing exercise into a strategic design process. It’s about creating a repeatable system that helps you move from a vague idea to a concrete, manufacturable concept with speed and clarity. For agencies juggling multiple projects and tight deadlines, having a structured approach is non-negotiable. It ensures your creative energy is channeled effectively, leading to better ideas that are ready for the next stage of development. A great workflow doesn't stifle creativity; it gives it a framework to thrive in. It helps you answer the big questions early, test assumptions without spending a dime on prototypes, and communicate your vision clearly to clients and collaborators. This system isn't about rigid rules, but about smart habits that make your design process more intentional. It's how you ensure that every line you draw serves a purpose, pushing the concept forward. By establishing a clear path from observation to iteration to manufacturing-aware design, you build confidence in your ideas and create a smoother handoff to engineering partners like us. The following steps will help you build a workflow that is both efficient and creatively powerful, bridging the gap between that initial spark and a product ready for engineering.
Build Your Visual Library
You can only draw what you understand. That’s why every great designer cultivates a "visual library"—a mental database of how things look, feel, and function. Start actively observing the products around you. Notice the parting lines on a remote control, the texture of a speaker grille, or the way a hinge mechanism works. Take photos of interesting details and build a mood board for inspiration. The more you deconstruct objects in your mind, the more solutions you’ll have to pull from when you’re facing a blank page. For an agency, a well-stocked visual library allows your team to generate relevant and innovative ideas quickly during a fast-paced client brainstorm.
Create Templates to Work Faster
Efficiency is key, and you don’t need to start from scratch every time. Creating templates for common product views—like isometric or orthographic projections—can save you a massive amount of time. These act as underlays, giving you a consistent framework so you can focus on the idea itself rather than the setup. In digital sketching apps, you can create libraries of common components like buttons, screens, or logos that can be dropped into any design. This approach is perfect for agency work, where you might be developing multiple concepts for a line of branded merchandise or iterating on packaging for an influencer kit. It keeps your sketches consistent and lets you work much faster.
How to Iterate on Your Designs
Sketching’s real power lies in its ability to facilitate rapid iteration. The goal isn’t to create one perfect drawing, but to explore dozens of possibilities quickly and cheaply. Use techniques like crazy eights, where you sketch eight different ideas in eight minutes, to force yourself past the obvious solutions. Don’t get attached to your first concept. Instead, ask "what if?" What if this was triangular? What if it had no buttons? This process of iteration allows you to explore a wide range of forms and functions, ensuring you land on the strongest possible design. For agencies, presenting a few key iterative sketches shows clients the creative journey and reinforces the value of your design thinking.
Sketching with Manufacturing in Mind
Even in the earliest stages, the best sketches contain a seed of realism. Thinking about how a product will actually be built will save you and your client headaches down the road. You don’t need to be an engineer, but considering basic principles of Design for Manufacturing (DFM) is critical. Think about where the parts might join, what materials could be used, and whether a shape is too complex to mold. This foresight is what separates a pretty picture from a viable product concept. It ensures your creative vision is grounded in reality and ready for the transition to detailed 3D CAD models and engineering.
Common Sketching Mistakes (and How to Fix Them)
Every designer makes mistakes, especially in the early stages of sketching. The goal isn’t to create a flawless masterpiece on the first try, but to communicate an idea clearly. Think of your early sketches as a conversation starter. Still, a few common slip-ups can make your concepts harder to understand. The good news is that they’re usually easy to fix with a little practice and awareness. By tidying up your technique, you can ensure your vision is ready to be handed off to an engineering partner who can bring it to life.
Fixing Perspective and Proportion
One of the quickest ways a sketch can look "off" is when the perspective or proportions are skewed. An object might look tilted, distorted, or just not quite right in 3D space. You don't need to be a master of architectural drawing to fix this. Simply step back and check your perspective to see if the angles and lines feel natural. For more complex objects, lightly drawing in vanishing points can be a huge help. Similarly, make sure the different parts of your product are the right size relative to each other. A button that’s too large or a handle that’s too small can throw off the entire design and make it feel unrealistic.
Improving Your Line Quality
Not all lines are created equal. A sketch with lines that are all the same thickness can appear flat and lifeless. This is where line weight comes in. By varying the thickness of your lines, you can guide the viewer's eye and create a sense of depth and importance. Use thicker, bolder lines for the main outline of your product to make it pop. You can also thicken the lines where the object meets a surface, which helps ground it and gives it a subtle shadow effect. Thinner lines are perfect for interior details, textures, or construction lines. This simple technique adds a professional touch and makes your sketch much easier to read.
Avoiding Technical Oversights
While early sketches are for exploring ideas, it’s helpful to keep manufacturability in the back of your mind. A common mistake is drawing a feature that looks great on paper but would be impossible or incredibly expensive to produce. You don’t need to be an engineer, but try to think logically about how parts might connect or move. Get into the habit of looking at your own drawings with a critical eye. Does that hinge have room to pivot? Is that material thick enough to be durable? Catching these small oversights early saves time and helps streamline the transition from a creative concept to an engineered product.
Ensuring Your Sketches Communicate Clearly
Ultimately, the purpose of a product design sketch is communication. If your team or your development partner can't understand your idea, the sketch hasn't done its job. A messy, unclear drawing can lead to misinterpretation and slow down the entire project. Remember that your product design sketches are a visual brief, allowing you to explore options far more quickly than a written document ever could. Add notes, callouts, and arrows to explain features, materials, or interactions. The clearer your sketch, the faster your idea can move from the page into prototyping and production.
Take Your Sketching to the Next Level
Once you’ve mastered the basics, you can start using your sketches as a strategic tool to communicate complex ideas, streamline teamwork, and sell your vision. It’s not just about making pretty drawings; it’s about using sketching to solve problems and bring ambitious concepts to life. Moving beyond simple forms and into more refined visual communication will make your ideas more compelling and your entire creative process more efficient. These next steps are about turning your sketching skill into a professional advantage that helps your agency deliver incredible physical products.
Develop a Consistent Design Language
Think of a design language as the visual DNA of your product. It’s the consistent set of shapes, curves, materials, and details that make a product feel cohesive and intentional. When you’re developing a branded product or a line of merchandise, this consistency is everything. Use your sketches to establish this language early on. Sketches are a basic tool for exploring ideas and explaining your vision clearly. By defining rules for corner radii, button styles, or surface transitions in your sketches, you ensure every piece feels like it belongs to the same family. This creates a unified brand experience for your client and makes the engineering handoff much smoother.
Sketching for the User Experience
A great product isn’t just about how it looks—it’s about how it feels and functions in someone’s hands. Use your sketches to think through the entire user experience. How will someone hold the device? Where will their fingers naturally rest? What’s the first thing they see when they open the package? Sketching allows you to quickly explore different design options and user flows without committing to a physical prototype. You can map out every interaction, from unboxing to daily use, ensuring the final product is intuitive and enjoyable. This user-centered approach shows clients you’re thinking beyond aesthetics and focusing on creating a meaningful connection with their audience.
Using Sketches for Better Team Collaboration
In an agency setting, clear communication is critical. Sketches are a universal language that everyone—from creative directors to account managers and clients—can understand instantly. Instead of relying on dense creative briefs or long email chains, you can use a sketch to get everyone on the same page. Digital tools have made this even easier, allowing you to share designs and prototypes where stakeholders can pin comments directly on the image. This creates a direct feedback loop, reduces misunderstandings, and helps you get to a client-approved design faster. When you bring in an engineering partner like us, these sketches become the foundation for turning your creative vision into a manufacturable reality.
Build a Strong Sketching Portfolio
Your sketches are proof of your creative process. A strong portfolio shouldn’t just show polished final renderings; it should tell the story of how you solved a problem. Include your early, exploratory sketches alongside your more refined concepts. This demonstrates your ability to iterate and think strategically. Remember, realism is a key part of making your sketches convincing. Paying attention to small details and subtle drawing techniques can make a big difference in how professional your work looks. For an agency, a portfolio that showcases a thoughtful sketching process is a powerful asset for pitching new clients and winning ambitious product-focused projects.
Related Articles
Concept Design and Development: A 7-Step Guide — Jackson Hedden
Get a Prototype Made Fast: The Ultimate Guide — Jackson Hedden
Consumer Product Design: The Ultimate 2025 Guide — Jackson Hedden
How to Get a Product Prototype: A Simple Guide — Jackson Hedden
Why Industrial Design Is the Secret Weapon of Top Consumer Brands — Jackson Hedden
Frequently Asked Questions
How good do our sketches really need to be? We're not industrial designers. Your sketches need to be clear, not perfect. The goal is to communicate an idea, not to create a piece of art. A simple drawing with notes and arrows that clearly explains the product's function and form is far more valuable than a beautiful rendering that's confusing. Think of it as a visual brief—as long as it gets the core concept across to your team and your engineering partner, it has done its job perfectly.
At what point should we hand our sketches over to an engineering partner? The ideal time to bring in a partner is after you’ve explored a few directions and have a concept sketch that feels strong. You don't need a final, polished drawing. In fact, it's better to engage an engineering team when the idea is still a little flexible. This allows them to provide feedback on manufacturing feasibility and material choices early on, which can save a lot of time and prevent headaches later in the process.
Should my agency invest in digital sketching tools, or is pen and paper enough? You can absolutely get the job done with just a pen and paper, especially for initial brainstorming and rapid idea generation. There's a speed and freedom to traditional sketching that is hard to beat. However, digital tools are fantastic for creating refined, presentation-ready sketches for clients and for making quick edits based on feedback. Many teams use both—starting on paper to get the raw ideas out and then moving to a digital platform to clean them up.
How can we use sketches to get clients on board with a product idea? Sketches are a powerful tool for telling a story. Instead of just showing the final, polished concept, walk your client through a few of the key exploratory sketches. This shows them the creative journey and the strategic thinking that led to the recommended design. When clients see the different avenues you explored, they gain confidence in the final solution and feel more involved in the process, which makes getting that final sign-off much easier.
Is it possible to spend too much time sketching an idea? Yes, definitely. Sketching is meant to be a fast and fluid part of the process. If you find yourself spending hours perfecting a single drawing or getting stuck on tiny details, it might be a sign to move on. The purpose of sketching is to explore a wide range of possibilities quickly. Once you have a concept that clearly communicates the vision and solves the core problem, it’s time to transition to the next phase of development.