Functional Prototype Development: A Step-by-Step Guide
You’ve created a stunning influencer kit concept, complete with interactive packaging and a unique branded gadget. The idea is a winner, but how do you get the client to sign off on a five-figure production budget based on a drawing? You put a working model in their hands. A functional prototype makes your idea undeniable. It’s the most powerful tool for getting stakeholder approval because it replaces speculation with experience. This is the power of functional prototype development: turning an abstract concept into a physical product that decision-makers can see, touch, and test for themselves.
Key Takeaways
Test Your Big Idea Before Committing Big Dollars: A functional prototype is your insurance policy. It lets you prove the concept works, get client buy-in with a tangible product, and fix any issues before you spend a dime on expensive manufacturing tools.
Prototyping Is a Cycle, Not a Single Step: The best products come from a loop of building, testing, and refining. Start with clear goals, get a working model into people's hands, and use their feedback to make smart improvements before finalizing the design.
Your Final Prototype Is the Factory's Playbook: A finished prototype isn't the end—it's the official starting point for production. It provides the proven design and technical details needed to create precise manufacturing instructions, ensuring every unit is made exactly as you and your client approved.
What Is a Functional Prototype?
Think of a functional prototype as the first real, working version of your product idea. It’s not just a static model that looks the part; it’s a tangible object that behaves like the final product. A functional prototype is designed to help you and your engineering partners find problems early, which saves a ton of time and money down the line. For creative agencies, this is your secret weapon for turning an ambitious campaign concept into a physical reality.
Before you commit to a full production run of that custom-branded smart device or interactive influencer package, a functional prototype lets you test everything from the electronics to the user experience. It’s the bridge between a great idea on a slide deck and a reliable product you can confidently present to a client. This step is all about proving the concept works as intended, ironing out the kinks, and making sure the final product will be a success. It’s where our engineering and design teams bring your vision to life, ensuring every button, light, and mechanism performs flawlessly before it ever reaches an audience.
What Makes a Prototype "Functional"?
A prototype becomes "functional" the moment it lets a user do something. It’s all about interaction and experience. While a simple 3D-printed model shows you what a product looks like, a functional prototype shows you how it works. Imagine you’re developing a unique piece of merchandise for a client, like a self-heating coffee mug. A non-functional prototype might just be a correctly shaped and weighted mug. But a functional prototype would actually heat the coffee. You could press the button, see the indicator light turn on, and feel the temperature change. This allows you to test the core user experience and validate that the product delivers on its promise before you invest in manufacturing thousands of them.
A Quick Guide to Prototype Types
Prototypes generally fall into three categories, each with a different level of detail, or "fidelity." A low-fidelity prototype might be a simple foam model or a cardboard mock-up, used early on to test basic shape and ergonomics. Medium-fidelity prototypes are a step up—think a detailed 3D print that looks like the final product but doesn't have working electronics. Finally, a high-fidelity prototype is what we’re focused on here: a functional model that looks, feels, and works just like the finished product. Each type has its place, but the functional, high-fidelity prototype is the one that truly proves your design is ready for the real world. It’s the final dress rehearsal before opening night.
Why You Need a Functional Prototype
Jumping from a digital design straight to mass production is a huge gamble. A functional prototype is your insurance policy against costly mistakes and delays. It’s a critical step for making sure the path to manufacturing is as smooth as possible. For your agency, this means you can get tangible client feedback, confirm all the technical elements are working together correctly, and catch potential issues—like a battery that drains too fast or a button that’s hard to press—long before they become expensive factory-floor problems. Building a functional prototype de-risks the entire project, giving you and your client the confidence that the final product will be a hit. It’s about being thorough, professional, and setting your campaign up for success.
Your Step-by-Step Guide to Developing a Functional Prototype
Building a functional prototype can feel like a huge undertaking, but it’s really just a series of focused, manageable steps. Think of it as bringing a big idea to life, one piece at a time. The key is to follow a structured process that moves you from a rough concept to a tangible product you can hold, test, and show off to your client. This guide breaks down the five essential stages of development. By following these steps, you can ensure your project stays on track, on budget, and true to your creative vision.
Step 1: Define Your Goals and Requirements
Before you sketch a single line or order any parts, you need to get crystal clear on what you’re building and why. Start by writing down your goals and what the product absolutely needs to do. These are your user requirements, and it’s important to be specific. For an agency, this means defining both the user experience and the brand objectives. What should someone feel when they unbox this product? What action should it inspire? What core function must it perform flawlessly to make the campaign a success? Answering these questions upfront creates a roadmap that will guide every decision you make down the line.
Step 2: Design the Product and Select Components
With your goals defined, it’s time to move into the design phase. This is where you translate your ideas into a concrete plan. Before you start building, you need a solid "paper design" that acts as a blueprint for your prototype. This usually involves creating 3D CAD (computer-aided design) models to define the product's form, structure, and appearance. At this stage, you’ll also select the materials and internal components, like electronics or mechanical parts. For creative agencies, this is a critical step for ensuring the final product not only works perfectly but also aligns with the client’s brand aesthetic and campaign message.
Step 3: Assemble and Integrate Your Parts
This is where your digital blueprint becomes a physical reality. You’ll start assembling the components you selected, bringing the structure, electronics, and mechanisms together. The goal is to create a prototype that can interact with its environment in a meaningful way. If you’re building an interactive display, this is when you connect the sensors and screens. If it’s a piece of smart merchandise, you’ll integrate the circuit boards and power source. This step is all about careful, precise execution to ensure every part fits and functions as intended. It’s the first moment you get to see if your design truly works in the real world.
Step 4: Test, Validate, and Refine
Once your prototype is assembled, the real test begins. It’s not enough for it to just turn on; you need to verify that it works correctly, reliably, and can withstand real-world use. This means putting it through its paces across its full range of operations. Does the battery last as long as you promised? Does it survive a drop from a reasonable height? Does the app connect every single time? This phase is all about finding the weak spots and potential failure points so you can fix them now, long before the product gets into the hands of your client or their audience.
Step 5: Iterate on Your Design
Prototyping is rarely a one-and-done process. The feedback you gather during testing is your roadmap for improvement. This final step is all about iteration—taking what you’ve learned and using it to make the product better. Implementing feedback at each stage is the best way to ensure the final version truly meets user needs. Maybe the button needs to be more prominent, the material feels cheaper than expected, or a key feature is confusing to use. Each round of feedback and refinement gets you closer to a polished, production-ready product that not only functions perfectly but also delivers an exceptional experience.
Choosing the Right Tools for the Job
A great idea needs the right toolkit to become a reality. When we talk about tools for prototype development, we’re not just talking about a workshop full of equipment. We’re referring to the entire ecosystem of software, hardware, and systems required to move from a digital drawing to a physical object you can hold in your hand. For creative agencies, this part of the process can feel like a black box. Our job is to handle the technical details, but understanding the key tools involved will give you a clearer picture of how your vision comes to life. Think of it as the production toolkit for your physical campaign asset or branded product.
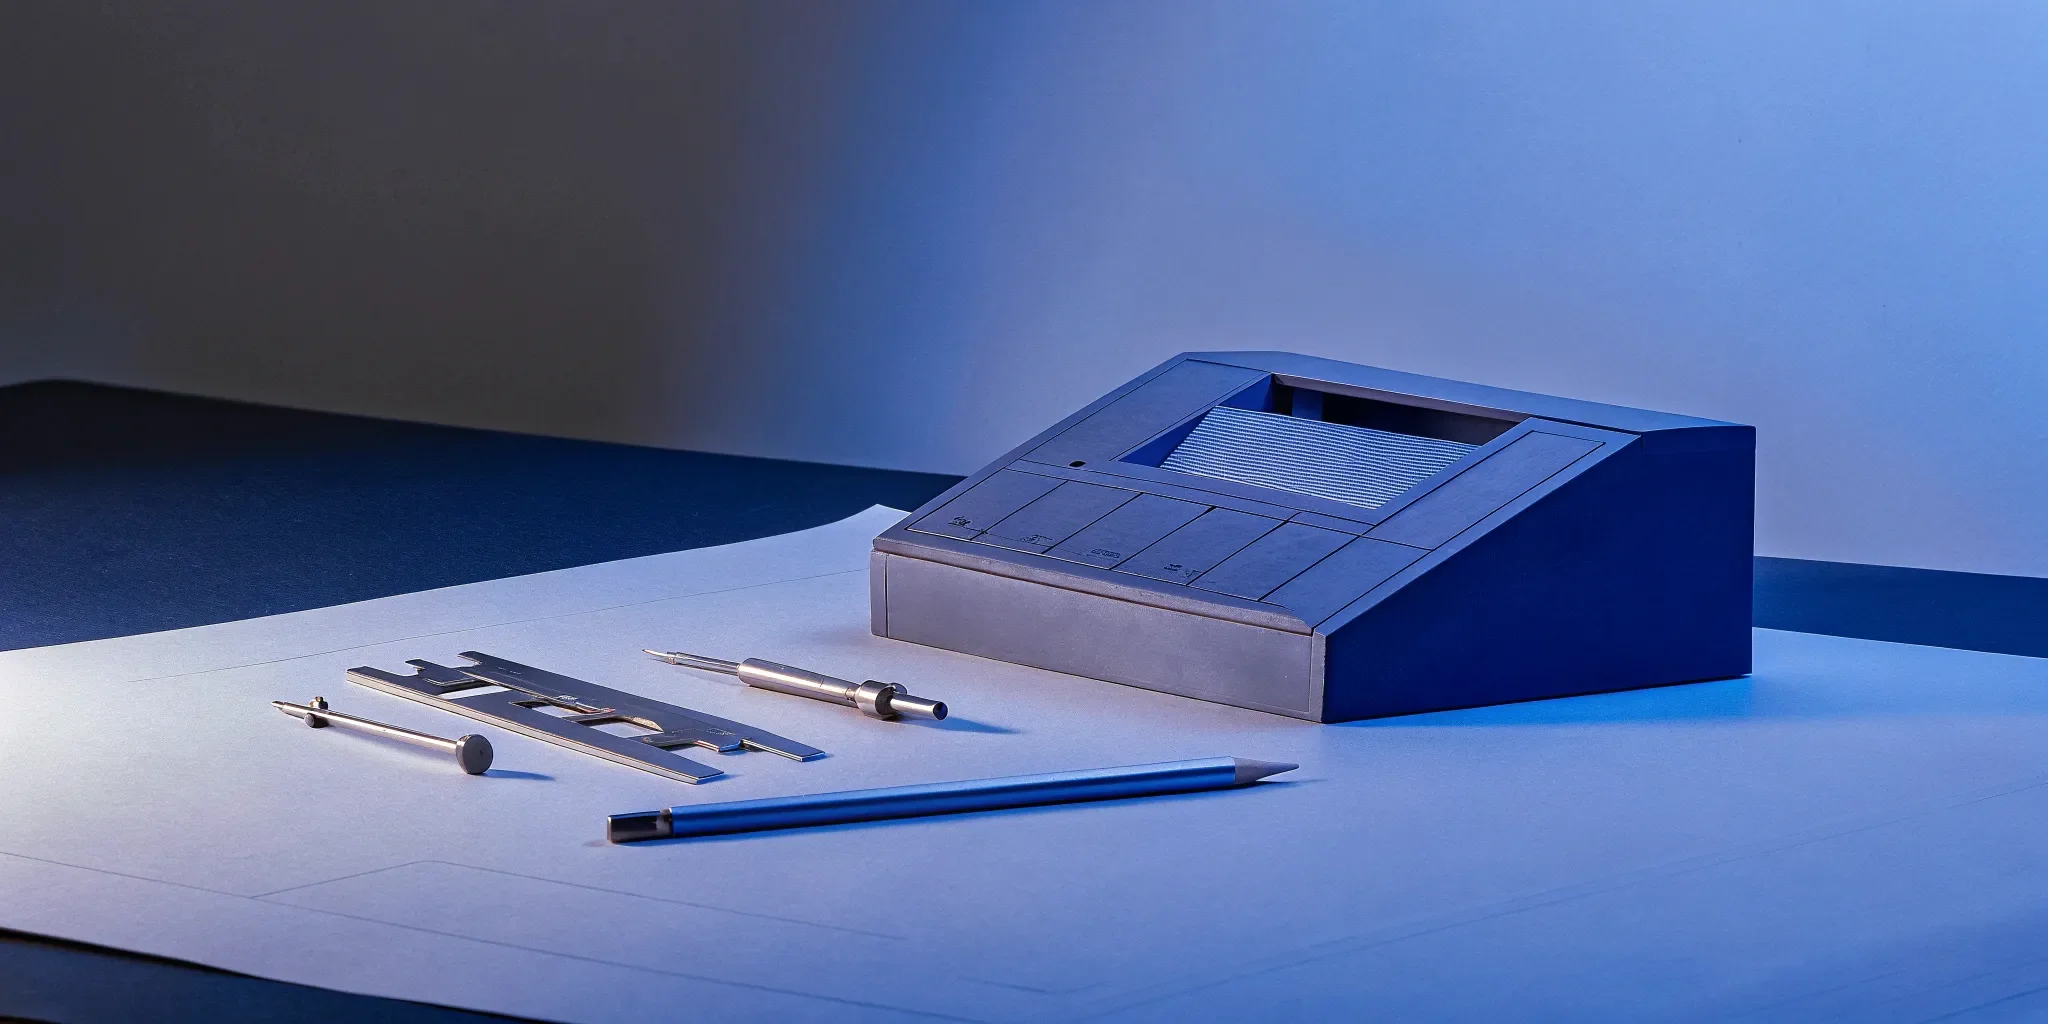
CAD and Design Software
Before we can build anything, we need a blueprint. In modern product development, those blueprints are created using computer-aided design (CAD) software. This is where we translate sketches and concepts into precise, three-dimensional digital models that define every curve, angle, and component with engineering accuracy. Prototyping is ultimately about testing how well a product functions and performs from the perspective of your target audience, and it all starts with a solid digital foundation. This CAD model is the master file that guides every subsequent step, from 3D printing the first iteration to tooling for mass production.
3D Printers and Prototyping Machines
This is where the digital concept becomes a physical reality. Using the CAD file, 3D printers and other rapid prototyping machines build an object layer by layer. This technology allows us to create complex parts quickly and test them almost immediately. It’s not just for making look-alike models, either. For example, automotive companies rely on 3D printing prototype services to create accurate scale models and functional parts for testing. Whether we’re using durable plastics to test a snap-fit enclosure or high-resolution resins to check fine details, we select the right technology to build a prototype that truly performs.
Tools for Testing and Measurement
A functional prototype has to do one thing well: function. To verify that, we use a range of testing and measurement tools. This can include everything from digital calipers that measure dimensions down to the millimeter to specialized electronic equipment that tests a circuit board’s performance. By gathering and implementing feedback at various stages of prototyping, you can ensure that the final product meets user needs, aligns with business goals, and functions as intended. This rigorous testing is what separates a simple model from a true functional prototype and ensures the final product is reliable and ready for users.
Keeping Your Project Organized
With so many moving parts, staying organized is non-negotiable. A successful prototype development process relies on strong project management and clear communication. We use dedicated systems to manage file versions, track feedback, and document every decision along the way. This ensures that every stakeholder is on the same page and that the project moves forward efficiently. Some prototyping tools with built-in feedback features can even streamline the collection of in-context user input. For our agency partners, this means you get clear updates and a transparent process, without having to manage the technical complexities yourself.
How to Select Materials and Plan Your Budget
This is the stage where your creative vision starts to take on real-world weight and cost. Choosing materials and setting a budget isn't just about numbers on a spreadsheet; it's a series of strategic decisions that will define your prototype's look, feel, and function. The right material can make a product feel premium and durable, while the wrong one can make it feel cheap or fail under pressure. It’s a balancing act between your ideal outcome, your timeline, and your available resources.
For creative agencies, this process is key to managing client expectations and delivering a physical asset that aligns perfectly with the campaign's goals. Whether you’re creating a sleek tech gadget for an influencer kit or a rugged piece of branded gear, the material choices you make now will directly impact the final result. A great product development partner will help you explore the options, understand the trade-offs, and build a realistic budget. This isn't about finding the cheapest path forward; it's about investing smartly to create a functional prototype that does its job, wows your client, and sets the stage for a successful launch.
Popular Materials and When to Use Them
You don’t need to be a materials scientist to make smart choices. Most functional prototypes rely on a handful of common materials. For early-stage models where you’re just checking the shape and size, 3D-printed plastics like PLA or ABS are fast and affordable. When you need something more robust that can handle mechanical stress, CNC-machined plastics or metals like aluminum are excellent choices. Machined parts are essential in industries that need cost-effective accuracy for their projects. For creating a small batch of high-fidelity prototypes that look and feel like the final product, cast urethane is a fantastic option that bridges the gap between a one-off model and full production.
How to Choose the Best Material for Your Project
Picking the right material comes down to answering a few simple questions about your prototype's purpose. First, what does it need to do? If it has to withstand force, you’ll need a strong engineering plastic or metal. If it needs to be lightweight, you’ll look at different options. Second, how does it need to look and feel? For a client-facing presentation or a photoshoot, you’ll want materials and finishes that mimic the final product perfectly. Finally, what’s your budget? Choosing the right materials means finding the sweet spot where performance, aesthetics, and cost all align with your project goals.
Factoring Costs into Your Decision
Think of your prototype budget as an investment in risk reduction. While it might be tempting to choose the cheapest material option, spending a bit more on a prototype that accurately simulates the final product can save you a massive amount of money and time later. A high-fidelity prototype helps you find and fix problems with the design, materials, or manufacturing process before you commit to expensive production tooling. Remember to account for costs beyond the raw material, including machining time, finishing (like painting or polishing), and assembly labor. A transparent partner will break down these costs for you, ensuring there are no surprises along the way.
Tips for Sourcing Your Materials
Unless you plan on building a workshop in your office, you won’t be sourcing raw materials yourself. Your best resource here is your product development partner. They have the expertise and the supplier relationships to procure the exact materials and components your project needs. This is especially true for products with electronic components, where a partner can help you select integrated hardware that is reliable and readily available. Leaning on your partner’s network prevents you from getting bogged down in supply chain logistics, freeing you up to focus on the creative and strategic goals of the project.
Getting and Using Valuable User Feedback
A functional prototype isn't just a technical checkpoint; it's your first real conversation with your audience. This is where you move beyond assumptions and get tangible insights into how people will actually interact with your product. For agencies, this step is critical. It’s how you validate that a creative concept for a physical product—whether it's a piece of branded merch or a high-tech experiential asset—will actually land with its intended audience. Gathering feedback is less about seeking validation and more about finding opportunities for improvement. It’s the process that refines a clever concept into a product that feels intuitive, useful, and genuinely connects with the user.
The key is to approach feedback as a collaborative loop. You present a working model, watch how people use it, listen to what they say, and then channel those observations back into the design. This iterative process de-risks the project, saving time and money by catching potential issues long before you commit to a full production run. By gathering and implementing feedback at various stages, you can ensure the final product not only functions as intended but also meets user needs and aligns with your client's business goals. This section will walk you through how to ask for the right kind of feedback, make sense of it all, and use it to make your prototype even better.
How to Ask for Great Feedback
The quality of the feedback you receive depends entirely on the quality of your questions. Instead of asking a generic "What do you think?" guide the conversation with specific, open-ended prompts. When you present a functional model to potential users, you create an opportunity to gather valuable feedback early. Give them a task to complete, like "Show me how you would turn this on and adjust the setting," and then observe quietly.
Pay attention to where they hesitate or seem confused. Ask follow-up questions like, "What did you expect to happen when you pressed that button?" or "Was anything about that process surprising?" This approach uncovers insights about the user experience that people might not think to volunteer on their own, giving you a clear, actionable list of refinements.
Making Sense of what Users Tell You
Once the feedback starts rolling in, you might find yourself with a mix of conflicting opinions and one-off suggestions. The goal isn't to act on every single comment but to identify recurring themes and patterns. Start by organizing the notes. Group similar comments into categories like "usability issues," "aesthetic preferences," or "new feature ideas." This helps you see which problems are impacting multiple users.
Prioritize the feedback based on your project's core objectives. A minor cosmetic tweak might be easy to implement, but a consistent point of confusion in the core functionality needs to be addressed first. This systematic approach helps you focus your efforts on changes that will have the greatest impact, ensuring your design decisions are driven by data-backed insights rather than just the loudest voice in the room.
Tools to Streamline the Feedback Process
Managing feedback doesn't have to be a chaotic mess of sticky notes and email threads. Using the right tools can keep the process organized and efficient. For gathering initial reactions, simple survey platforms like Google Forms or Typeform are great for asking standardized questions. To capture more nuanced interactions, consider recording user testing sessions (with permission, of course) so your team can review them later.
Some digital prototyping tools even have built-in feedback features that let stakeholders leave comments directly on a design, which is perfect for keeping input tied to specific components. For physical prototypes, a shared spreadsheet or a project management tool like Asana can work wonders for tracking comments, assigning action items, and ensuring no valuable insight gets lost along the way.
Putting Feedback into Action
Collecting feedback is only half the battle; the real work is in translating those insights into meaningful design improvements. Once you've analyzed and prioritized the comments, create a clear action plan. For each key piece of feedback, define the specific change you're going to make, whether it's adjusting a button's placement, refining the texture of a material, or clarifying an instruction.
Throughout this process, it’s important to gather feedback from business stakeholders to ensure the design continues to align with the overall strategy and brand goals. Document every change and the reason behind it. This creates a clear record of the prototype's evolution and helps keep everyone on the team aligned as you move toward the next iteration. This disciplined approach ensures your product development is both user-centered and strategically sound.
How to Handle Common Development Hurdles
Bringing a physical product to life is an exciting process, but it’s rarely a straight line from A to B. Every project hits a few bumps, whether it’s a technical puzzle, a budget surprise, or a timeline shift. The key isn’t to avoid hurdles altogether—it’s to anticipate them and have a smart plan for handling them when they appear. A functional prototype is your most powerful tool for this. It helps you spot challenges early, when they’re still small and easy to solve. By embracing a proactive mindset, you can keep your project moving forward with confidence, ensuring your creative vision is realized without derailing your budget or timeline.
When Things Get Technically Complicated
It’s easy to feel stuck when a technical issue pops up that’s outside your team’s expertise. This is completely normal, and it’s precisely what a functional prototype is designed to uncover. Think of it as a diagnostic tool. Prototyping helps you find and fix problems with the design, materials, or manufacturing approach long before you’ve committed to expensive tooling. Instead of seeing a technical snag as a roadblock, view it as a critical piece of data. A good engineering partner uses these moments to refine the design, ensuring the final product is not only beautiful but also robust and manufacturable. This early troubleshooting saves an incredible amount of money and stress down the road.
Managing Your Time and Budget
For any agency, staying on schedule and within budget is non-negotiable. A functional prototype is one of the best tools for protecting both. It might feel like an extra step, but it’s an investment that pays for itself by preventing costly mistakes. Making a change to a CAD model is simple; altering steel tooling for mass production can cost tens of thousands of dollars and add weeks to your timeline. By creating a working model quickly, you can get stakeholder approval and lock in the design with confidence. This process transforms abstract ideas into something tangible, which helps get your ideas approved and keeps the project aligned and moving forward without expensive revisions late in the game.
Maintaining Quality from Start to Finish
Quality isn’t something you inspect for at the end of the process; it’s something you build in from the very beginning. Your functional prototype is the first and most important stage of quality control. This is your chance to rigorously test every aspect of the product to ensure it works correctly and reliably. This goes beyond just checking if it turns on. It involves stress testing, checking that parts fit together perfectly, and validating performance against your initial goals. You can run computer simulations or test real-world interactions to catch potential failures. This early, thorough testing sets the quality standard for the entire production run and ensures the final product lives up to your brand’s promise.
Planning for What Could Go Wrong
Great project management involves planning for success while also preparing for potential setbacks. What happens if a key component is suddenly unavailable due to supply chain issues? What if user feedback reveals a major flaw in your core concept? A functional prototype is your best tool for managing these risks. It allows you to gather feedback from users early in the process, making sure the product truly meets their needs before you scale up. A good development partner will help you identify potential risks from the start—from material sourcing to manufacturing tolerances—and build contingency plans. This foresight helps you stay agile and make smart pivots without jeopardizing the entire project.
A Practical Guide to Testing and Quality Assurance
Testing isn’t just a final hurdle to clear before launch; it’s a continuous process that ensures your physical product lives up to the creative vision you sold to your client. Think of it as your safety net. A solid testing and quality assurance (QA) plan helps you catch issues early, saving you from costly fixes and last-minute scrambles. When you’re developing a branded product for a campaign, reliability is everything. The last thing you want is for an influencer’s high-tech mailer to fail on camera or for a piece of merchandise to feel cheap or flimsy.
A structured approach to quality assurance confirms that the product not only works but also delivers the intended brand experience. This involves checking its core functions, measuring its performance against key benchmarks, and getting it into the hands of real people to see how it holds up. By systematically validating your prototype, you can move forward with confidence, knowing the final product will be polished, professional, and ready for its moment in the spotlight. This is how you protect your agency’s reputation and ensure the physical component of your campaign strengthens, rather than detracts from, the overall message.
How to Test for Functionality
The first and most fundamental question you need to answer is: does it work? Functional testing is all about making sure your prototype operates correctly and reliably under normal conditions. This means going through every feature with a fine-toothed comb. If it’s a smart device, does it pair easily? If it’s a custom package, does it open smoothly without tearing?
Beyond basic operation, you should also perform limit and stress testing. Limit testing checks if the product performs across its full range of intended operations—for example, does it work when the battery is low? Stress testing pushes the product beyond normal use to find its breaking point. This helps you understand its durability and prevent failures once it’s out in the world. A good functional testing plan is your best defense against unexpected problems.
What Performance Metrics Actually Matter?
Once you’ve confirmed your prototype works, the next step is to measure how well it works. Performance metrics are the specific, quantifiable benchmarks that define a quality user experience. These aren't just abstract engineering specs; they directly impact how a person perceives your product and, by extension, the brand. For a portable speaker, key metrics might be battery life and Bluetooth range. For a high-end influencer kit, it could be the force required to open a magnetic clasp or the brightness of an integrated LED.
Defining these metrics early in the product development process is crucial. They provide objective goals for your design and engineering teams to work toward and give you a clear way to evaluate success. When performance is tied to the brand experience, these details make all the difference.
Getting Real People to Test Your Product
Your team knows how the product is supposed to work, which is exactly why you can’t be the only ones to test it. Getting the prototype into the hands of real people is the only way to uncover usability issues you’re too close to see. Presenting a functional model to stakeholders, clients, or a small test group provides invaluable feedback early in the process. These fresh eyes will interact with the product in ways you never anticipated, revealing confusing features or potential points of failure.
You don’t need a massive focus group. Start by sharing it with colleagues outside the project team or a handful of trusted contacts. The goal is to observe their genuine interactions and listen to their unfiltered thoughts. This user feedback is critical for refining the design to be more intuitive and user-friendly before you commit to a larger production run.
Simple Checks for Quality Control
Quality control (QC) isn’t a single event; it’s a mindset and a series of checks integrated throughout the development process. It’s about maintaining consistency and catching small imperfections before they become big problems. For agency projects, this is especially important for preserving brand integrity. Simple QC checks include verifying that colors match brand guidelines exactly, ensuring logos are applied cleanly, and checking for smooth finishes and tight seams on all physical components.
Create a detailed quality control checklist that covers every aspect of the product, from aesthetics to function. This document becomes your guide for every prototype and production unit. It ensures that whether you’re making ten units or ten thousand, each one meets the same high standard. This systematic approach empowers your team to deliver a polished, professional product every time.
From Prototype to Production: What's Next?
You’ve nailed it. The functional prototype looks incredible, works flawlessly, and has the client buzzing with excitement. But turning that single, perfect unit into hundreds or thousands of market-ready products is a whole new challenge. This is where your project moves from a creative sprint to a manufacturing marathon. A successful transition requires a strategic approach that balances design intent with the realities of mass production. It’s about making smart, informed decisions now to avoid costly headaches later. Let’s walk through the key steps to take your prototype from the workshop to the world.
Designing for Real-World Manufacturing
A prototype proves your idea works; a production-ready design proves it can be made efficiently and affordably. This is the core principle of Design for Manufacturability (DFM), a process where the design is optimized for the specific manufacturing methods you plan to use. The goal is to make the product easier and cheaper to produce without sacrificing quality or function.
This means thinking about things like material choices, part consolidation, and assembly steps. For example, can two separate parts be combined into a single molded piece? Can we use a standard screw instead of a custom-fabricated one? Every decision impacts your final cost per unit and production speed. This is where an engineering partner becomes invaluable, ensuring your creative vision is practical for real-world manufacturing from the very beginning.
Getting Your Documentation in Order
To get your product made, you need to give a factory a precise set of instructions. Think of it as a detailed blueprint that leaves no room for interpretation. This technical data package is the universal language of manufacturing. It ensures that the factory in another city—or another country—produces exactly what you designed. Without it, you’re just sending them a pretty picture and hoping for the best.
Your documentation should include DFM-optimized CAD models, master assembly drawings, and a complete Bill of Materials (BOM). The BOM is essentially a comprehensive shopping list that details every single component, from the main housing down to the tiniest screw. This complete package allows manufacturers to provide accurate quotes and build your product to spec, ensuring consistency across the entire production run.
How to Choose the Right Manufacturing Partner
Finding the right factory is less like hiring a vendor and more like entering a partnership. The success of your product depends heavily on their capabilities, communication, and reliability. Start by looking for manufacturers with a proven track record in your industry and experience with the materials and processes your product requires. Don't just take their word for it—ask for case studies, references, and production samples to verify their quality.
Once you have a shortlist, it’s time to start a conversation. How responsive are they? Do they understand your brand’s quality standards? A good partner will ask smart questions and offer suggestions to improve your design for their specific production line. This collaborative approach is a strong indicator that they are invested in your success, not just in fulfilling an order.
Creating Your Production Plan
A solid production plan is your roadmap for a smooth and efficient manufacturing run. This plan should outline everything from timelines and resource allocation to quality control measures. Start by establishing a clear timeline with key milestones: tooling creation, first article inspection (the first product off the line), mass production, and final delivery. This helps you manage client expectations and coordinate with other campaign elements.
Your plan must also include a rigorous quality control (QC) strategy. Define your quality standards and establish checkpoints throughout the production process to catch any issues early. Will you have someone on-site for inspections? What are the acceptable tolerance levels for each part? A well-structured production plan anticipates potential roadblocks and ensures your final product meets the high standards your agency and your client expect.
Related Articles
How to Get a Product Prototype: A Simple Guide — Jackson Hedden
Get a Prototype Made Fast: The Ultimate Guide — Jackson Hedden
Product Design Process: The 5 Essential Steps — Jackson Hedden
Frequently Asked Questions
Do we really need a functional prototype, or is a good-looking model enough for a client presentation? While a beautiful, non-working model can certainly look impressive on a boardroom table, a functional prototype does something far more important: it proves the idea is real. It builds unshakable confidence with your client by showing them not just what the product looks like, but how it will actually feel and work in a user's hands. This step protects your agency's reputation by uncovering potential issues—like a confusing button layout or a flimsy hinge—before you’re committed to a full production run.
How long does it typically take to develop a functional prototype from start to finish? The timeline really depends on the complexity of the product. A simple mechanical object with no electronics might come together in a few weeks, while a sophisticated smart device with custom circuit boards will naturally require more time for design, assembly, and testing. The most important factor is having a clear set of goals from the start. A well-defined plan allows the design and engineering work to move forward efficiently, but it’s always best to discuss your specific project to get a realistic timeline.
What are the main factors that determine the cost of a functional prototype? The cost is primarily driven by three things: material choice, complexity, and the level of finish. For example, a prototype made from CNC-machined aluminum will cost more than a 3D-printed plastic one. Similarly, a product with intricate electronics and multiple moving parts will require more engineering and assembly time than a simple enclosure. Think of it as an investment in risk reduction—spending a bit more on a high-fidelity prototype now can save you from incredibly expensive tooling changes later on.
What happens if user feedback requires a major change to the design? That’s actually great news, because it means the process is working perfectly. Discovering a major design flaw during the prototype stage is the best-case scenario. Making changes to a digital CAD model or a single physical unit is relatively fast and inexpensive. It’s far better to learn that a core feature is confusing now than after you’ve manufactured ten thousand units. This feedback loop is designed to catch those big issues, allowing us to refine the product until it’s right.
How closely will the final manufactured product match the functional prototype? The goal is for the final product to look, feel, and function identically to the approved prototype. The prototype serves as the gold standard for the manufacturer to follow. During the transition to mass production, your engineering partner will make small, strategic adjustments to optimize the design for the factory's equipment—a process called Design for Manufacturability (DFM). These changes are typically invisible to the end user and are made to ensure quality and consistency across every single unit.