Enclosure Design Guidelines: A Creative's Guide
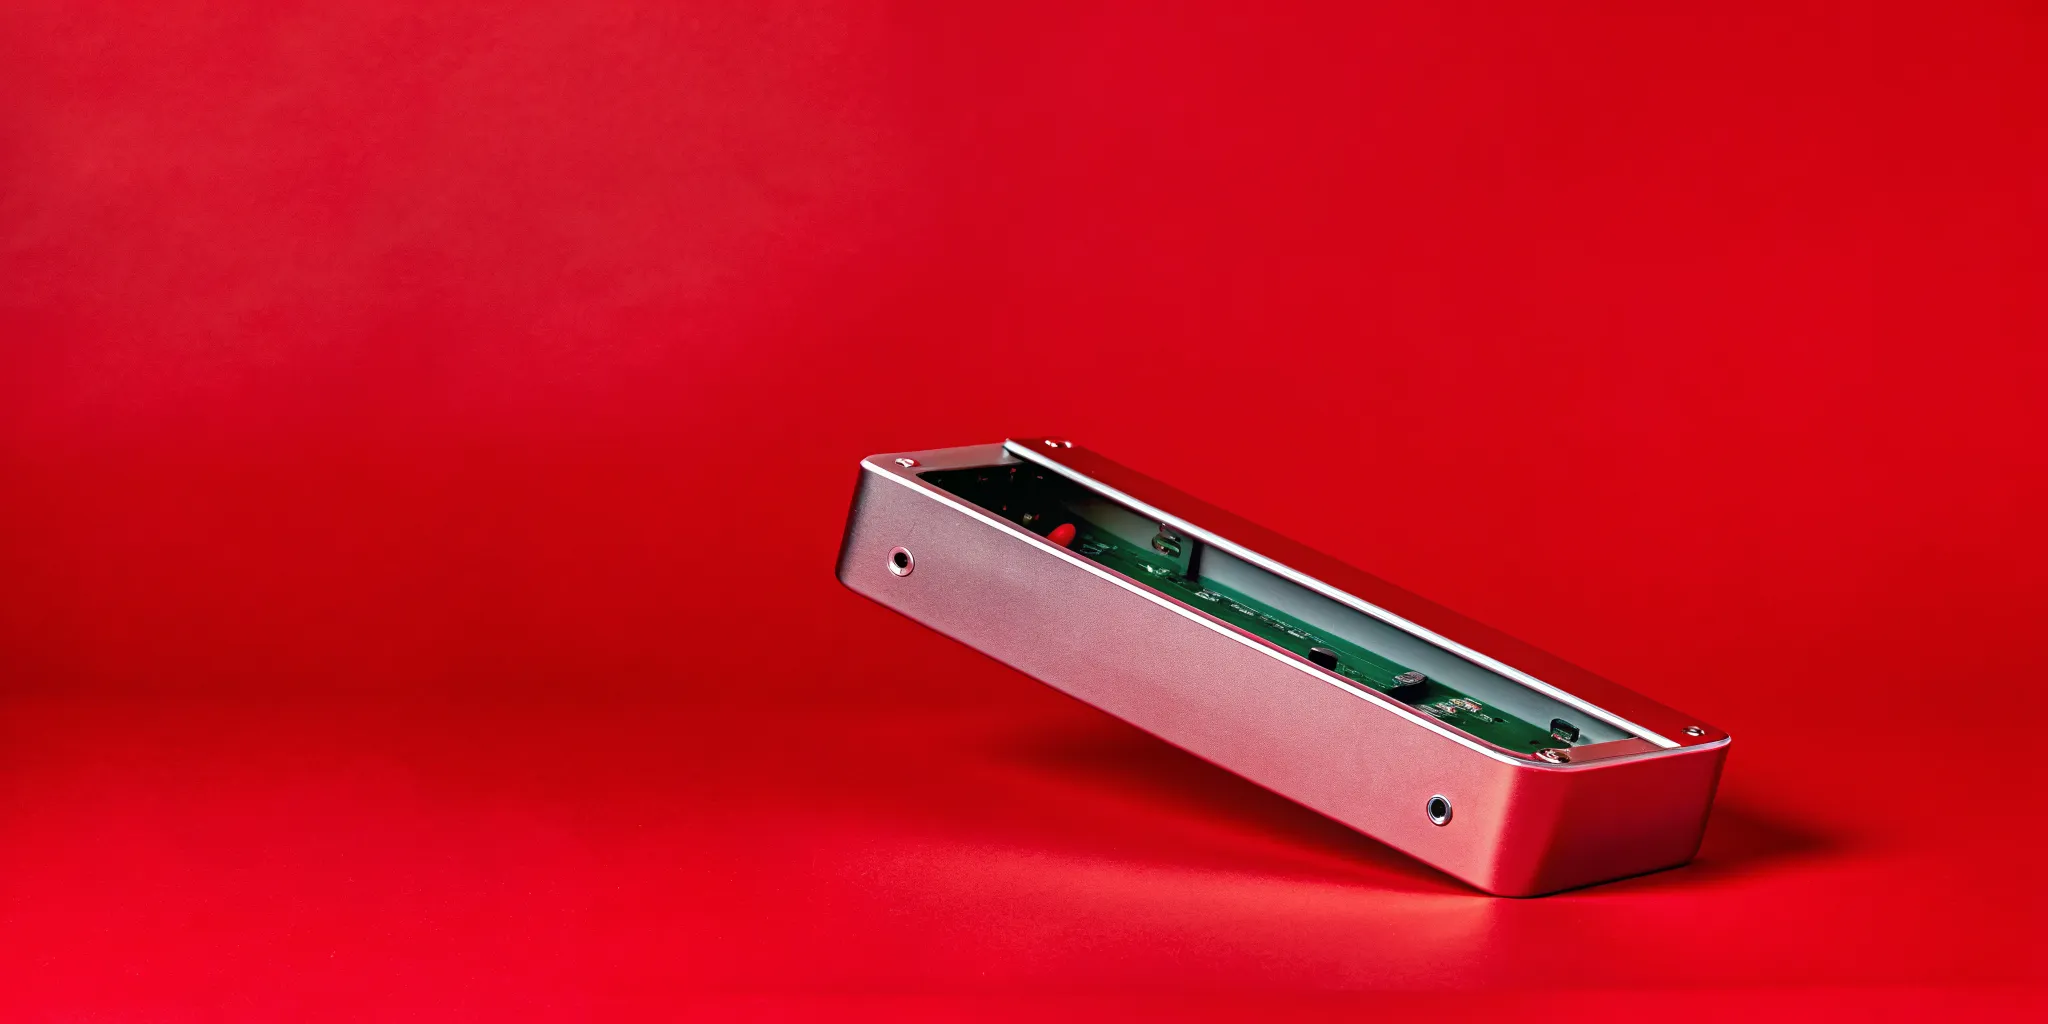
Your campaign is a massive success, and the custom product you created is a hit. But what happens next year? A truly strategic physical asset should have a life beyond a single launch. This is where future-proofing comes in. By designing an enclosure with change in mind, you create a platform that can evolve. Imagine being able to update the internal tech for a sequel campaign or release new modular components without a complete redesign. This forward-thinking approach makes your work more valuable and sustainable. Following smart enclosure design guidelines that account for scalability, upgrades, and tech integration ensures the product you create today is ready for the opportunities of tomorrow.
Key Takeaways
- Balance brand story with real-world defense: Your product's enclosure is the first thing people touch, so its look and feel must align with your creative vision. It also needs to be a protective shell that guards the internal parts against drops, dust, and moisture, ensuring the experience is flawless.
- Design for production, not just presentation: A beautiful concept is only half the battle; it also needs to be buildable. By thinking about the manufacturing process early, you can simplify parts and make smart material choices that prevent costly delays and ensure your final product is as polished as your pitch deck.
- Plan for a sequel, not just a one-off: Future-proof your design by building in flexibility from the start. A modular approach makes upgrades simple and cost-effective, allowing you to extend a campaign or refresh a product line without starting from scratch. This turns a single project into a long-term asset for your client.
What Is an Enclosure and What Does It Do?
Think of an enclosure as your product's body. It’s the outer case that holds everything together, and it’s the very first thing your audience will see, touch, and experience. For any physical product you’re creating, from a high-tech device for a product launch to a unique piece of branded merchandise, the enclosure does two critical jobs: it protects the delicate components inside and it defines the product's entire look and feel. It’s where your creative vision becomes a tangible object. A great enclosure isn't just a box; it's a strategic part of the user experience that communicates quality, durability, and brand identity from the first glance.
Protecting Your Product's Core Components
At its most basic level, an enclosure is a protective shell. Its primary job is to guard the internal workings of your product, like the main circuit board or other delicate electronics, from bumps, drops, and everyday handling. This structural shield is what keeps the technology safe and functional. But it’s also the main point of interaction. The texture, shape, weight, and finish are all part of the story you’re telling. A well-designed enclosure feels good in the hand, looks compelling on a shelf, and is intuitive to use. It successfully merges practical strength with the aesthetic you’ve worked so hard to create for your campaign, ensuring the final product is both beautiful and resilient.
Balancing Structure with Environmental Defense
Beyond just physical impact, an enclosure acts as a barrier against the outside world. It’s designed to keep sensitive parts safe from environmental threats like dust, moisture, and even UV light that can degrade materials over time. Think of it like the walls and roof of a building; it creates a controlled, stable environment where the internal components can perform as intended. This is crucial whether your product is meant for indoor use or will be exposed to the elements. At the same time, the enclosure protects the user from the product’s internal mechanisms, like moving parts or electrical currents. It’s a two-way shield that ensures the product is safe, reliable, and ready for real-world use.
Key Principles for Effective Enclosure Design
When you’re turning a big idea into a physical product, the enclosure is where your creative vision meets the real world. It’s more than just a box; it’s the product’s armor, its interface, and a huge part of its personality. Getting it right comes down to a few core principles. By focusing on protection, smart material layering, and the timeless relationship between form and function, you can create an enclosure that not only looks incredible but also performs flawlessly. These guidelines will help you make the right decisions from the start, ensuring your final product is both beautiful and built to last.
Creating a Protective Barrier
Think of an enclosure as your product's first line of defense and its first impression. It’s the outer case that shields all the important internal components, but it’s also the part your audience will see, touch, and interact with. Its primary job is to create a protective barrier against everything the world might throw at it, from accidental drops and spills to dust and moisture. A well-designed enclosure is strong, practical, and feels good in your hands. The key is to find the perfect balance between a durable structure and a compelling aesthetic that aligns with your brand’s story. Good PCB enclosure design is the foundation for a product that lasts.
Integrating Control Layers
A high-performance enclosure is a lot like a technical jacket you’d wear on a hike. It’s not made of just one material, but several intelligent layers that work together to keep you comfortable and protected. Your product’s housing should do the same. By intelligently arranging materials, you can create a system that manages heat, blocks moisture, and provides structural integrity all at once. For example, one layer might be a rigid frame for strength, another a waterproof seal, and a third a ventilated panel to let heat escape. It’s not about just stacking materials; it’s about creating a cohesive system where each layer enhances the performance of the others, giving your product the robust protection it needs.
Why Form Should Follow Function
It’s a classic rule for a reason: form should always follow function. While it’s tempting to dream up a wild, sculptural shape for your product, its look can’t get in the way of its job. The design must support the product’s purpose, protect its internal parts, and be manufacturable. The most successful products find beauty in efficiency. Beyond that, the best designs are also “forgiving.” This means the product is designed to work perfectly even if there are tiny imperfections during the manufacturing process. This approach builds resilience into your product, ensuring a high-quality outcome that’s as reliable as it is beautiful and ready for real-world use.
How to Choose the Right Materials
The material you choose is a core part of your product's story. It dictates the look, feel, and durability, shaping the entire user experience. A sleek metal finish tells a different story than a soft-touch plastic. Before you get locked into a concept, think about where your product will be used. An indoor display has different needs than a rugged piece of outdoor gear for an influencer kit. Understanding these basics helps you match your creative vision with a material that can bring it to life.
Plastics for Indoor Use
For indoor products, plastics offer incredible versatility. They can be molded into almost any shape, allowing for unique forms and intricate details that make a brand statement. The most common choice is ABS plastic, a great all-around performer for items like desktop accessories or custom device casings. If you need something tougher, Polycarbonate (PC) is a step up in strength. But the real creative potential lies in the finish. You can specify a high-gloss, matte, or even a velvety soft-touch texture to create a specific tactile experience. This level of design freedom is what turns a simple object into a memorable brand artifact.
Metals for Outdoor Durability
When your product needs to withstand the elements, metal is usually the answer. For projects that require a balance of strength and low weight, aluminum is a fantastic choice. It has a modern, clean aesthetic and can be anodized to add durable color, making it perfect for branded tech accessories or sleek displays. For maximum toughness, stainless steel is the go-to. It’s heavier but provides a premium, rugged feel that’s ideal for permanent installations or high-end merchandise. The choice often comes down to the story you want to tell and the specific fabrication needs of your design.
Composites and Hybrid Options
If you’re looking to push creative boundaries, composites are where the real innovation happens. Think of them as custom-blended materials, combining substances like plastics and carbon fiber to create something with superior qualities. This allows you to get the best of both worlds: a material that’s as lightweight as plastic but as strong as metal. These advanced composite materials are perfect for high-performance applications or when you want to create a tactile experience that feels completely new. They let you solve complex challenges with an elegant, integrated solution, turning your most ambitious campaign ideas into reality.
Designing for Maximum Protection
A product’s enclosure is its first and most important line of defense. Beyond defining the look and feel, a well-designed case protects the sensitive components inside from drops, heat, moisture, and other real-world hazards. Getting this right is what turns a brilliant creative concept into a durable, reliable product that people can actually use and enjoy. It’s about building a physical experience that works flawlessly from the unboxing moment to long-term use. For your agency’s next big campaign or branded product launch, ensuring the physical asset is tough enough for the real world is non-negotiable. Here’s how we approach designing for total protection.
Getting Wall Thickness and Structure Right
The strength of your product’s shell starts with its wall thickness. It might seem like a minor detail, but keeping the walls of an enclosure a consistent thickness is critical, especially for common production methods like injection molding. Uniform walls help prevent defects like warping or weak spots, ensuring the final product is structurally sound and looks polished. We also add features like ribs and bosses to the internal structure. These act like a skeleton, adding significant strength and rigidity without making the product bulky or heavy, which is perfect for creating a premium yet durable feel for any handheld device or piece of merchandise.
Managing Heat with Proper Ventilation
If your product has any electronics inside, it’s going to generate heat. Without a way to escape, that heat can build up and cause components to fail, leading to a product that just stops working. Effective thermal management is crucial. Depending on the product, this could mean designing subtle ventilation slots that blend into the aesthetic, using materials that naturally dissipate heat, or incorporating internal heat sinks. The goal is to keep everything running within its optimal temperature range. This ensures the high-tech influencer kit or interactive display you designed performs perfectly every time it’s powered on, protecting the user experience and your client’s reputation.
Ensuring Component Access and Clearance
A product’s interior is a puzzle of circuit boards, wires, and other parts that all need to fit together perfectly. A key part of the design process is planning for proper clearance, which means leaving just enough space around each component. Think of it as giving everything a little breathing room. This small buffer, often just a fraction of a millimeter, prevents parts from getting crushed during assembly and makes sure wires aren’t pinched. It also simplifies the manufacturing process and makes any future repairs possible. This foresight ensures a smooth transition from a digital model to a fully assembled, functional product.
Controlling Moisture and Planning for Drainage
Water is one of the biggest threats to any physical product, especially one with electronics. Even if your product isn’t meant for the outdoors, humidity or an accidental spill can cause serious damage. To protect against this, we design enclosures to handle moisture effectively. This can involve creating tight seals with gaskets or using an overmolding process to create a water-resistant barrier. For some products, we even design tiny, hidden channels that guide water away from sensitive areas. These strategies are part of how products get official IP ratings for water resistance, giving you confidence that your creation is built to last.
What Do NEMA and IP Ratings Mean for Your Design?
When you're bringing a physical product to life, you want it to be tough enough to handle its environment. This is where NEMA and IP ratings come in. Think of them as standardized report cards for how well an enclosure protects the sensitive electronics inside from things like dust, water, and impact. Understanding these ratings helps ensure that the beautiful product you designed for a campaign or launch stays beautiful and functional, whether it’s sitting on a desk or being used at an outdoor festival. These standards take the guesswork out of durability, giving you a clear language to define exactly what your product needs to withstand.
Decoding NEMA Ratings
NEMA ratings come from the National Electrical Manufacturers Association and are mostly used in North America. They classify an enclosure based on the types of environmental hazards it can protect against. The system is straightforward: a higher number generally means more protection, but each number also corresponds to specific types of defense. For example, a NEMA 1 enclosure is perfect for indoor use, as it guards against light dust and someone accidentally touching the components inside.
If your product is headed outdoors, you’ll need something much more robust. A NEMA 4 rating, for instance, signifies an enclosure that is built for harsh weather and is completely waterproof. These enclosure design guidelines are crucial when you're planning a brand activation or creating a product that will live outside, ensuring your creation can handle rain or shine without any issues.
What IP Ratings Tell You About Dust and Water Protection
IP, or Ingress Protection, ratings are an international standard used to specify how well an enclosure seals out dust and moisture. You’ll see them written as "IP" followed by two numbers. The first digit (0-6) rates the protection against solid objects, from fingers to fine dust. The second digit (0-9) rates protection against liquids, like drips, sprays, and even full submersion.
For example, a product with an IP65 rating is completely dust-tight and can withstand jets of water, making it great for outdoor settings where it might get sprayed or rained on. A product with an IP67 rating is also dust-tight but can be temporarily submerged in water. Knowing what these numbers mean helps you match your product’s durability to its real-world use, so you can confidently create anything from a splash-proof speaker for an influencer kit to a rugged device for an interactive display.
How to Match Ratings to Your Product's Environment
Choosing the right rating is all about thinking through where and how your product will be used. Before you get too far into the design, map out the product’s journey. Will it be used exclusively indoors, or does it need to survive an outdoor event? Will it be exposed to moisture, dust, or extreme temperatures? Answering these questions early helps you define the technical requirements for its shell.
For any product intended for the outdoors, you should look for higher NEMA and IP ratings to guarantee its longevity. An enclosure for outdoor applications might need a NEMA 4 rating for weather resistance and an IP65 rating to protect against dust and rain. By defining the environmental needs upfront, you build a solid foundation for a successful product that performs flawlessly, no matter where it ends up.
How to Design for Manufacturing and Assembly
This is where your brilliant idea meets the real world. Taking a concept from a digital file to a physical product requires a specific mindset: designing for manufacturing and assembly (DFMA). It’s not about limiting your creative vision; it’s about making that vision possible to produce efficiently and at scale. Thinking about the production process from the very beginning is the secret to launching a physical product that is both beautiful and buildable.
For creative agencies, this step is crucial for turning an ambitious campaign asset or branded product into a tangible reality. It involves making strategic decisions about how parts are made, what they’re made of, and how they fit together. By planning for production early, you avoid costly redesigns and delays, ensuring your project stays on schedule and on budget. It’s the practical magic that transforms a great idea into a flawless final product.
Optimizing Your Design for Production
The goal here is to create a design that is as simple and efficient to produce as possible without sacrificing quality or intent. Just because a design looks good on a computer doesn't mean it's easy to build. Think of it as creating a clear, easy-to-follow recipe for your manufacturer. This involves minimizing the number of unique parts, using standard components where you can, and designing pieces that fit together intuitively. Every decision, from the way a seam closes to the type of screw used, impacts the final cost and assembly time. A well-optimized design is one that your production partner can build quickly, consistently, and without confusion, which is key for delivering high-impact products on a tight timeline.
Planning the Assembly and Fabrication Process
The most successful product launches happen when there’s a strong partnership between the design team and the manufacturer. You should talk to your manufacturer early and often. Instead of handing over a finished design and hoping for the best, treat it as an ongoing conversation. Sharing your ideas with production experts allows them to give feedback on what’s feasible and suggest more efficient ways to achieve your goals. This collaborative loop helps catch potential issues before they become expensive problems, streamlining the entire process from making the individual parts (fabrication) to putting them all together (assembly). This proactive communication is a hallmark of a smooth, successful project.
Considering Materials and Tooling
The materials you choose define the look, feel, and function of your final product. The best material always depends on what the enclosure will be used for. A sleek, indoor tech gadget for an influencer kit has different needs than a rugged, outdoor installation for a brand activation. Your choice will affect everything from durability and weight to the final cost. Equally important is tooling, which refers to the custom molds and fixtures needed to create your parts. Custom tools can be expensive, so a smart strategy is to design parts that can be made with tools the manufacturer already has. This helps manage your budget effectively while still delivering a high-quality product.
Integrating Cables and Wiring
For any product with electronic components, managing the internal wiring is a detail you can’t afford to overlook. A tangle of visible or unprotected wires not only looks unprofessional but can also lead to product failure. Great design accounts for this from the start. Planning for effective cable management means creating dedicated channels, clips, and pathways to keep all wiring neat, secure, and out of sight. This ensures the product is reliable, safe, and easy to service if needed. It’s a perfect example of how the inside of your product should be just as thoughtfully considered as the outside, reflecting a commitment to quality down to the smallest detail.
Getting Your Product Certified
After all the creative work, prototyping, and refinement, certification is the final step that proves your product is ready for the real world. Think of it as the official seal of approval that confirms your enclosure performs exactly as designed. It’s not just about passing a test; it’s about demonstrating that the product is safe, reliable, and can withstand the conditions it was built for. For your client’s brand, this step is crucial. It provides the credibility and quality assurance that protects their reputation and gives end-users confidence.
This process involves putting your product through a series of standardized tests to verify its durability and safety. Globally recognized standards provide a clear, objective framework for this evaluation. A certified product is one that has been independently verified to meet these benchmarks, turning your design from a great idea into a trusted, market-ready asset. This validation is what separates professional-grade products from the rest, ensuring the physical part of your campaign is as polished as the creative.
What to Know About UL and Industry Standards
You don’t have to guess what “good” looks like. Industry standards provide a clear roadmap for quality and safety. Organizations like UL (Underwriters Laboratories), NEMA, and CSA have established a unified framework to evaluate products, especially enclosures. These standards aren’t just arbitrary rules; they are detailed guidelines based on decades of testing and real-world data. They cover everything from a material’s ability to resist fire to an enclosure’s power to protect against electrical shock.
Following these standards ensures your product is safe and dependable. For agencies, aligning a product with a recognized standard like UL is a powerful statement. It tells your client and their customers that the product isn't just a gimmick; it's a high-quality item built with user safety and performance in mind.
How to Test for Environmental Compliance
Remember those NEMA and IP ratings? Certification is where your enclosure proves it has earned them. Environmental compliance testing is a hands-on process where the product is subjected to the very elements it’s designed to resist. This means spraying it with high-pressure water jets to test for leaks or placing it in a dust chamber to check for particle ingress. The goal is to confirm it meets the strict pass-fail criteria for its target rating.
For example, the IEC IP ratings have specific tests for protection against solids (the first digit) and liquids (the second digit). Passing these tests isn’t a matter of opinion. It’s a verifiable outcome that confirms your enclosure provides the exact level of protection you designed it for, ensuring it will perform reliably out in the world.
Validating Your Product's Performance
Beyond just passing a test, performance validation gives you concrete data on how well your enclosure works. This process moves beyond a simple pass or fail to quantitatively measure its effectiveness. For instance, Building Enclosure Testing can report the precise airtightness of a structure, giving you hard numbers to back up your design choices. This data is incredibly valuable, as it provides undeniable proof of the product’s quality.
For a creative agency, this is your evidence. When you can go to your client with a report showing the product not only passed certification but also exceeded performance benchmarks, you’re demonstrating a level of professionalism and execution that builds immense trust. It proves the final product is as robust and reliable as the campaign it supports.
Solving Common Enclosure Design Challenges
Every great product idea comes with its own set of puzzles to solve. When you’re creating something physical, the enclosure design is where many of these challenges pop up. It’s one thing to have a stunning concept, but it’s another to make sure it can be built efficiently, withstand heat, and protect the sensitive components inside from the elements. This is where creative vision meets real-world physics.
Thinking through these potential hurdles early on is the secret to a smooth development process. Instead of seeing them as roadblocks, we see them as opportunities to make the final product even better. By addressing manufacturability, thermal management, and environmental protection from the start, you ensure the product not only looks incredible but also performs flawlessly. Let’s walk through some of the most common challenges and how to approach them, so your big idea can become a reliable, real-world product.
Balancing Complex Designs with Manufacturability
It’s a classic dilemma: you have a bold, beautiful design, but can it actually be built? Just because a design looks good on a computer doesn't mean it's easy to build. This is the core challenge of balancing aesthetics with manufacturability. An overly complex shape might require expensive custom tooling or an assembly process that’s slow and prone to errors. The key is to find a sweet spot where your creative vision is preserved without making production a nightmare.
This is where design for manufacturability (DFM) comes in. It’s a practice of designing products in a way that makes them easy to produce. By considering materials, tooling, and assembly steps from the very beginning, we can refine the design to be both striking and practical, ensuring a smooth handoff from prototype to final production.
Managing Heat Buildup
If your product contains electronics, heat is an invisible enemy you have to plan for. Components like processors, batteries, and LEDs all generate heat, and if it gets trapped, it can lead to poor performance, a shortened lifespan, or even total failure. A product that overheats is a quick way to disappoint a customer. The enclosure plays a huge role in thermal management, acting as the first line of defense against heat buildup.
The right material can make all the difference. For example, metal helps release heat, preventing electronics from getting too hot. Other strategies include adding ventilation slots for airflow or incorporating heat sinks to draw warmth away from critical components. A thoughtful thermal management strategy ensures your product stays cool and functions exactly as it should, no matter what’s happening under the hood.
Ensuring Your Protective Layers Are Continuous
Think of your product’s enclosure as a tiny, high-tech building for its internal parts. Just as a building needs a continuous barrier against wind and rain, your enclosure needs a seamless shield to protect against dust, water, and other environmental factors. It's very important that the control layers for air, water, and heat are continuous, especially where different parts of the enclosure meet.
Any gap, no matter how small, can become a weak point. This is why details like seals, gaskets, and overlapping seams are so critical. By creating an unbroken protective layer, you ensure that moisture and debris stay out, and the sensitive electronics inside stay safe. This continuous barrier is fundamental to creating a durable product that can stand up to real-world conditions.
Building in Redundancy for Key Functions
What happens if something goes wrong? A truly robust design has a backup plan. In product design, this is called redundancy, and it’s about anticipating potential failures and building in a failsafe. For enclosures, this is especially important for critical functions like moisture control. You can’t just hope a seal holds; you have to plan for what happens if it doesn’t.
For instance, an enclosure might have a primary seal to keep water out, but also include a secondary drainage channel that directs any moisture that gets past it away from sensitive components. This kind of design for reliability is a hallmark of high-quality product development. It adds a layer of security that protects the product’s function and, by extension, the brand’s reputation for creating dependable goods.
Using Innovative Tech in Your Enclosure Design
A great enclosure does more than just protect what’s inside; it can become a core part of the user experience. By weaving in modern technology, you can transform a simple box into an interactive, intelligent, and forward-thinking product. This is especially powerful for campaign assets and influencer kits, where the goal is to create a memorable, shareable moment. Instead of just thinking about defense, consider how the enclosure itself can tell a story, adapt to future needs, or reflect your brand’s commitment to innovation. It’s the difference between sending someone a product and delivering an experience.
From smart locks that create a sense of discovery to materials that communicate a message of sustainability, the possibilities are expanding quickly. These aren't just flashy add-ons; they are strategic choices that can make your physical product more compelling and relevant. Thinking about tech integration early in the design process allows you to build these features in seamlessly, rather than tacking them on as an afterthought. It’s about creating a cohesive product where the form, function, and technology all work together to deliver a standout experience for your audience. This approach helps your physical product concepts feel less like merchandise and more like a natural extension of a digital-first brand story, making your agency's creative vision tangible and unforgettable.
Integrating Smart Access Controls
Moving beyond a traditional lock and key can completely change how someone interacts with your product. Imagine an exclusive influencer package that only opens when tapped with a specific NFC-enabled card or a user’s smartphone. This turns the simple act of opening a box into a moment of surprise and delight. Modern enclosure security trends are shifting toward these kinds of smart solutions, using technologies like NFC and cloud-based management. Integrating these advanced access controls not only adds a layer of security but also gives you creative ways to manage and personalize the user experience, making your product feel more exclusive and interactive.
Exploring Adaptive Design
Campaigns and products rarely stay the same forever. New technologies emerge, and user needs change. An adaptive design approach ensures your enclosure can keep up. Instead of creating a rigid, one-and-done shell, you can build in flexibility from the start. This might mean designing a modular interior that can be reconfigured for future product updates or creating a housing that can accommodate different tech components. As new technologies create new packaging considerations, industrial enclosures adapt by focusing on flexibility. This forward-thinking strategy makes your product more sustainable and cost-effective in the long run, as you can update it without starting from scratch.
Choosing Sustainable and Efficient Materials
The materials you choose are a huge part of your product’s story. For many brands, sustainability innovation is no longer optional; it’s a core part of their identity. Selecting recycled, biodegradable, or responsibly sourced materials can send a powerful message and resonate deeply with your audience. Beyond the eco-friendly angle, new material options can also offer significant performance benefits. For example, lightweight yet durable composites can provide excellent insulation and protection while making the product easier to handle and ship. This focus on both sustainability and efficiency helps you create a product that is not only responsible but also high-performing.
How to Future-Proof Your Enclosure
Thinking about the future isn't just for sci-fi movies; it's a core part of smart product design. When you create a physical product for a campaign, you want it to have a life beyond the launch party. Future-proofing your enclosure means designing it with change in mind. Technology evolves, components get updated, and your client’s brand strategy might shift. A forward-thinking design ensures your product can adapt without needing a complete, and costly, do-over. This is how you turn a one-off promotional item into a long-term brand platform that can be revisited and refreshed.
This approach is about building in flexibility from the very beginning. It allows the product to grow and change, whether that means adding new features for a sequel campaign or simply swapping out a part that’s become obsolete. By planning for what’s next, you create a more sustainable, valuable, and impressive asset for your client. It’s the difference between a disposable piece of swag and a lasting brand icon. A future-proofed product shows foresight and delivers more value, strengthening your relationship with your client and setting your agency apart. It demonstrates that you're not just thinking about this campaign, but about the brand's entire journey. Let’s look at three key ways to build an enclosure that’s ready for tomorrow.
The Benefits of a Modular Design
A modular design is your best friend for long-term flexibility. Think of it like building with LEGO bricks instead of carving from a single block. This approach breaks the product down into independent, interchangeable modules. If a single component needs an update or a repair, you can simply swap out that specific module instead of redesigning the entire product. This makes maintenance and upgrades incredibly efficient.
For agencies, this opens up a ton of creative possibilities. You could launch a core product and then release new, limited-edition modules as part of future campaigns. Modular designs also reduce waste and save money over the product’s lifecycle, as you can reuse core components. It’s a strategic way to keep a product relevant and exciting long after its initial debut.
Planning for Scalability and Upgrades
Scalability is about leaving room to grow. When you’re in the initial design phase, it’s smart to think about what might come next. Will a future version need a bigger battery, a more powerful processor, or an additional sensor? Designing with scalability in mind means making intentional choices to accommodate these potential upgrades without a full teardown.
This could be as simple as leaving a bit of extra physical space inside the enclosure or designing the internal layout to easily accept larger components down the road. This foresight ensures that as technology improves, your product can improve right along with it. It gives the product a longer, more useful life and provides a clear path for future iterations, making your initial creative investment go even further.
Creating a Strategy for Tech Integration
Even if your product doesn't need "smart" features on day one, it's wise to plan for them. A solid strategy for tech integration means designing the enclosure so that adding sensors, connectivity, or other advanced systems later is a straightforward process. This might involve planning pathways for wiring or creating non-functional knockouts that can be removed to add ports or antennas in a future version.
By considering tech integration from the start, you prepare the product to become part of a larger connected ecosystem. For example, an influencer kit might be a simple, beautiful object today, but the retail version might need IoT capabilities. Planning for this possibility at the concept stage makes that transition smooth, fast, and cost-effective, keeping your project on the cutting edge.
Related Articles
- Electronics Enclosure Design Tips & Best Practices | Jackson Hedden Inc
- Electronics Enclosure Design: A Practical Guide — Jackson Hedden
- What Is an IP Rating? The Ultimate Guide
Frequently Asked Questions
Our creative idea for a physical product is pretty ambitious. How do we know if it can actually be built? This is my favorite kind of question because it’s where the most exciting work happens. The key is to bring a product development partner into the conversation early. A beautiful, complex design is almost always possible to create, but it requires a smart strategy. By thinking about the manufacturing process from the start, we can find clever ways to achieve your vision without making the product impossible to assemble. It’s not about scaling back your idea; it’s about finding the most efficient path to bring it to life.
How does the material we choose affect the story our product tells? The material is a huge part of your product’s personality and the first thing your audience will notice. It’s a core storytelling tool. A product made from brushed aluminum feels sleek, durable, and premium, while one with a soft-touch plastic finish can feel more modern, approachable, and warm. The weight, texture, and temperature of a material create an immediate emotional connection. Choosing the right one helps you communicate your brand’s identity before the product is even turned on.
Do we really need to worry about ratings like NEMA or IP for a simple campaign product? It’s a great question, and the answer depends entirely on how and where the product will be used. These ratings are essentially a promise that your product will work as intended. If you’re creating an interactive display for an outdoor festival, then yes, a rating that protects against rain and dust is critical for ensuring it doesn't fail. Even for an indoor product, considering protection against an accidental spill can be the difference between a memorable experience and a disappointing one. It’s all about protecting the user experience and your client’s reputation.
How can we keep our physical product idea from getting too expensive to produce? Cost is always a factor, and the best way to manage it is through smart planning. The biggest expenses in production often come from overly complex parts and the custom tools needed to make them. By focusing on a design-for-manufacturing approach, we can simplify the internal structure and assembly process without sacrificing the external look and feel. Making strategic choices about materials and using standard components where possible are also great ways to keep the project on budget without compromising quality.
Why should we think about 'future-proofing' a product that might only be for a single campaign? Thinking ahead is what separates a good project from a great one. A successful campaign often creates demand for more, whether it’s a sequel campaign or a full retail launch. Designing a product with a modular or scalable foundation means you’re ready for that success. It allows you to easily update, upgrade, or repair the product down the line. This turns a one-time promotional item into a lasting brand asset, giving your client far more value for their investment and positioning your agency as a strategic, long-term partner.