Influencer kit packaging has to make a launch easy to understand and practical to deliver. It should introduce the product, protect it through handling, and give the recipient a clear, useful opening experience. Agencies can achieve that by beginning with the campaign brief and working through contents, structure, presentation, and fulfillment in that order.
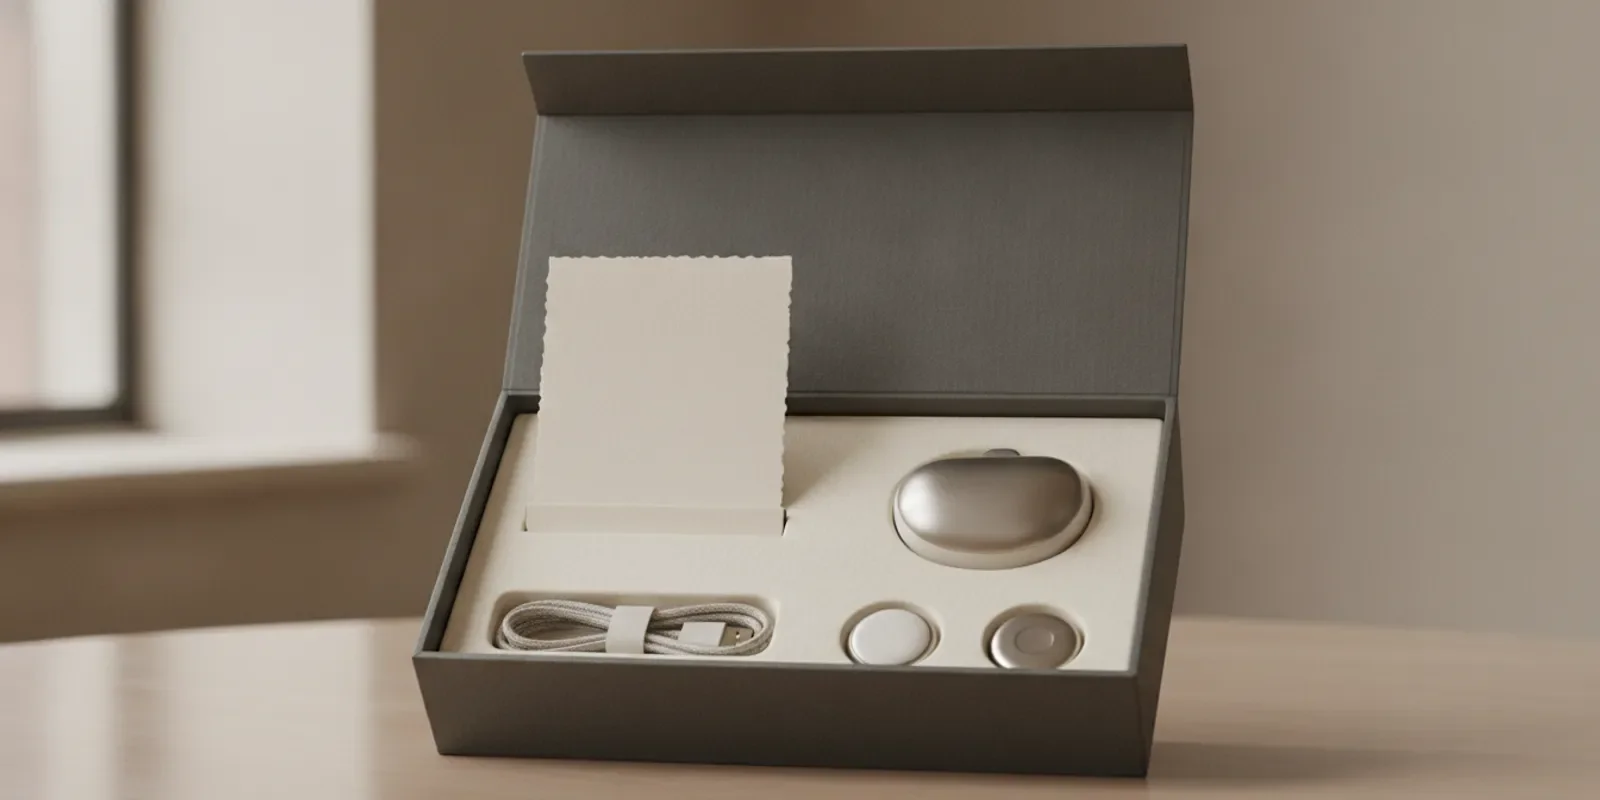
What should influencer kit packaging accomplish?
A successful kit is more than a decorated box. It is a physical communication sequence and a container that has to work across several handoffs. The campaign team defines the message, suppliers make components, a fulfillment team packs them, a carrier moves them, and the recipient opens and uses them. Build the plan around all those moments.
Write down the package's primary job before choosing colors or finishes. Is it meant to introduce a new product, support a demonstration, provide samples, or give a small group of partners a consistent campaign experience? A single kit may do several things, but one goal should lead the decisions.
Introduce: Make the product and its relevance to the launch clear.
Protect: Keep the contents stable and free from avoidable contact or pressure.
Guide: Help the recipient find key items and understand any first-use steps.
Represent: Express the campaign and brand without competing with the product.
Deliver: Work with the real quantities, schedule, addresses, and packing resources.
These goals can pull in different directions. A dramatic reveal may require more layers and assembly time. A compact mailer may be easier to handle but provide less space for a staged presentation. Capture the priorities and tradeoffs in the brief, so later reviews are about decisions rather than personal taste.
How should an agency turn the brief into a package concept?
Translate the campaign into physical choices. A useful brief records the audience, launch message, product, quantity, recipient locations, delivery date, contents, restrictions, and the person responsible for supplying each component. Add dimensions and weights as soon as they are known. If a product is still changing, label the information provisional and identify who will confirm it.
Start with the recipient and opening context
Ask who receives the package and what they need to do with it. A creator preparing a hands-on demonstration may need a concise setup card and an unobstructed route to the product. A journalist or partner may need a short product overview and samples arranged so each is easy to identify. The package should serve the real use case instead of an imagined unboxing scene.
Consider where it will be opened. A kit opened at a desk can include several organized components; a package likely to be received at a busy office benefits from an exterior that is easy to identify and an interior that stays orderly if moved. Avoid assuming the recipient will have scissors, a large work surface, or time to sort through loose pieces.
Choose one campaign idea to carry through
Give the package a simple story. The opening view might reveal the main product first, then an insert with context, followed by accessories or samples. The order should make sense without a long instruction sheet. If the recipient must remove decorative layers before finding the item or learning what it is, simplify the sequence.
Agree on the central message and tone with the client. Use those choices to guide form, color, material, graphic hierarchy, and copy. A strong concept can be expressed with one focal moment and a few supporting details. It does not require a separate visual idea on every surface.
For agencies planning broader physical campaign work, the product development guides for agencies offer related context. Keep the package brief anchored to the current launch rather than turning it into a general brand presentation.
Which contents belong in the kit?
Each item should help the recipient understand, use, or contextualize the product. Build the contents list before laying out the interior. Record the item owner, quantity per package, dimensions, weight, fragility, orientation, and approval status. Note whether it arrives in its own packaging or needs a place within the kit.
Main product: Confirm whether it arrives assembled, ready to handle, and protected by its own container.
Essential accessories: Include the pieces needed for first use or the intended demonstration.
Information card: Supply concise product context and any essential setup or support directions.
Campaign sample: Add a swatch, sample, or related object only when it supports the launch idea.
Personalized note: Use recipient-specific details only when they are accurate, approved, and manageable at packout.
A useful test is to ask what would be lost if each item were removed. If the answer is only that the box might look less full, the item may not belong. Extra objects add sourcing, storage, assembly, and quality checks. They can also distract from the product or make the package harder to close.
Use a contents matrix to control changes
Make one shared list for the agency, client, supplier, and fulfillment team. For each item, record its description, source, dimensions, quantity, arrival date, approval owner, and whether it is essential or optional. This simple record helps reveal dependencies. For example, a late accessory change may require a new insert cavity, a larger box, or a different packing order.
Set a decision point for locking the contents. If an item is not confirmed by that point, decide whether to hold the package, remove the item, or design a flexible space for it. Do not leave a placeholder in the approved layout without an owner and deadline.
How do you balance presentation and protection?
Design the interior around the actual product and journey. The package may pass through a packing station, carrier, receiving desk, and several handling points before it reaches the recipient. The product should not shift freely, rub against another object, or take pressure from a poorly placed component. A decorative insert is not automatically protective just because it looks fitted.
The CUNY Pressbooks discussion of e-commerce packaging and branded unboxing notes the value of combining practical shipping materials with branded interior details. Applied to a launch kit, that means separating the transit job from the presentation job: an outer shipper can handle movement, while the inside arrangement creates the opening sequence.
Consider the following questions while developing the layout:
Does the product need a cradle, divider, sleeve, wrap, or restraint?
Can packers place every component in a consistent order?
Will cards stay in position instead of covering the product or falling out?
Can the recipient remove the product without damaging the presentation?
Is the outside suitable for the delivery context and privacy expectations?
Can the package close securely without force or improvised tape?
Right-size the package. Excess space can let items move and may require more fill. A layout that is too tight can make assembly difficult or put pressure on a product. Use representative samples to confirm fit and access before a full run. For a focused look at physical validation, see the guide to packaging design testing.
Separate the mailer decision from the interior decision
The outer package and the presentation insert do not have to solve the same problem. An outer mailer may prioritize closure, handling, and a sensible size. The insert may prioritize organization, product access, and a deliberate reveal. Keeping those roles distinct can make decisions easier: ask the delivery partner to review the outer format and ask the campaign team to review the interior story.
Check the full packout, not just a single item in isolation. A card placed beneath a product may be invisible at first opening. A bottle or device may shift when the box is tilted. A small accessory can disappear under filler. Pack the complete set, close it, move it through ordinary handling, and then open it as a recipient would.
How should the design express the brand without feeling overdone?
Use the brand as a system, not a reason to repeat a logo on every surface. A focused palette, clear type hierarchy, and one deliberate detail can make a more coherent experience than multiple competing messages. Decide where branded elements add value: outer wrap, lid, insert, product support, or a small connection to the campaign idea.
Keep the product recognizable and the information legible. If a recipient needs to know what the item is, do not hide that behind a clever phrase. If instructions are necessary, make them easy to find and use. A short card with a clear heading and a few direct steps often serves better than an elaborate booklet that repeats campaign copy.
Materials affect both appearance and handling. Paperboard, cut inserts, molded supports, reusable containers, and protective wraps involve different production and packout needs. Choose according to the contents, desired experience, available production options, and disposal or reuse expectations. Do not make environmental claims unless the client can support them for the specific material and package system.
Ask the client to approve the exact artwork and information that will be printed. That includes product names, instructions, claims, QR destinations, and personalization. Use a proof to check spelling, contrast, alignment, and whether small text remains readable at actual size. For related thinking on a brand system, explore brand development.
How can agencies compare package directions?
When several concepts seem plausible, compare them against the same requirements instead of discussing renderings in the abstract. A short scorecard can keep the review grounded in what matters for this launch.
Presentation-led direction
This approach emphasizes a staged opening, multiple layers, or a distinctive container. It can suit a small, high-touch recipient group when the reveal is central to the campaign. Review the added material, assembly time, storage needs, and risk that the presentation obscures the product. Ask whether the extra steps are meaningful to the recipient.
Compact mailer direction
A compact format can simplify storage and handling and keep the contents close together. It may be a good fit when the product and message are straightforward. Check whether the smaller interior still gives enough protection, clear labeling, and room for essential instructions. Do not force the product into a format that complicates removal or closure.
Flexible insert direction
A flexible insert can accommodate a defined range of contents or small variations in a recipient set. It may help when a campaign has shared components plus one variable sample. The tradeoff is that open space can look unfinished or allow movement. Identify the allowed variation, test the fullest and emptiest packouts, and make the packing instructions explicit.
For each direction, review four questions: Does it meet the recipient need? Does it protect and organize the contents? Can the team produce and pack it as planned? Is its complexity justified by the campaign? The answers make tradeoffs visible without pretending there is one universally best package.
What should the agency confirm before production?
Concept approval is not production readiness. Confirm the construction, dimensions, print areas, material choices, assembly sequence, and who supplies every component. A package can look resolved in a rendering and still fail when the real product does not fit or a supplier interprets the fold differently.
Build a production checklist
Lock the contents and confirm the latest product dimensions.
Record the selected materials, finishes, colors, and acceptable substitutions.
Confirm the package format, closure, assembly method, and packout order.
Approve artwork, copy, product details, and any destination linked from printed codes.
Set quantities, shipping addresses, delivery date, and the person receiving the goods.
Plan a representative sample review and time for revisions before the run.
Document how damaged, incomplete, or returned kits will be handled.
Make the sample with actual contents wherever possible. Review the opening sequence, fit, finish, closure, and packing effort. Ask someone outside the concept team to open it using only the included information. Observe where they hesitate, what shifts, and whether they can identify the product and next step. Record changes as specific actions, such as moving the card to the top layer or widening a finger opening.
A sample review is also an opportunity to test repeatability. Have a packer assemble several units, not just one carefully prepared example. Note whether the sequence is clear, whether components need special handling, and whether the finished package closes the same way each time. If packout requires repeated judgment calls, revise the layout or instructions.
Teams considering a more developed physical concept can review product design services and prototyping. The appropriate level of development depends on the package complexity and the questions still unresolved.
How should teams coordinate suppliers and timing?
Influencer kits often involve client brand teams, agency creatives, product owners, print or packaging suppliers, and fulfillment partners. Assign an owner to each decision. Keep one current source of truth for artwork, dimensions, contents, quantities, and schedule. When the product changes, check the insert, outer dimensions, instructions, and packing plan rather than treating it as an isolated update.
Plan backward from the delivery date. Work through approval, sample creation, revisions, final production, arrival of components, packout, and shipping. Identify which steps depend on other suppliers. A printed insert cannot be finalized if its copy is still under review, and packout cannot begin if the product or accessories have no confirmed arrival date.
For each handoff, specify what the next person needs. A supplier may need an approved drawing and finish reference. A fulfillment partner may need a count of each item, a packing sequence, and a photo of the completed kit. The receiving contact may need the expected shipment size and delivery window. Clear handoffs reduce last-minute interpretation.
Do not rely on a single deadline for the entire project. Create milestones for brief approval, contents lock, first sample, sample sign-off, artwork release, component receipt, packout, and shipment. At each review, note open decisions, owner, and due date. If a date moves, identify the downstream steps it affects and agree on a revised plan.
Agencies looking for a physical product development partner can also explore examples of completed product work and the packaging topic collection. Keep the package focused on the launch while coordinating the decisions that make the physical result possible.
What mistakes should teams avoid?
Designing from a rendering alone: A screen image cannot confirm fit, opening force, print behavior, or packing effort. Review a physical sample.
Adding items without a recipient purpose: Extra components bring sourcing and coordination. Tie each one to a need or campaign goal.
Leaving packout until late: A complex assembly sequence can disrupt delivery. Ask the people who will pack the kits to review it early.
Using unclear copy: Make the product and any essential next step easy to understand. Keep supporting messaging brief.
Ignoring content changes: A new accessory or product revision can affect protection and fit. Recheck the complete layout.
Confusing shareability with spectacle: A useful, thoughtful package can be memorable without demanding a reaction.
Approving an untested substitute: A different material or component can change fit and finish. Confirm substitutions with a sample where needed.
When a problem appears, classify it before revising the design. Is it about communication, protection, usability, assembly, timing, or approval? That makes the next action clearer. For instance, if the recipient misses the setup information, moving the card may solve more than adding another printed panel. If the product moves in transit, changing the restraint is more direct than adding decorative tissue.
Discuss your product launch package
Frequently Asked Questions
What is influencer kit packaging?
It is a package designed to deliver a product or campaign set to creators and other recipients. It combines containment and protection with a deliberate presentation of the product and supporting information.
What should an influencer package include?
Include the main product, accessories needed for first use, concise and accurate context, and campaign materials that support the recipient's purpose. Agree on the contents before finalizing the layout.
How can a launch kit feel distinctive?
Connect the package form, materials, and opening order to one clear campaign idea. Thoughtful organization and useful information can create a distinctive experience without unrelated extras.
When should a package sample be reviewed?
Review a representative sample before approving the full run. Check fit, protection, opening order, graphic clarity, closure, and packing steps, then revise any observed issue.
How early should planning begin?
Begin while the contents, launch goals, recipient group, quantity, and delivery timing are being defined. Early planning gives the team room to align design choices with sourcing, samples, approvals, and fulfillment.
A strong influencer package brings the product, campaign story, protection, and delivery plan together. Start with the recipient and the contents, test the real package, and make every design choice serve a clear purpose.