A physical product feasibility study helps a team decide whether an idea deserves further investment before committing to a full development program. It cannot promise a successful outcome. It is a structured way to test user need, product form, materials, production route, and major risks through evidence rather than assumptions.
What should a physical product feasibility study answer?
A useful study supports one of three decisions: proceed to concept development, revise and test again, or stop before spending more. The answer depends on the product and the decision at hand. A wearable, countertop appliance, and reusable package need different tests.
Write the decision in one sentence. For example: “Can we create a portable device that users can operate one-handed, protect during daily transport, and make through a repeatable production process?” This is more actionable than asking whether the idea is good.
User value: Who will use it, where, and what problem does it solve?
Product definition: What must it do, and what is outside the first version?
Physical feasibility: Can the shape, interface, and internal layout support the intended use?
Production feasibility: Can the selected materials and processes make parts and assemblies consistently?
Risk and evidence: What remains uncertain, and what test would reduce that uncertainty?
Set boundaries as carefully as the questions. A study might check whether a device can be held securely without deciding its final surface finish. It might compare enclosure concepts without selecting a supplier. Record exclusions so an early answer is not mistaken for approval of every detail.
Agree on decision criteria before testing. Criteria should be observable, even when they are qualitative. They might include whether people can complete a defined task without assistance, whether components fit within an estimated envelope, or whether a plausible process can form a key feature. Clear criteria keep the team from redefining “feasible” after results arrive.
Make the decision specific to a version and a moment. A concept may be feasible with one battery size, closure, or material, but not after those choices change. Write down the configuration being assessed, the assumptions that remain open, and the evidence date. This prevents a favorable early review from being reused as approval for a substantially different design.
How do you test whether the product solves a real need?
Start with the user and use context, not a polished rendering. Describe the intended user, setting, task, and difficulty the product should reduce. Record what people do now, what they find inconvenient, and what they would need to change to adopt a new object.
Use interviews or observation to gather specific examples. Ask people to describe a recent instance of the problem rather than whether they like your proposed solution. A favorable reaction is not proof that the problem matters enough to change behavior or pay for an alternative.
Look for patterns and disagreements, not only comments that support the concept. Accounts may differ by user, setting, frequency, or workaround. If people describe distinct problems, the product may need a narrower intended use or a different first version. Keep contradictory evidence alongside positive feedback.
Turn findings into testable requirements. “Easy to use” is broad. “A user can open the enclosure without a tool while wearing everyday gloves” can be checked. Separate essential outcomes from preferences and note who supplied each requirement. A concise design handoff plan can help carry intent between teams.
Consider adoption friction. A concept may address a genuine inconvenience but require unfamiliar care, a new routine, or difficult setup. Ask what users must stop doing, learn, carry, clean, or maintain. These factors shape requirements and can reveal whether the proposed benefit is strong enough in context.
For example, suppose people say a compact kitchen tool would save space. Ask where the existing tool is stored, how often it is used, and what happens when it is hard to clean. Observe the drawer or counter setup if practical. The finding may be that the real problem is not size but the time needed to assemble and wash the current tool. That distinction changes what the new product must prove.
Keep a simple evidence log for each conversation or observation. Record the question asked, the context, what the person did or said, and the team’s interpretation in separate fields. Avoid turning a single memorable quote into a broad conclusion. If one user reports a strong need and several others do not, note the difference and consider whether the audience definition needs refinement.
Which technical and form questions belong in the review?
Sketch the product as a system. Consider the outer form, contact points, moving parts, electronics if needed, fasteners, seals, and service access. A simple block diagram can expose conflicts: a battery may use space needed for a grip, a hinge may interrupt a seal, or a charging port may be hard to reach.
List assumptions that could invalidate the concept. These might include the volume available for components, operating environment, target weight, cleaning needs, or force a user can comfortably apply. Do not treat a guessed dimension or untested mechanism as settled.
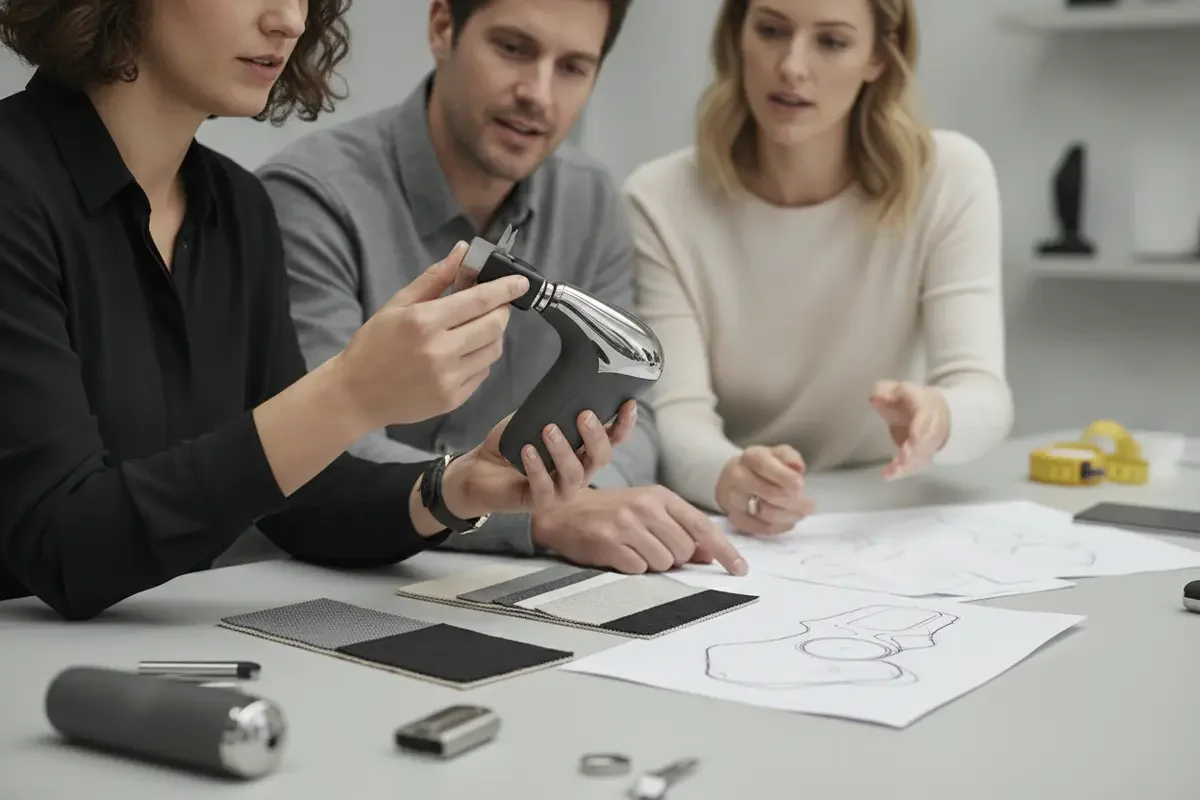
A rough physical mock-up can reveal reach, grip, access, and proportion issues that are hard to judge on screen. It need not have cosmetic finish if the question is whether the object fits in a hand or on a shelf.
Review interfaces in context. A button’s location, travel, feedback, and relation to the grip all affect use. A lid depends on clearance and opening direction. A replaceable component needs a reachable service path. List interactions and test the ones most likely to cause failure, confusion, or awkward movement.
Separate what a model can show from what needs further review or supplier input. A foam or cardboard model can support an early discussion about size and access. It cannot establish durability, heat behavior, sealing, or repeatable production. Label the model’s purpose and limitations so success on one question is not treated as proof of another.
Use a question-led model plan. If the main concern is whether a person can grip and activate the product, make the grip zone and control location accurate enough to assess. If the uncertainty is whether a removable cover can clear nearby components, model that interface and its movement. A model that is detailed everywhere but inaccurate at the critical interface can create false confidence.
Check the physical envelope with real references. Compare the concept against the hand, shelf, bag, countertop, or other space where it will be used. A dimension that seems small in a drawing can feel bulky in a pocket or interfere with a neighboring object. Note the position and orientation during the task, not only the overall width and height.
Consider edge cases as well as the ideal demonstration. What happens if a user approaches from the side, has limited reach, is wearing gloves, or uses the product with one hand occupied? Which conditions are part of intended use, and which are outside scope? These questions help the team decide what to test now and what should be explicitly deferred.
How should you compare materials and production routes?
Do not select material by appearance alone. Compare requirements that affect use and production: stiffness, impact behavior, heat exposure, surface feel, cleaning, wear, joining method, finish, and availability. The relevant factors vary, so record why each matters.
Compare plausible processes against part geometry and likely demand. A process suitable for a one-off model may not work for repeat production. Ask how the part would be formed, finished, inspected, and assembled, and where tolerances or cosmetic standards could cause difficulty. The goal is to identify whether a credible route exists, not to choose a factory prematurely.
Form and fit
Early option: Rough mock-up.
What to verify: Reach, grip, access, and envelope.
Useful evidence: Observed task and fit notes.
Material
Early option: Candidate shortlist.
What to verify: Environment, finish, and joining.
Useful evidence: Sample comparison and supplier questions.
Production
Early option: One or two plausible processes.
What to verify: Geometry, assembly, and inspection.
Useful evidence: Process review and risk list.
User value
Early option: Problem statement and concept.
What to verify: Problem importance and adoption barriers.
Useful evidence: Interview or observation findings.
Consider the whole assembly, not just a material sample. A candidate may feel right but require a joining method that complicates repair. A process may form the shell but leave little room for fasteners or inspection. Review part interfaces, assembly sequence, tool access, and how defects could be detected.
Demand and expected change matter. At low quantities, a simple method may support learning even if it is not the eventual route. At higher volumes, repeatability, tooling, process steps, and quality checks become more important. Treat these as comparison factors, not settled conclusions.
Ask suppliers focused questions rather than requesting a premature quote. Share the function and critical geometry, then ask what may be difficult to form, join, finish, or inspect. Record what information they need to give a more reliable answer. Supplier feedback is useful evidence, but may be limited while the design is changing.Build a comparison around the product’s actual constraints. For a reusable container, for example, cleaning access, closure performance, and the way parts join may matter more than a distinctive surface texture. For a handheld device, impact exposure, grip, and internal packaging may dominate. The point is not to rank every material property. It is to identify the few properties that can change the decision and compare options against those.
Ask what would make each proposed route unsuitable. A formed part might require a draft direction that conflicts with the desired shape. A multi-part assembly could add a seam in a place that users touch or clean. A finish may hide a surface defect but add a process step. Write these constraints beside the option rather than burying them in meeting notes.
Use a staged comparison instead of trying to settle every detail at once. First remove options that plainly fail a must-have requirement. Then compare the remaining candidates against secondary needs, such as surface feel or ease of assembly. If two routes remain close, identify a small test or supplier question that could distinguish them. This keeps the discussion tied to evidence and avoids treating personal preference as a technical conclusion.
Production route and product architecture affect each other. If an enclosure is split into several parts, the team must consider how those parts align, fasten, seal, and reach inspection. If a component is likely to be replaced, the service path affects access and fastener placement. Capture these relationships early so a promising material or process does not appear feasible only because the assembly was simplified on paper.
How can a team make risk and evidence actionable?
Build a risk register that connects uncertainty to a practical test. “The latch may be difficult to open with wet hands” is more useful than “usability risk.” For each item, record the consequence, current confidence, proposed test, and result that would change the decision.
List assumptions about user behavior, dimensions, performance, materials, and production.
Rank them by potential impact and how little is known.
Choose the smallest test that answers each high-priority question.
Record results, including failures and conditions, not only conclusions.
Update requirements and decide whether to proceed, revise, or pause.
Tests may include interviews, simple models, material samples, assembly trials, or a focused prototype. Each prototype should answer a stated question. If the question concerns hand access, appearance should not consume the effort. If it concerns a production interface, make that interface representative enough to evaluate.
Before building or recruiting participants, define the question, method, conditions, observations, and decision threshold. A team testing access might specify the task, user position, whether gloves are worn, and what counts as an unsuccessful attempt. Without this, observers may interpret the same result differently.
Separate observation from interpretation. “Three users repositioned their hands before opening the latch” is an observation. “The latch is unacceptable” is an interpretation. The record should show how the conclusion follows from the requirement and what remains uncertain.
Prioritize assumptions that could force major redesign, create a safety or use concern, or undermine the product’s basic value. Give lower priority to details that can change later without affecting the core concept. Revisit priority when new evidence changes likelihood or consequence.
Test assumptions that could invalidate the direction before refining details. First check that the user and problem are clear. Next test basic dimensions and interactions. Then examine remaining material, assembly, and production questions. This sequence helps avoid polishing a concept whose central premise is unsupported.
Make tests proportionate to the decision. A sketch review may be enough to compare broad form directions. A hand-built mock-up may be better for checking reach and movement. Material samples can help compare touch and surface behavior, while an assembly trial can reveal tool access or part alignment issues. Use the lowest-effort method that provides useful evidence, then increase fidelity only when the unresolved question demands it.
Write a test card before the activity. Include the assumption, the task, the setup, what the team will observe, and what result triggers a change. For a closure, the card might say: “Can intended users open the sample while holding the container in one hand?” The team can observe grip changes, repeated attempts, unintended spills, and requests for help. A clear card makes the result useful to people who were not in the room.
Keep failures informative. If a model breaks during a handling test, record where it broke, how it was held, and whether the break relates to the question being tested. Do not hide a failed test because the model was crude. Instead, decide whether the failure reveals a real design concern or a limitation of the test article. The distinction can be assessed with a more focused follow-up.When several uncertainties compete for attention, compare them by consequence and cost of learning. A low-impact uncertainty that is easy to resolve may be worth clearing quickly. A high-impact uncertainty that requires substantial work may still deserve priority if it could invalidate the concept. This is a planning aid, not a formula: explain why the selected tests matter most to the decision.
What belongs in the feasibility decision?
Close with a decision record. Include the intended user and use, key requirements, alternatives considered, evidence gathered, unresolved risks, and recommended next step. State what would cause the team to revisit the decision. A record helps prevent an early assessment from being mistaken for a guarantee or final specification.
Map findings to an appropriate product design process or examine product development examples. If a physical model is the next useful test, review prototyping options. Use these as context, not substitutes for product-specific evidence.
For a broader framework, the academic resource How to Conduct a Feasibility Study describes analysis of a proposed project and identifies technical and financial dimensions. Apply any general framework to the actual product, users, and production context rather than treating a checklist as proof.
Make the decision logic easy for someone outside the study to follow. State which criteria were met, which were not, and which could not yet be evaluated. Reference supporting notes, sketches, measurements, sample observations, and supplier responses. Record the concept’s date and version because evidence applies to a particular configuration and can become outdated after a change.
When evidence is mixed, describe the disagreement rather than forcing a yes-or-no answer. A team may have strong evidence of user need but limited information about production. The decision can authorize a targeted next investigation without implying that the whole product is ready.
A decision record works best when it is concise enough to use and detailed enough to audit. One practical format is a page with four blocks: the decision statement, supporting evidence, open risks, and next actions. Attach the test notes or sketches that support each conclusion. If the team recommends proceeding, state the limits of that recommendation. For example, moving into concept work may be reasonable while durability remains untested. Such a decision is not the same as approval for production.
Assign ownership to each open question. “Confirm cleaning access” is too vague unless someone is responsible for defining and running the check. Name the next action, expected output, and the decision it will inform. This does not require a complex project system; a short list can prevent unresolved issues from disappearing between meetings.
How should teams move from study to development?
Proceed when the core need is supported, the concept can plausibly meet essential requirements, and remaining unknowns have a reasonable plan. Revise when evidence points to a solvable mismatch, such as poor access or a material that conflicts with cleaning needs. Pause when a critical assumption lacks evidence or no credible path addresses it.
Before a larger commitment, ensure that people responsible for product decisions, design, technical review, and production input agree on what has been learned. Jackson Hedden works across industrial design, mechanical and electrical design disciplines, and manufacturing support. See the RelieVRx project for an example of product development in a medical-device context.
Turn the next step into a bounded plan. Name the question, work needed, contributors, and output that will support the next decision. A plan might call for a revised model, targeted user observation, material testing, or supplier review. State what is deliberately deferred to keep the effort focused.
As the concept changes, preserve a clear connection between requirements, evidence, and decisions. If a revised form improves access but changes internal volume, revisit the component layout assumption. If material changes, review joining, finish, and cleaning requirements again. Feasibility applies to the current version and available evidence, not to every future iteration.
For example, a team may decide to move from an initial feasibility review to a focused concept phase because the user task appears valuable and a workable overall size has been demonstrated. The team might still defer final material selection, detailed tolerance decisions, and supplier selection. List these explicitly, along with the point at which they must be resolved. This avoids treating a sequence of early decisions as one blanket approval.Agree on what evidence the next phase must produce. A useful next phase might deliver two alternative layouts, a more representative interaction model, or a supplier-informed process comparison. Keep the output connected to the unanswered question. If the next step produces attractive visuals but does not address the main uncertainty, it may not improve the decision.
Plan a feasibility conversation
Frequently Asked Questions
How long does a physical product feasibility study take?
There is no single duration. Scope depends on uncertainties, whether users or suppliers must be consulted, and whether models are needed. Define the decision and evidence required, then plan around those questions.
Does a feasibility study require a finished prototype?
No. Observation, sketches, measurements, or material samples may answer some questions. Build a prototype when an interaction or interface is difficult to assess otherwise, and make it representative of the question being tested.
Can a feasibility study guarantee commercial success?
No. It can reduce uncertainty about defined user, product, and production questions, but market response and execution remain uncertain. Treat findings as evidence for a decision, not a guarantee.
What is the difference between feasibility and a final specification?
A feasibility study evaluates whether a direction appears workable and identifies unresolved questions. A final specification defines agreed requirements and details needed to develop and produce the product. Feasibility informs that work but does not replace it.
Make the next decision evidence-based
A disciplined feasibility review turns a broad product idea into decisions the team can test. Define the user need, compare physical and production options, prioritize uncertainty, and document evidence before choosing what to develop next.